
Goes over the basic rolls and strategies of every class.
Table of Contents
Basic Guide to All Classes
Note: Credit goes to Local Melon Tree
Intro
While going in blind and discovering each class through playing is part of the fun, it becomes very overwhelming when you’re doing your first run on single player and are now faced with 4 unknown decks with no clue how they synergize.
Now if you are playing your first time with a group of friends, I would strongly suggest skipping the guide and just go head first into a tour match, experimenting with the cards and creating your own strategies. But for those wanting to tackle single player, unfamiliar to deck builders, or are overwhelmed/frustrated by their first experience I hope this guide helps.
Classes/ Card Basics
There are 4 classes representing each instrument in the band: Guitar, Bass, Keyboard, and Drums. The starting decks for each class are fairly similar, but will quickly between to separate from each other as you being upgrading and adding new cards.
Each class makes up their deck with common cards (which can be used by any class) and class cards which can only be played by a specific class. Common cards are useful in providing general utility and can cover weaknesses in your deck against certain enemies or support strategies provided by the class cards. Class cards are the foundation of your deck’s strategy and can change how you should play your deck and your roll on the team. These cards differ for each class and is what makes the co-op experience unique.
There’s not a hard-set rule on how each card type should be focused, but I would personally suggest gathering class cards early so you can upgrade them faster to start unlocking your classes strengths.
Another important mechanic of the game to understand is how the shielding works, as it took me a few games to understand the mechanic myself. If you or the enemy is affected by disruption such as power removal, card removal, energy removal, or adding bummer cards (bad cards that get added to the deck), it can take affect as long as you have a shield. Instead, one of these actions will remove a single shield regardless of the number of times a affect should take place (EX: a card gives -3 power to an enemy but the enemy has 2 shield, then the card will only remove 1 shield, meaning that the enemy dodges the effect and is left with 1 shield). This should emphasize the important of both generating shield for your band as well as removing shield from the enemy, as shields can often make or break an entire strategy.
Card Rarity
A golden rule for determining the strength of a card is by its background art. More flair, better the card.
Common: Static background
Uncommon: Diagonal Strips
Rare: Diagonal Strips with animated glitter
Epic: Sick animated flames
In my personal experience, its almost always worth picking up the rarest card whenever you’re adding to your deck.
(Once you have a better understanding of how your instrument interacts with others and start crafting deck ideas based on team synergy or tour boss counter play, picking up a less rare card can add more power to your deck. But as this is more relevant in the late game with higher leveled instruments, its perfectly fine to always go for shiny.)
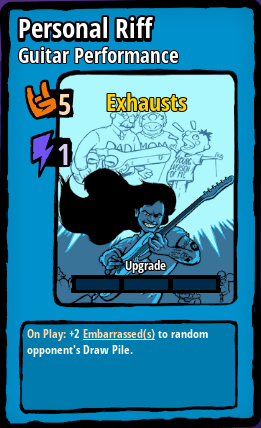
Guitar
The classic 6-string is the power of the band, reflecting on the “front-man” like nature of the instrument. They can make big plays in generating massive amounts of power for the team, while also providing ways to disrupting the enemy team by removing their power or stopping their active song selections or crews.
One of the main features of the class is being able to play powerful crews that can stack up lots of power every turn, forcing the enemy to focus on removing them if they want a chance. The class also has powerful performance cards that can generate a lot of power with little energy investment.
Bass
The low-end friend is the master of providing card draw for the band, discarding cards from the enemy band’s hand, and has a unique mechanic which allows you to discard cards in your hand to gain power or other affects depending on the discarded card, allowing for free 2 for 1’s. This game play reflects on the bassist’s roll to keep the rhythm and melody groovin’ and movin’, sometimes giving up some dignity to do so.
One of the most important things to consider is having a good balance between having cards that allow you to discard and cards that give affects when discarded. The worst feeling is when you have a hand full of cards with discard affects and no way to get them out of your hand. Ideally, having close to a 50/50 ratio will provide healthy hands with plenty of options. Technically the bass class can be played without focusing around the discard mechanic, but doing so will unlock the full potential of the instrument.
If the bass in your band is being played by a bot, avoid giving it discard cards as the bots are not able to properly use this mechanic. Best to pick cards that focus on drawing cards for the band or ones that discard cards from the enemy band.
Keyboard
The synth lord is powerful in its offensive versatility, both for your team and against the enemy. They focus on playing powerful cards that cost little to no energy and can effectively disrupt the enemy in every way possible (shield removal, crew removal, song selection removal). This reflects on the key player’s ability to add creative tech to the band and keeping your songs unpredictable to the audience (and to your enemies).
Because of their cheap cards, the keys benefit greatly from card draw by the bassist and can reliability close out song selections to ensure you can reap the bonuses before the enemy gets a chance to interfere. They can also upgrade your basic cards to gain power just from drawing them, meaning you can get value from cards without having to invest power.
Drums
The D.K. bongos main is extremely powerful at destroying the opponents defense through shield removal and is unique as they can generate energy for your band during a turn, allowing for your band to continue making plays as long as they have the cards to do so. This perfectly reflects on the drummer’s roll of being the play maker and energy of the band, keeping their band mates on rhythm and opening up opportunities for them to attack and shine. The drums also has some reliable ways to build up your bands own defense though shielding and can provide some smaller forms of enemy disruption so you too can take advantage of breaking down the enemy defenses.
While the drums may not be as combo focused as the other instruments, they appropriately are at their best when they have good timing. Some of their cards can cost up to 2 energy, meaning that you may only play 1-2 cards during a turn so you have to make it count (or ask your team mates for additional energy cause more times than not you’ll be giving energy back to your team).
Be the first to comment