
In this chapter, which introduces you to an extraordinarily comprehensive and configurable suite of modifications and tunes, learn about the most crucial Call of Duty: Modern Warfare II settings as well as the suggested specifications for the beta.
Table of Contents
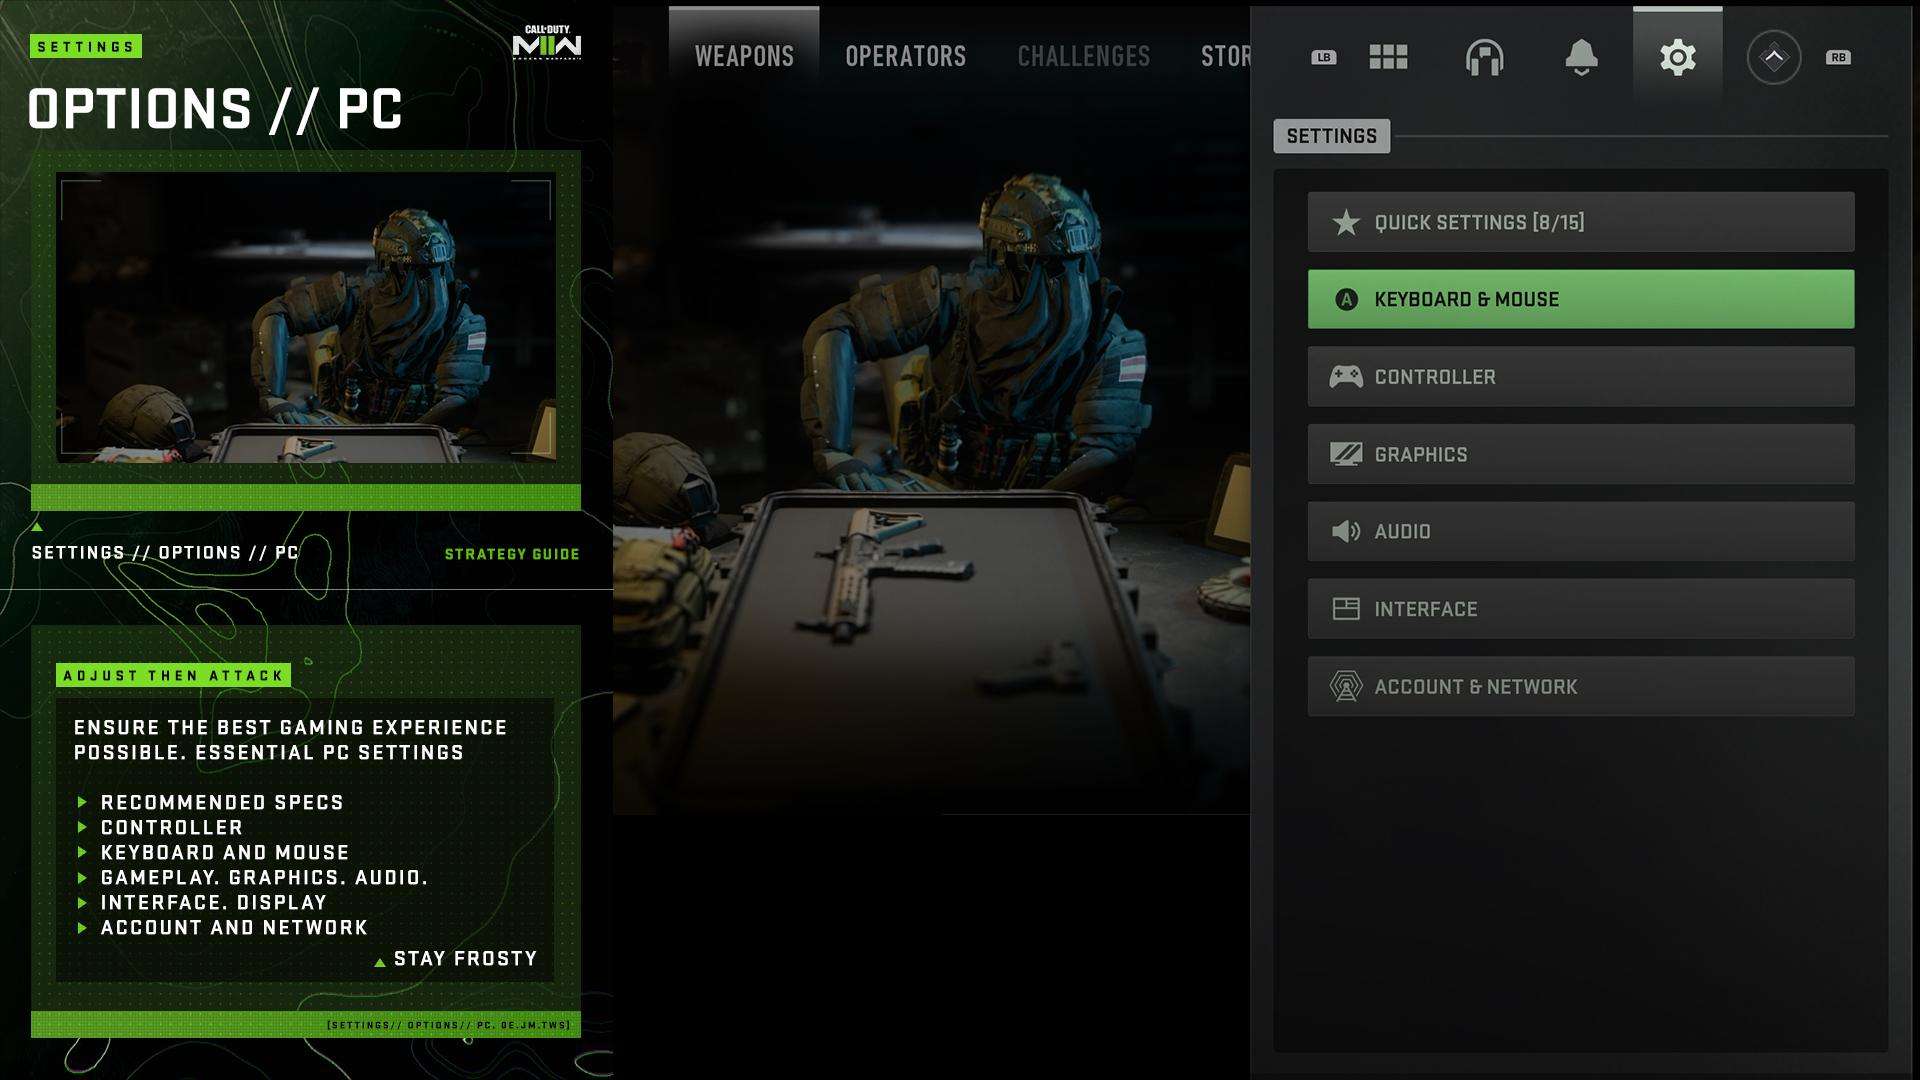
Play / Settings / PC
With its extraordinary range of options—from controls to graphics to music and a variety of Accessibility features—Modern Warfare II may be customized to fit your playstyle.
Selecting the Gear symbol in any menu will bring up the Settings menu. A Settings menu is also available during a game. However, if you’re not watching a live game, we advise using the Settings menu.
Essential Menu Settings for Modern Warfare II
In Modern Warfare II, there are more than 100 settings spread across numerous menus, and the creators have included helpful descriptions for what each one accomplishes. There are far more than this guide can possibly cover; the game is for that.
Instead, this manual includes the options that are absolutely necessary for each menu and submenu. Some of them need be added to your Quick Settings, which is also covered in this guide. From there, you can explore more choices to further tailor the game to your setup and playing preferences.
The PC Modern Warfare II Beta’s most important specifications and settings are covered in the sections below.
The Specs
Minimum Specs:
- OS: Windows 10 – 64 Bit (latest update)
- CPU: Intel Core i5-3570 or AMD Ryzen 5 1600X
- Video Card: NVIDIA GeForce GTX 960 or AMD Radeon RX 470
- Video Memory: 3GB
- RAM: 8GB RAM
- Storage Space: 25GB
- Network: Broadband Internet connection
- Sound Card: DirectX Compatible
- Requires DirectX 12 compatible system
Recommended Specs:
- OS: Windows 10 – 64 Bit (latest update)
- CPU: Intel Core i7-4770K or AMD Ryzen 7 1800X
- Video Card: NVIDIA GeForce GTX 1060 or AMD Radeon RX 580
- Video Memory: 6GB
- RAM: 16GB RAM
- Storage Space: 25GB
- Network: Broadband Internet connection
- Sound Card: DirectX Compatible
- Requires DirectX 12 compatible system
Recommended Drivers for AMD/NVIDIA:
- AMD: 22.9.1
- NVIDIA: 516.59
Quick Settings
Need to access the most essential settings across multiple menus quickly?
New to Modern Warfare II, the Quick Settings menu saves up to 15 options from any menu for easy access in or out of a match.
By default, options such as Master Volume, Stick Sensitivity and/or Mouse Sensativity, and Brightness are all saved here. These normally live on different menus, but in Quick Settings, they can all be accessed and changed in a streamlined way.
While in any menu except Quick Settings, look for the “Save from Quick Settings” command at the bottom of the screen, which also shows the number of currently saved Quick Settings out of 15. While hovering over an option, use that command to save it to Quick Settings for easy access.
Search Function
Another new feature is the built-in Search Function — you never need to be lost across all menus again.
Rather than paying respects, Pressing F while in any of the main menu screens will directly allow you to search for Settings. Otherwise, it can be found next to the Save/Remove From Quick Settings option and the Reset Option to Default command while in any Settings Menu.
After doing this, you can use the search bar to look up any setting available in the game, then jump to its respective menu to tune it.
Keyboard and Mouse
This menu has three submenus: Mouse, Gameplay, and Keybinds.
Mouse
In addition to choosing an Aiming Input Device, we recommend tuning these settings no matter what:
Mouse Sensitivity / Calibration. These two determine how quickly your in-game character moves their aim, and how they move their aim in general. We cover this extensively in the Movement section of our guide.
Gameplay
This menu helps you change how Movement, Combat, Vehicle, and Overlay (Pinging) behaviors work. It’s one of the few essential menus to visit for Accessibility features as well.
We recommend tweaking the following:
Sprint/Automatic Sprint Behavior / Automatic Sprint / Tactical Sprint Behavior (Also a Controller Option): These options are essential for ensuring your Operator does a Tactical Sprint when you need to, especially for players who primarily like to move quickly through the map and use advanced movement techniques, or for players with a differing ability.
The first option, Sprint/Automatic Sprint Behavior, determines whether holding or “toggling” the Sprint command activates Sprint.
Automatic Sprint is for players who don’t want or cannot make the additional input to sprint. It can be changed to an Auto Sprint or Tactical Sprint when moving forward.
Tactical Sprint Behavior is where you can either change the Tactical Sprint command to a Double Tap, a Single Tap from Sprint, or a Single Tap from running (moving forward normally).
If you have trouble getting and maintaining a Tactical Sprint, those three Options are what you need to change.
Automatic Airborne Mantle (Also a Controller Option): This is for players who find themselves grabbing on ledges at inopportune times.
By default, this is set to Partial, which automatically causes mantling if it could prevent a fall.
Combined with Grounded Mantle and Automatic Ground Mantle, adjust these settings to prevent grabbing on to ledges when parkouring or to always allow for grabs to prevent falling off the map.
Movement Advanced Settings -> Walk Speed: Crucial for mouse and keyboard players, this is just one of several options in the Advanced Settings that allows for controller-like behavior.
For instance, Walk Speed. With an analog stick, you can move as slowly or as quickly as you want based on how far you push the stick. On a keyboard, you can’t “lightly” press the W key — or at least, it won’t do much.
The Walk Speed slider allows you to tune the speed at which your Operator moves when using the Walk keybind. The higher the value, the faster the walk. The lower the value, the less noise an Operator makes while walking. Putting value down to less than 25 units makes footsteps silent while crouching.
Keybinds
This entire menu is important for keyboard and mouse users, as it allows you to change any action in the game to any button or combination of buttons, if applicable.
Controller
Using a game console? The Basic and Advanced controls for utilizing the gamepad or controller of your choice are covered in this menu.
Basic
Sensitivity (Stick, Deadzone, etc.): We cover this in-depth within the Movement chapter.
Button and Stick Layout Presets: This is the equivalent of keybinds. These presets offer a range of command options from familiar to essential for accessibility. For example, the N0M4D preset is named in honor of a pro gamer with quadriplegia and is a great starting point for those with differing ability, while the Bumper Jumper setting should be a welcome preset for new friends clambering over to Call of Duty.
Interact/Reload Behavior: Because Reload and Interact are often set to the same button, this optioncan be a crucial one to change. The “Prioritize Interact” and “Prioritize Reload” are smart options that allow for one-tap interacting and reloading in most situations. Otherwise, in cases where both are available, these options prioritize one over the other. We personally use Prioritize Reload in Multiplayer, and Prioritize Interact in non-Multiplayer modes where, for instance, we often open Supply Boxes and use Buy Stations.
Parachute Auto-Deploy (Also a Keyboard and Mouse Option): On larger maps, an Operator will automatically open when dropping from a height that would cause a lethal fall. Turning this off allows for more precise movements in the air but removes that safety net when falling from lethal height, putting the responsibility on the player to pull the chute before hitting the ground. We do not recommend that newer players turn this off.
Display
Here are the options that have the most effects on graphic fidelity and hardware use, excluding the obvious Display Mode and Brightness options.
Display
V-Sync/Custom Framerate Limit: The V-Sync option allows you to limit frame rate to your monitor’s refresh rate, which prevents screen tearing. The Custom Framerate Limit allows you to set limits in gameplay, menus, and out of focus (in windowed mode), which can help prevent instability and overuse of hardware.
Quality
In addition to options that are available, depending on hardware (e.g., NVIDIA or AMD), here are the most impactful options:
Spot Cache, Cache Spot Shadows, and Cache Sun Shadows: This option affects storing in-game Shadows, which speeds up rendering for future frames. That, in turn, allows for better in-game stability.
We recommend keeping these Caches on and adjusting Shadow Map Resolution and Spot Shadow quality if there is an FPS or smoothness issue.
Texture Resolution: There is a massive difference in VRAM usage between this setting’s Medium and High qualities. If you run a low-end PC or don’t care about the written contents of individual papers on the ground, we recommend turning this down from High to Medium to save hundreds of, if not over a thousand, VRAM MB.
View
Field of View (FOV): A higher FOV may sound like a no-brainer, especially on ultra-wide settings. However, it may cause graphical glitching and may make everything look “smaller” in-game. Not having the correct FOV can also cause motion sickness, so tune this setting if you are predisposed to that.
In other words, adjust FOV to your personal preference and peripherals rather than sliding it to the max.
Audio
Along with Audio Mixes, Subtitles, and Voice Chat options, we identified these as options to change:
Subtitles: This turns subtitles on and off, including toggles for each individual mode. More Subtitles settings can be found in the Interface menu.
Auto-Connect at Match Start: The new Channels feature allows for voice and text chats. If this is set to “Lobby,” the game will automatically swap channels to the Lobby every time you connect to a new game. Set this to “Off” to stay in your current channels.
Mute Yourself When Connecting: Anyone who does video or voice chats for work or school knows how helpful this feature is. Enable this to be automatically muted when connected to a channel — you can then unmute when you are ready to speak.
Hit Marker Sound Effects: We personally love this option, so it’s being included here. Change it to Classic for some serious nostalgia, or turn it off if the noises are interfering with other sounds.
Interface
With the help of numerous development studios, Modern Warfare II aspires to make progress in this menu’s essential section of accessibility settings.
Menu Text and Subtitles Size: Those who benefit from larger text might want to turn these up.
Color Customization: Absolutely essential for those with color blindness, or for anyone who wants to better see things like minimap icons in the game.
In addition to the standard color filters for trichromacy, dichromacy, and monochromacy, players can change individual interface colors, as well as change the intensity of the colors for a more visible game overall.
Minimap Shape: Set this to Square over Round if you care about seeing slightly more of the minimap at all times.
Telemetry and In-Game Alert Icons: Put these all on if you are interested in tracking game performance, both in terms of hardware and connection.
Account and Network
You can access your Activision account information and modify your privacy and security settings from this menu.
Blocked Players: This shows the last 200 players blocked in-game, which is helpful for out-of-game reports in addition to in-game reporting.
Text Chat / Profanity Filter / Gore Effects: These three content filters are recommended for those who don’t want to experience all of the above. Profanity Filters are for the text chat only.


Be the first to comment