
This is a straightforward and easy to understand guide on how to make your own quests in Conan Exiles using the Pippi mod (pretty much the simplest and most popular mod out there).
It is in no way an all encompassing guide for every type of quest and situation, but it will give you a solid understanding of how to make a typical fetch quest. Aka: “Go get me something and I’ll reward you.”
Table of Contents
Video Guide
Note: Credit goes to Xbwalker
Before I get into the textual guide, I figure, it’s easier for many of you to simply watch a video on it.
Quick Note
Before we begin, I want to note a few things that this tutorial already assumes.
- You have admin access on your server
- You have logged into your server
- You know how to open the cheat panel and add a thespian to your inventory
- You know how to clothe and adjust said thespian’s physical features.
If you know these things, you are good to begin!
Opening Mushi Editor – Dialogue and Options
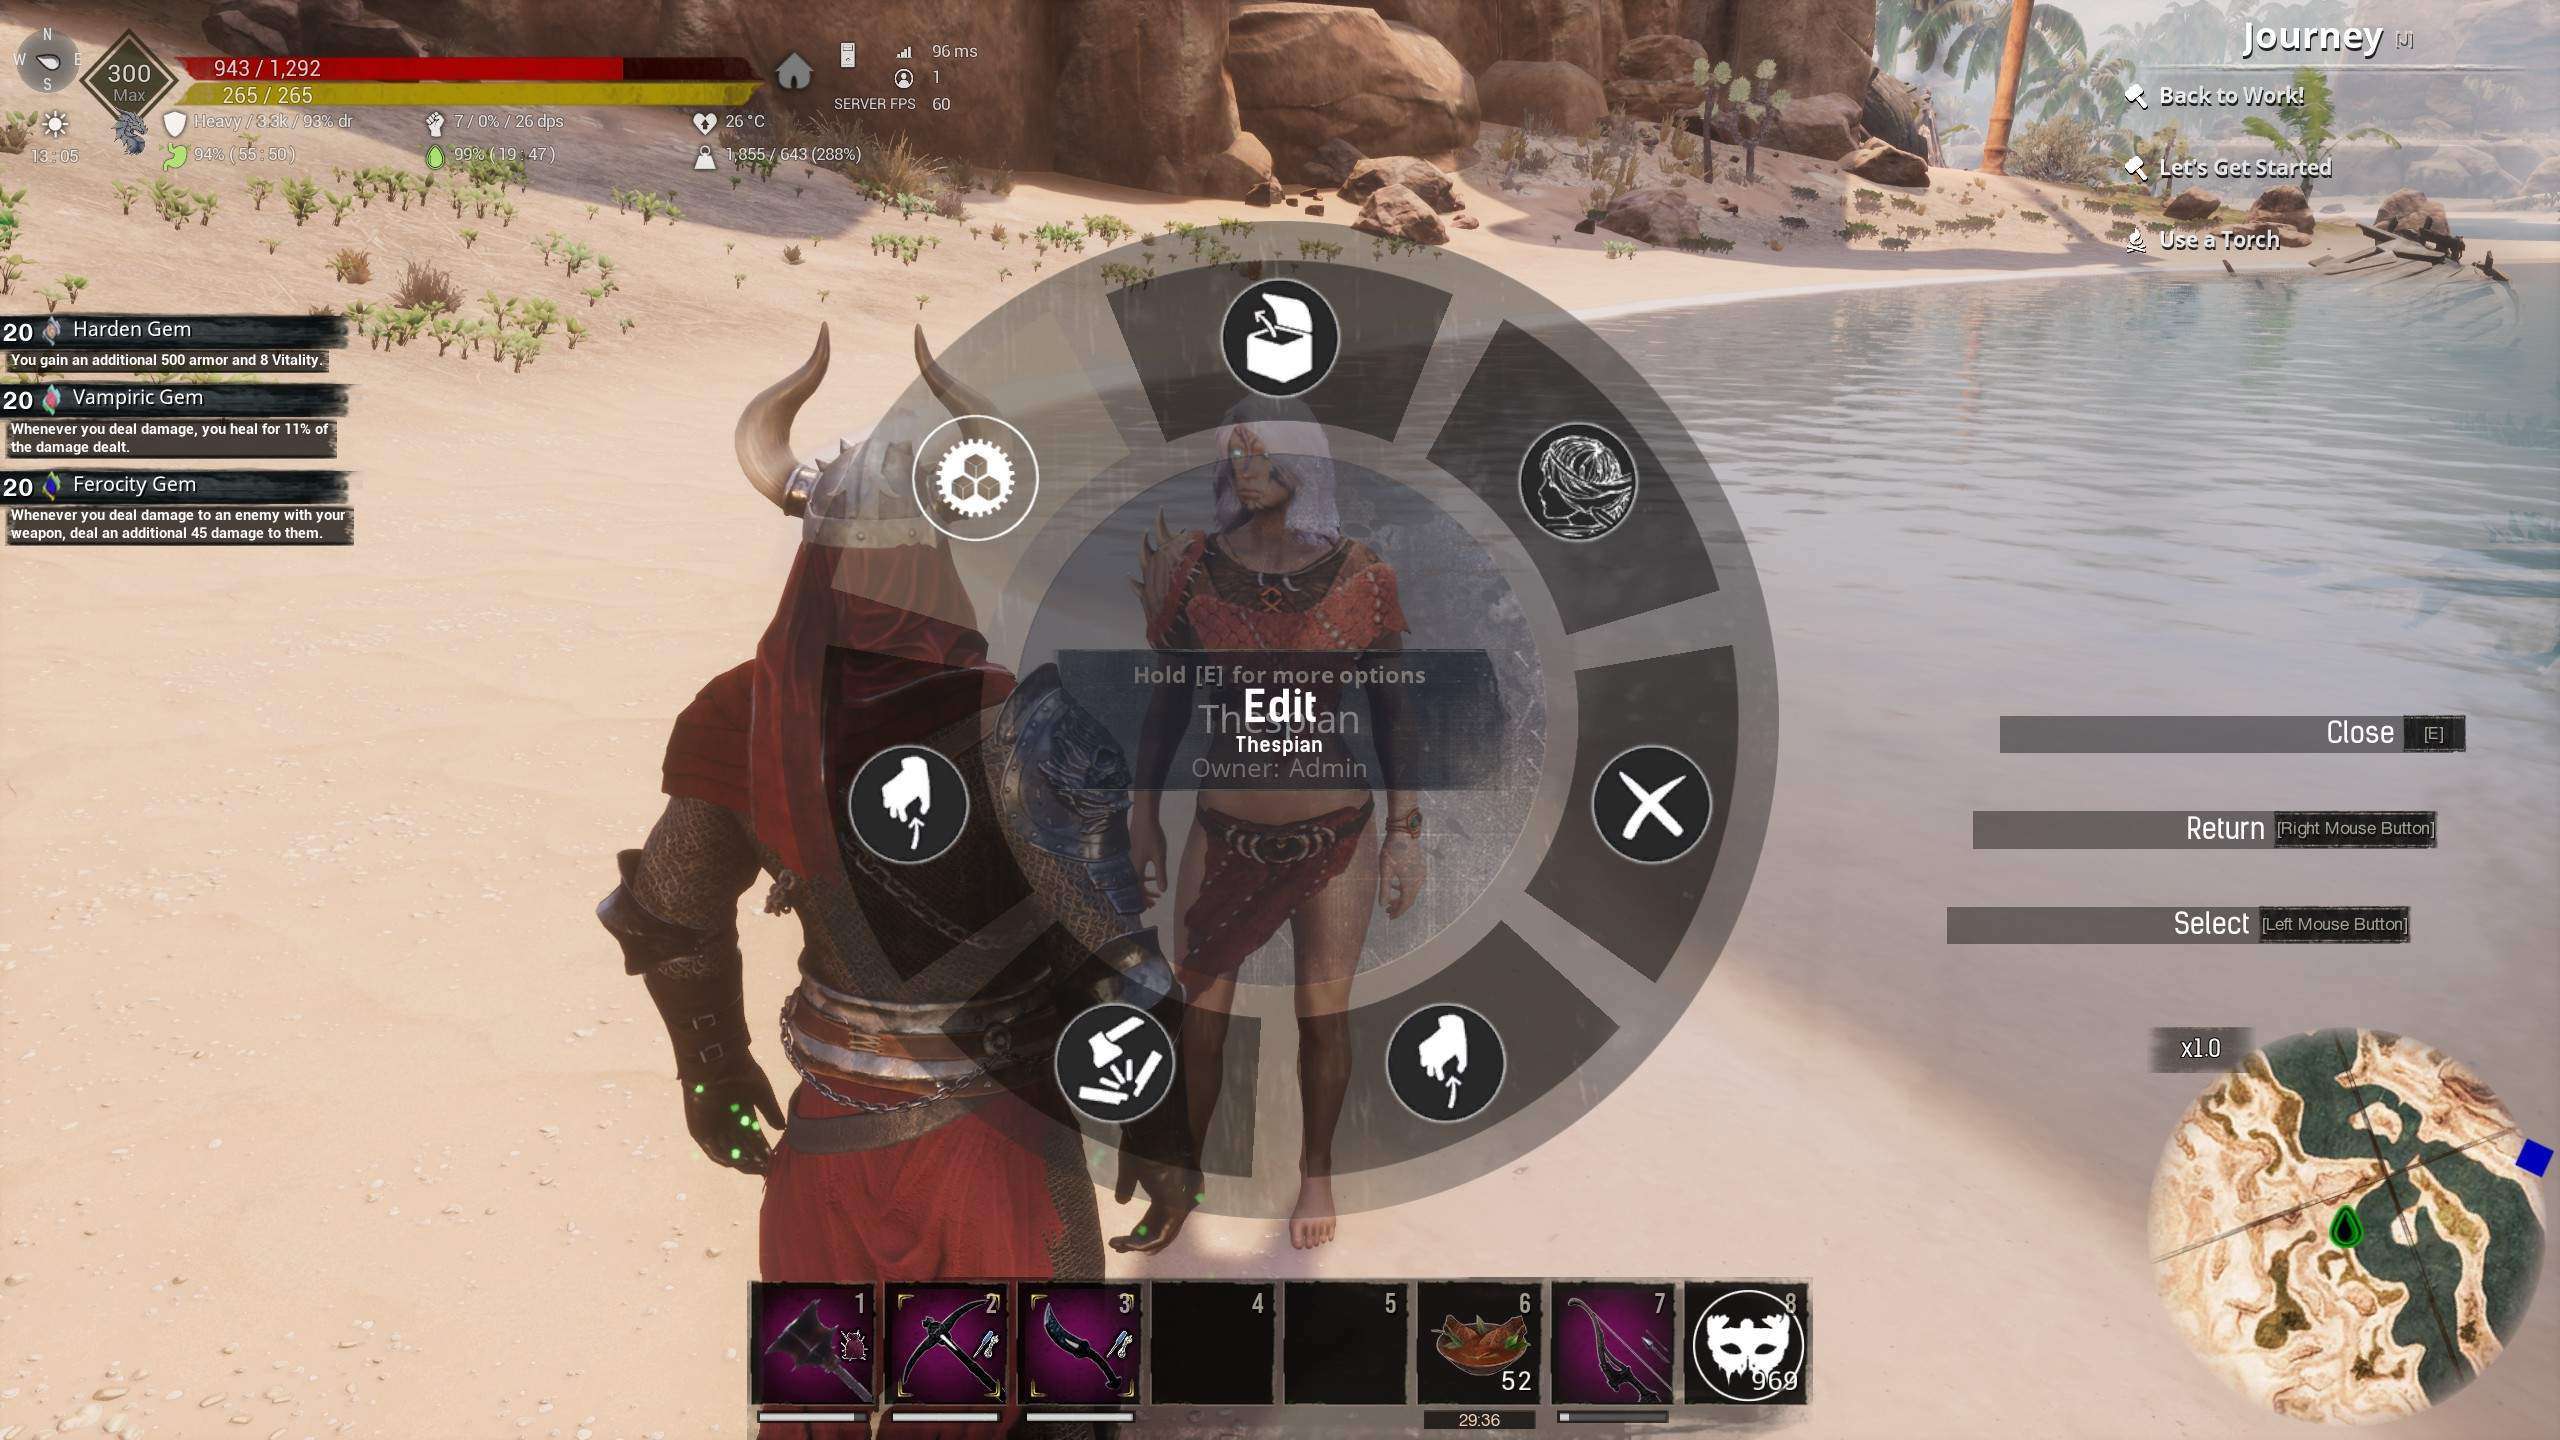
First step is to use the E (or Use) key on your thespian. Either hold it down and click “Edit” or, if you haven’t changed any of the default settings on it, simply fast pressing use will also work.
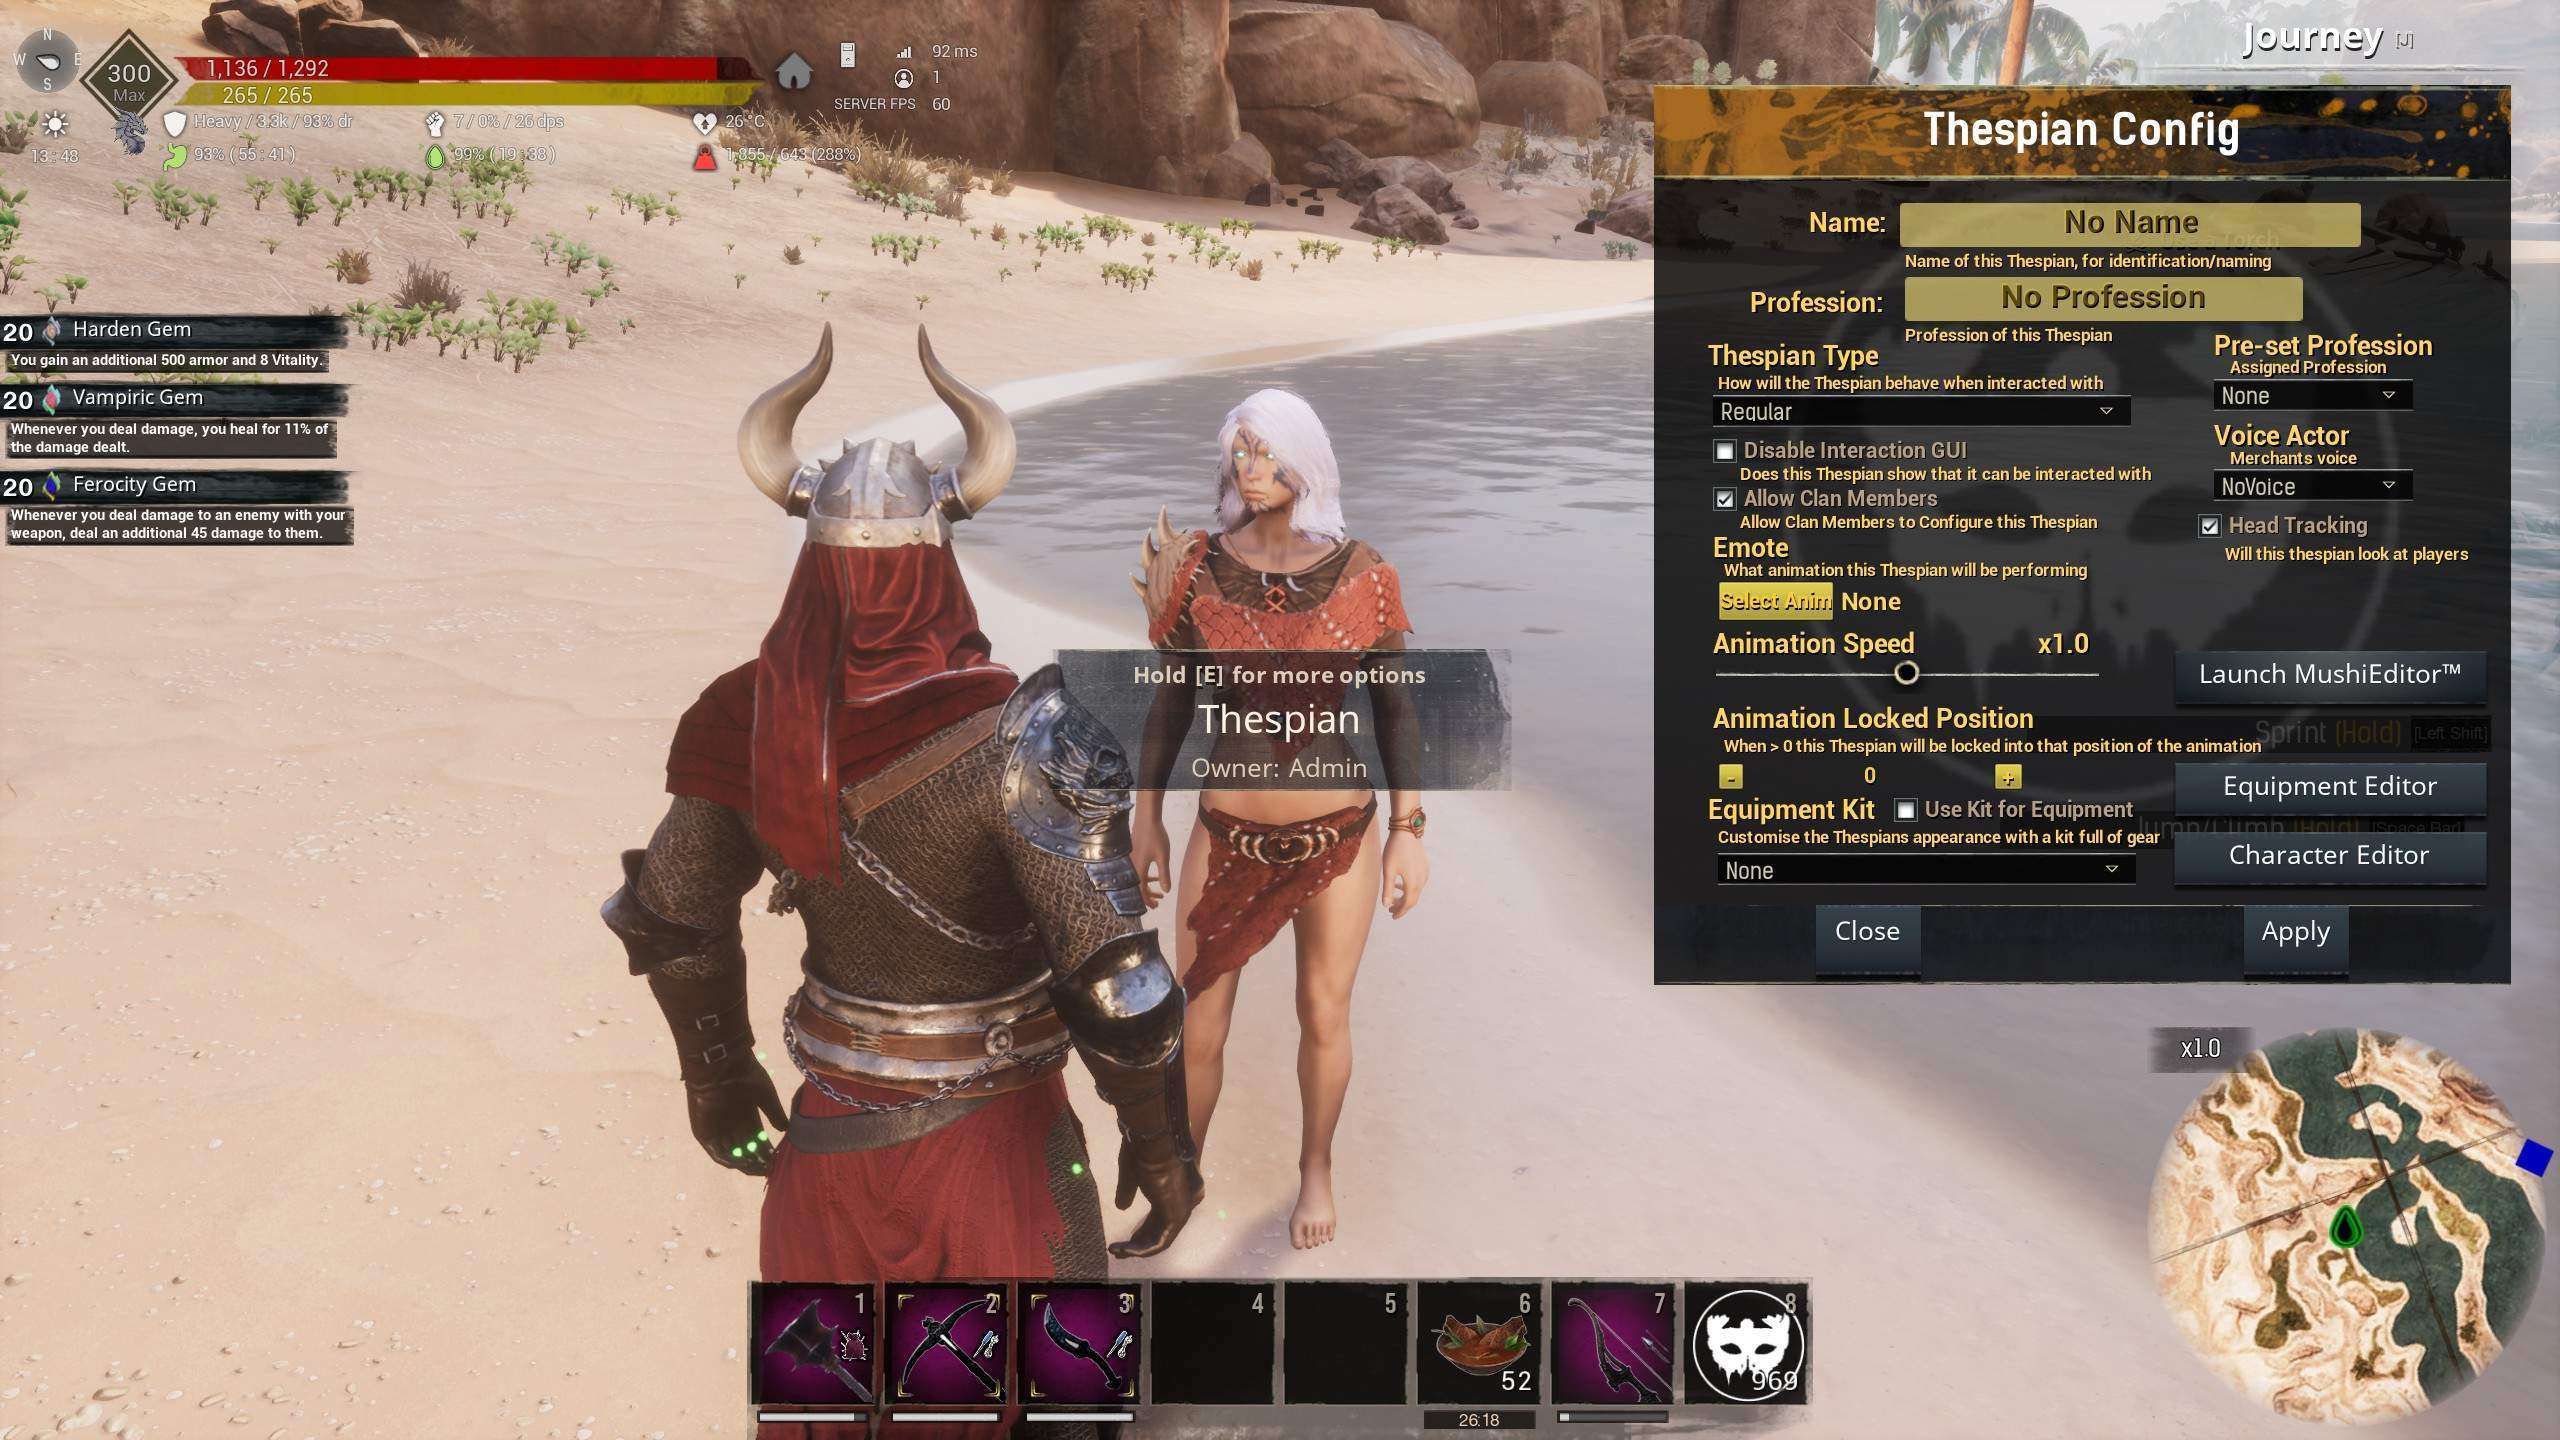
Good work! Next click on the Mushi Editor.
Now, let’s give your NPC something to say. I have typed in a simple and ridiculous dialogue. This is done by right clicking anywhere in the blank worksheet and chosing “New Dialogue Node.”

Next, let’s give the player a few response options.
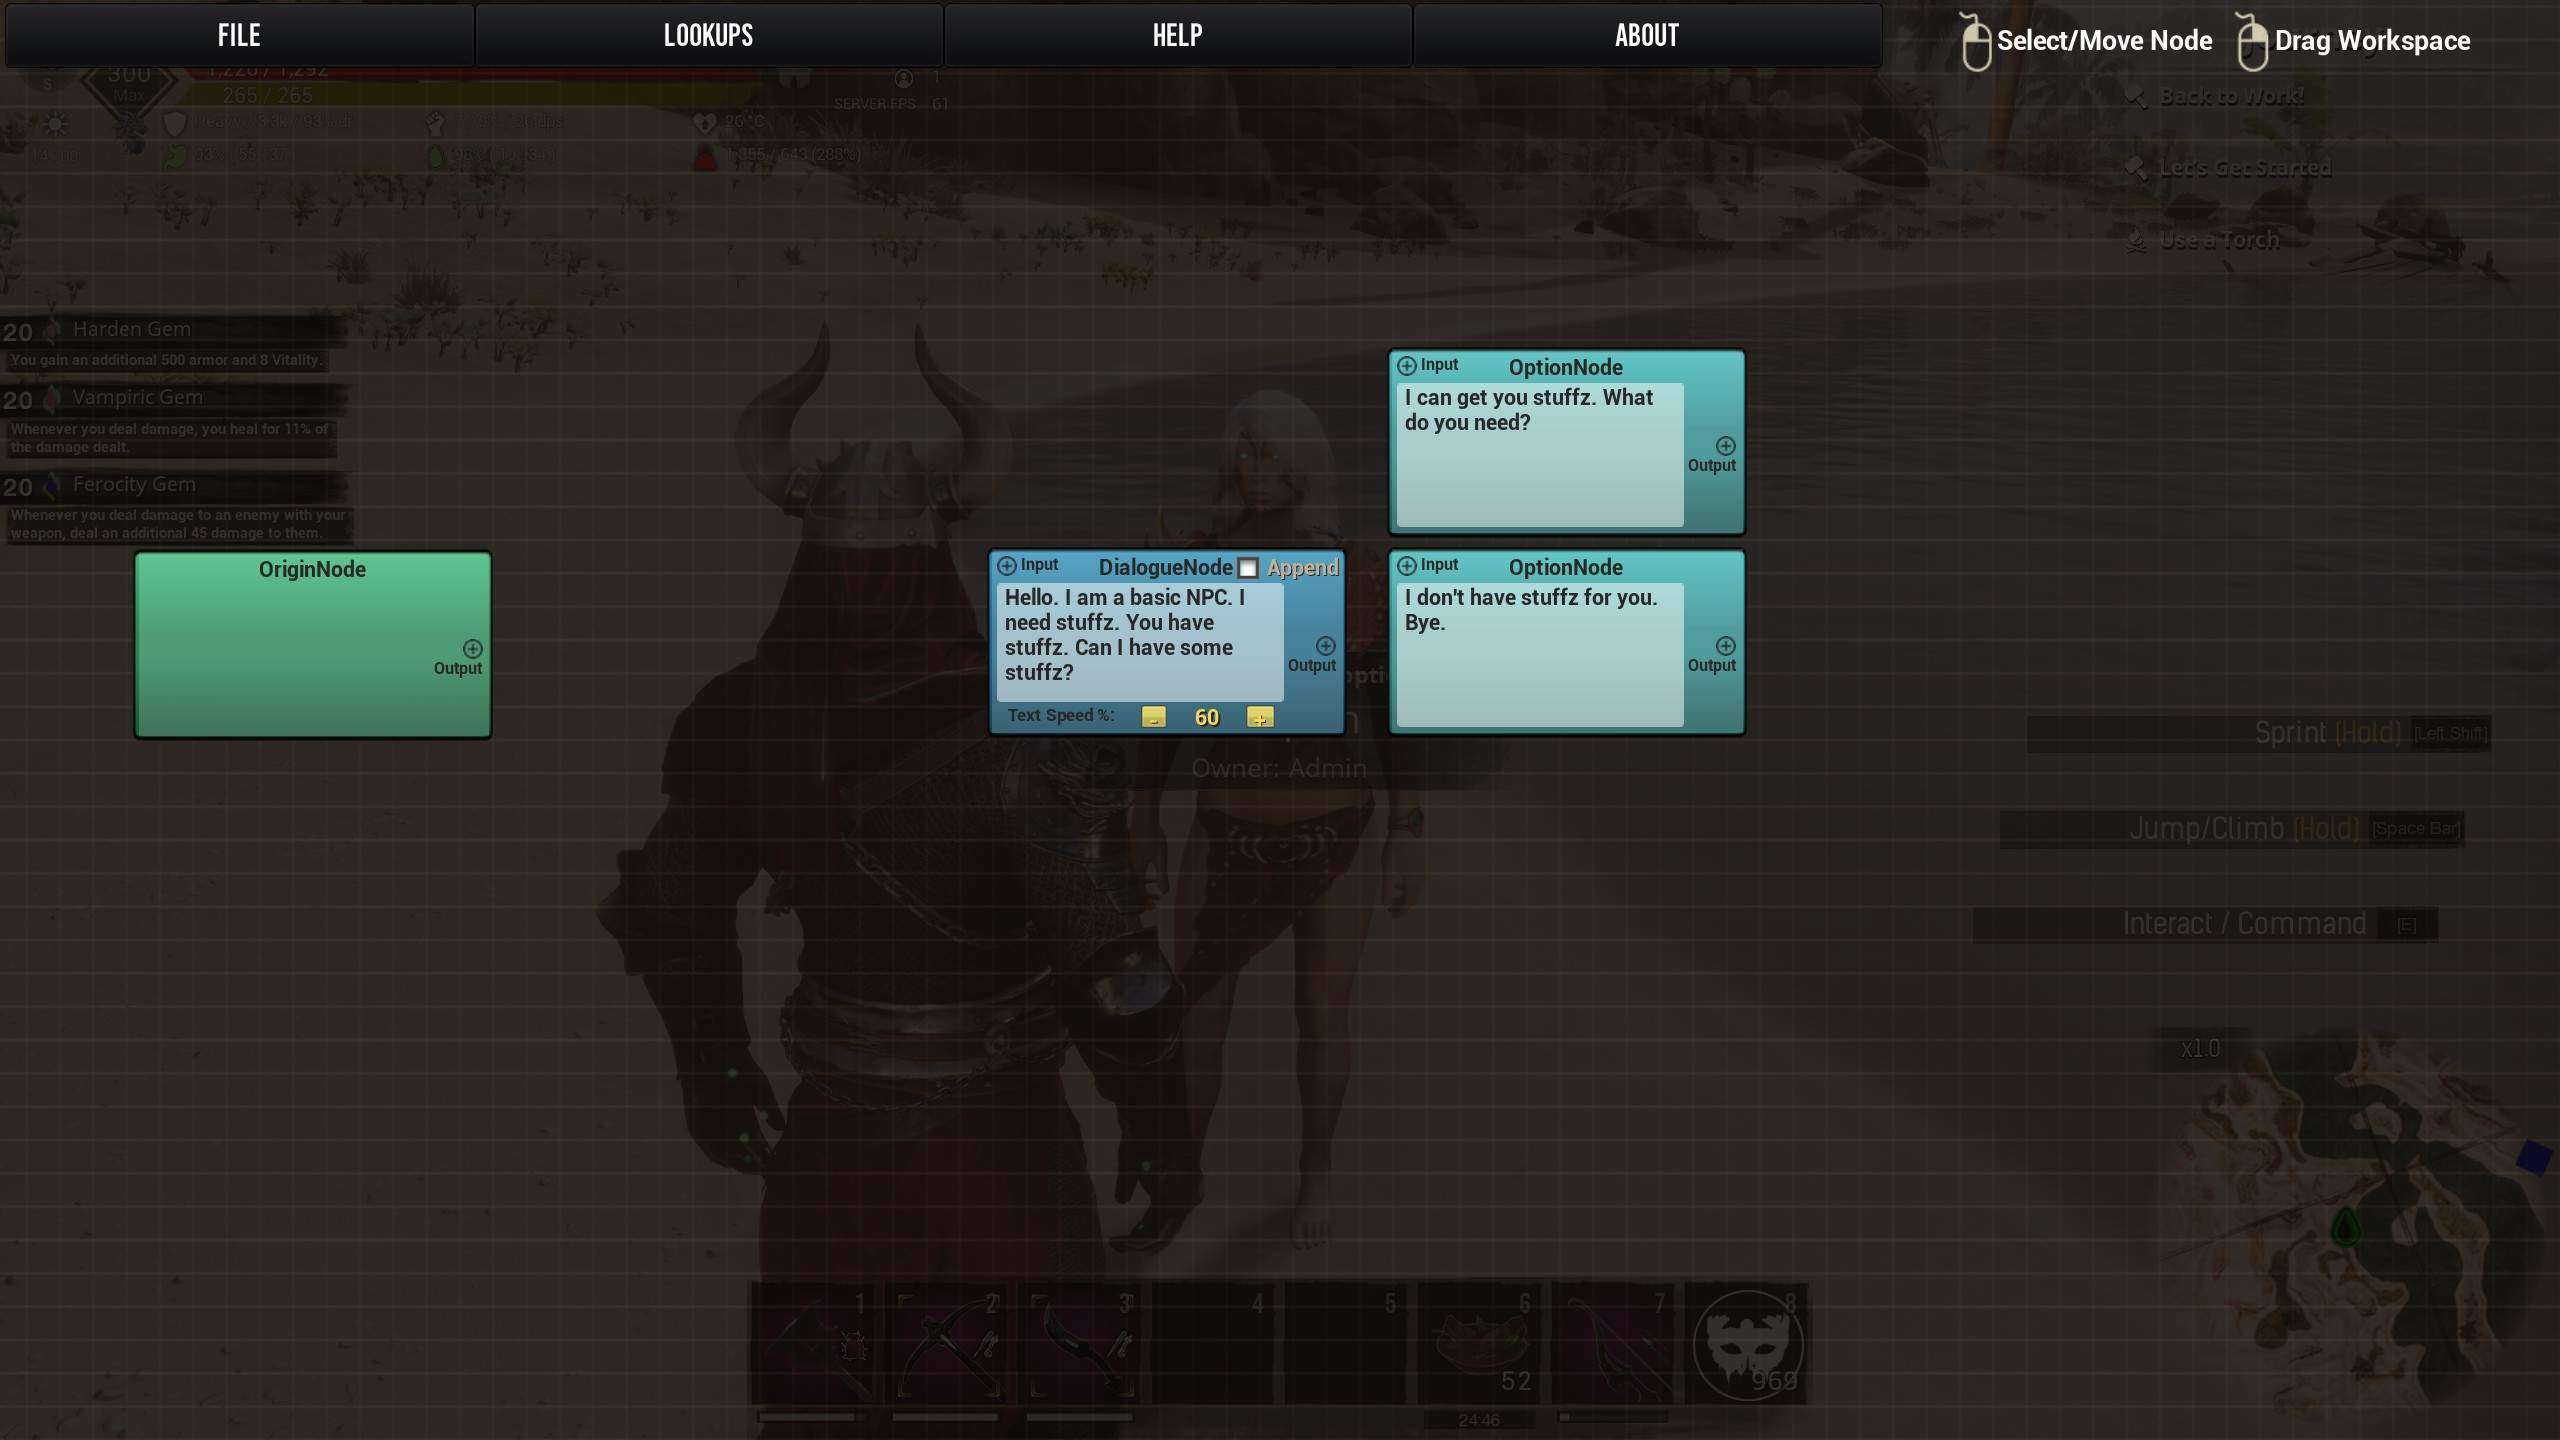
Remember, more is better. It gives players a feeling of choice. I recommend against single responses, at least not for opening dialogue.
Next, we will add a bit more dialogue to the positive option. I’ll return to the consequences of saying “No” shortly.

Action and Bounce Nodes (oh…and Connecting Them)
Now that we have some responses inserted as well as some dialogue, we need to link it all together. Also, we need to make some consequences for the things we say.
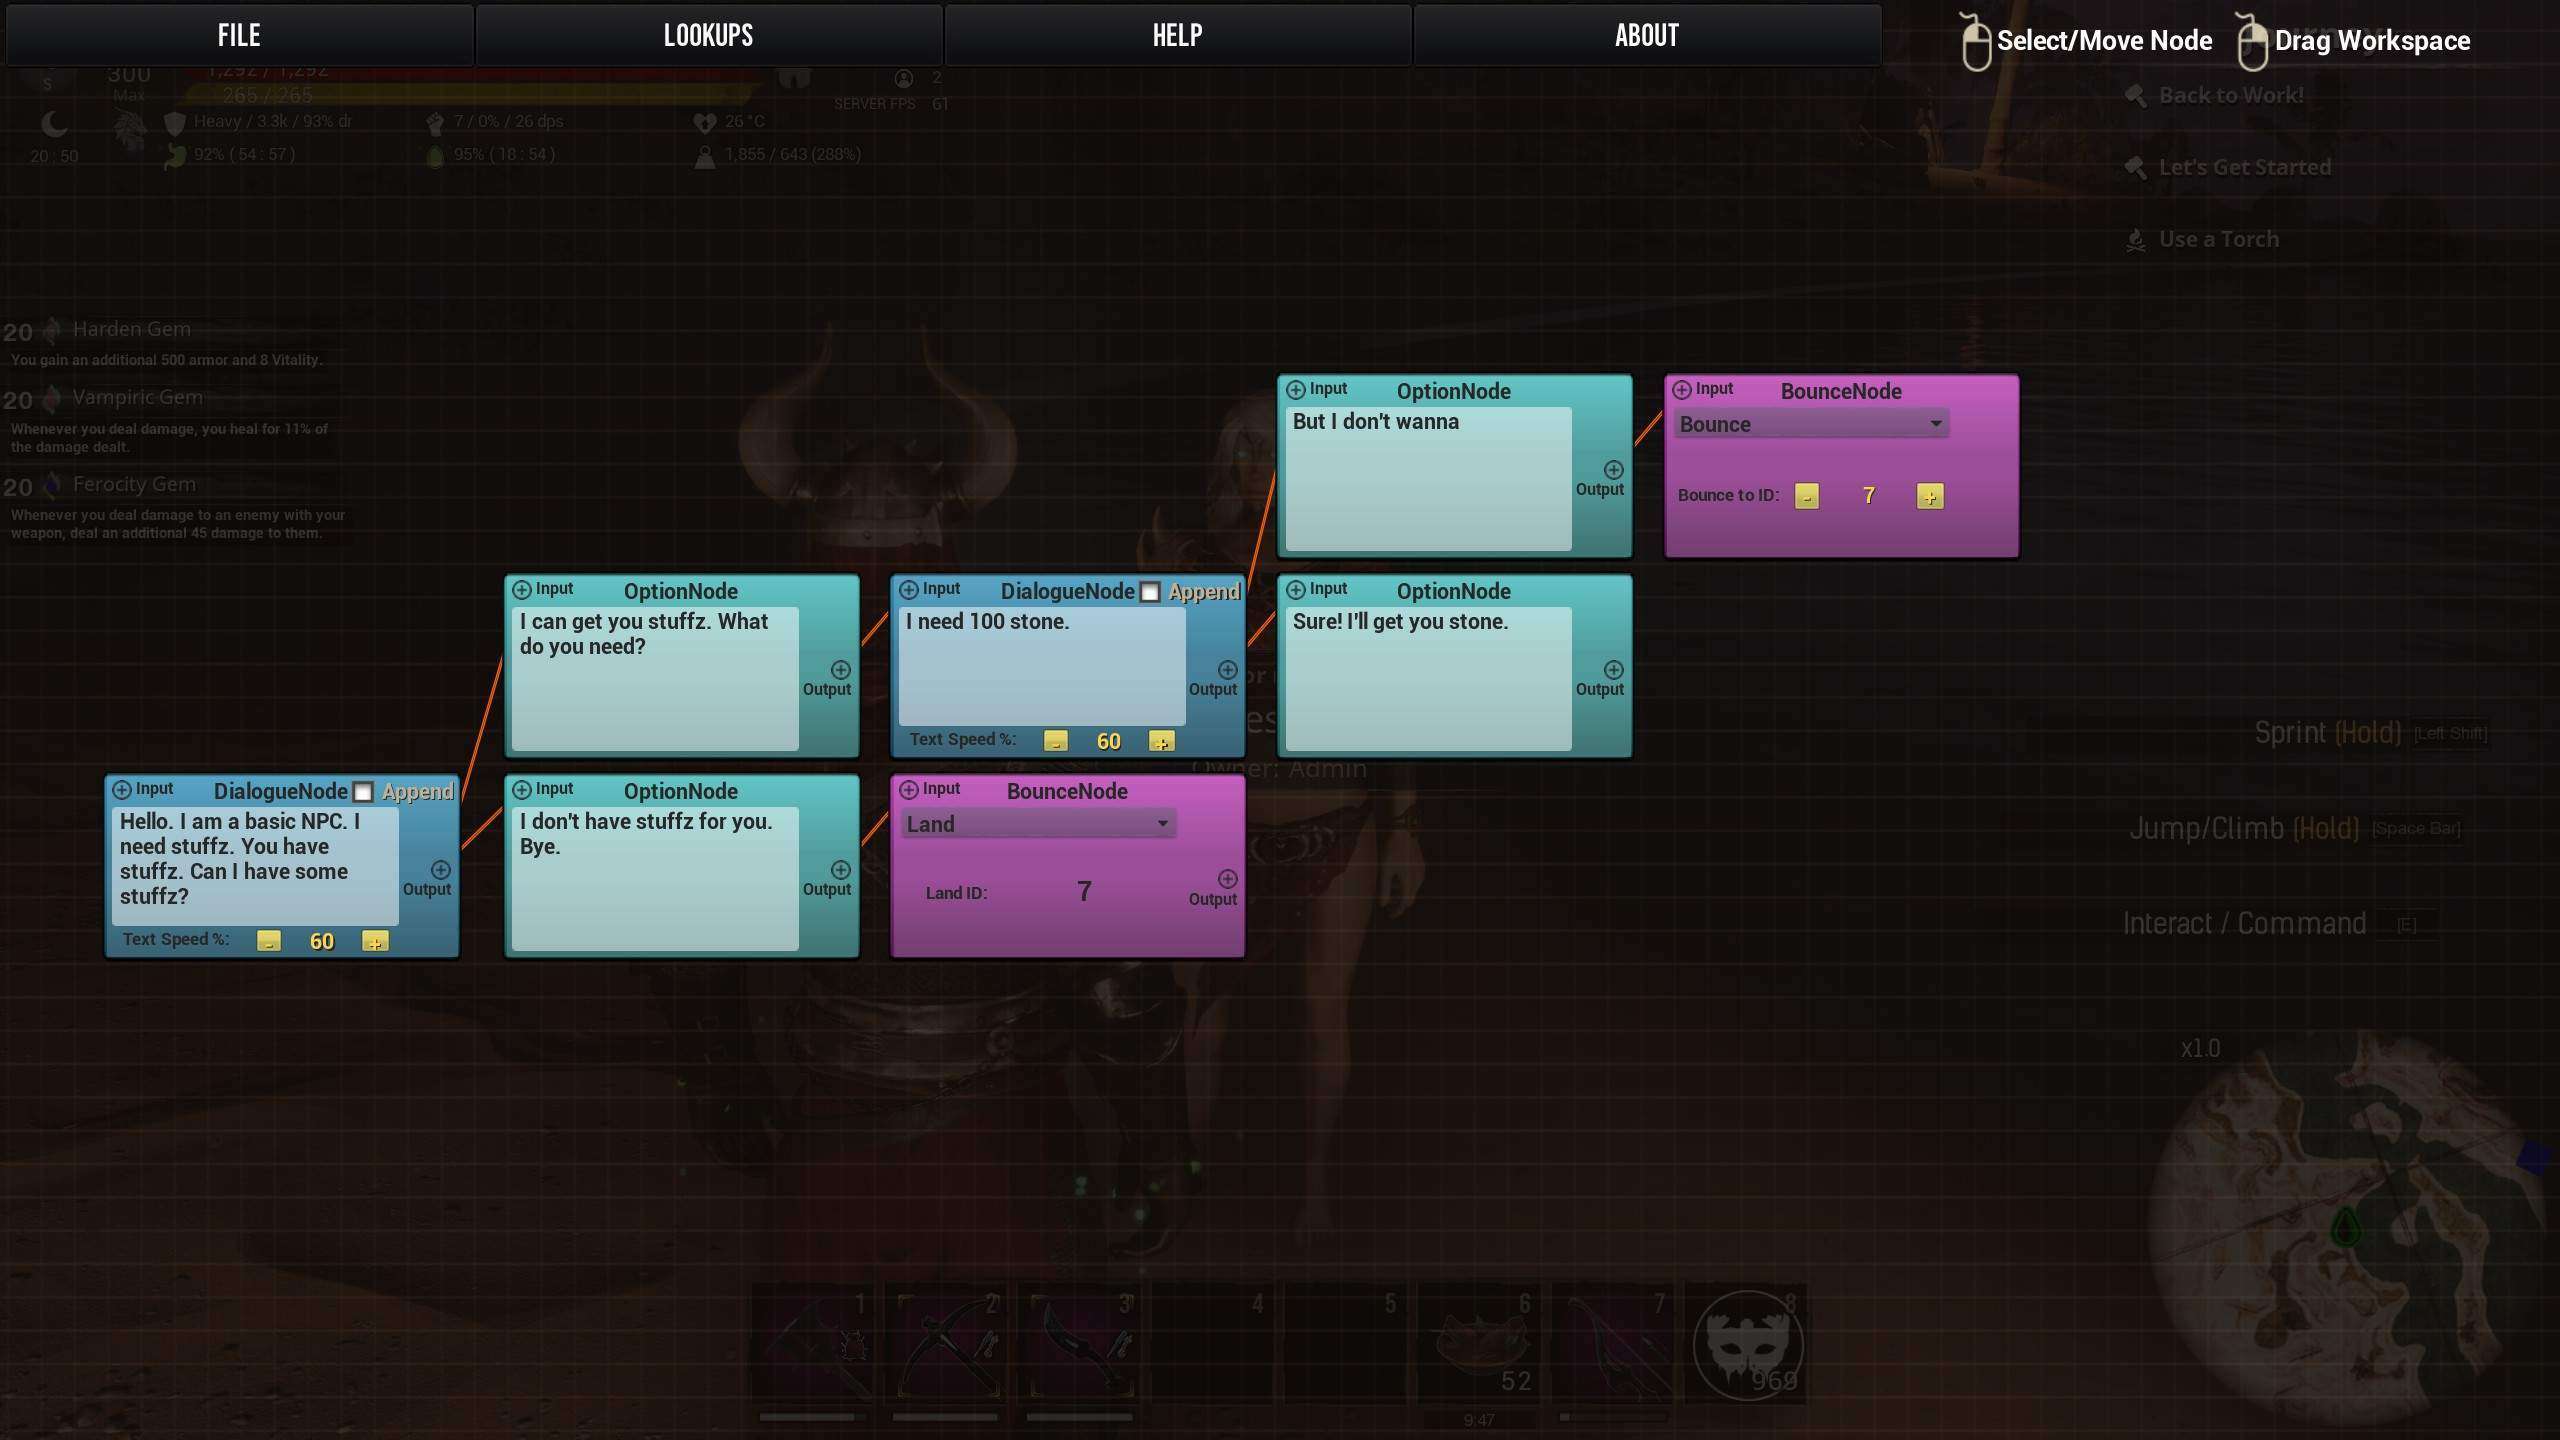
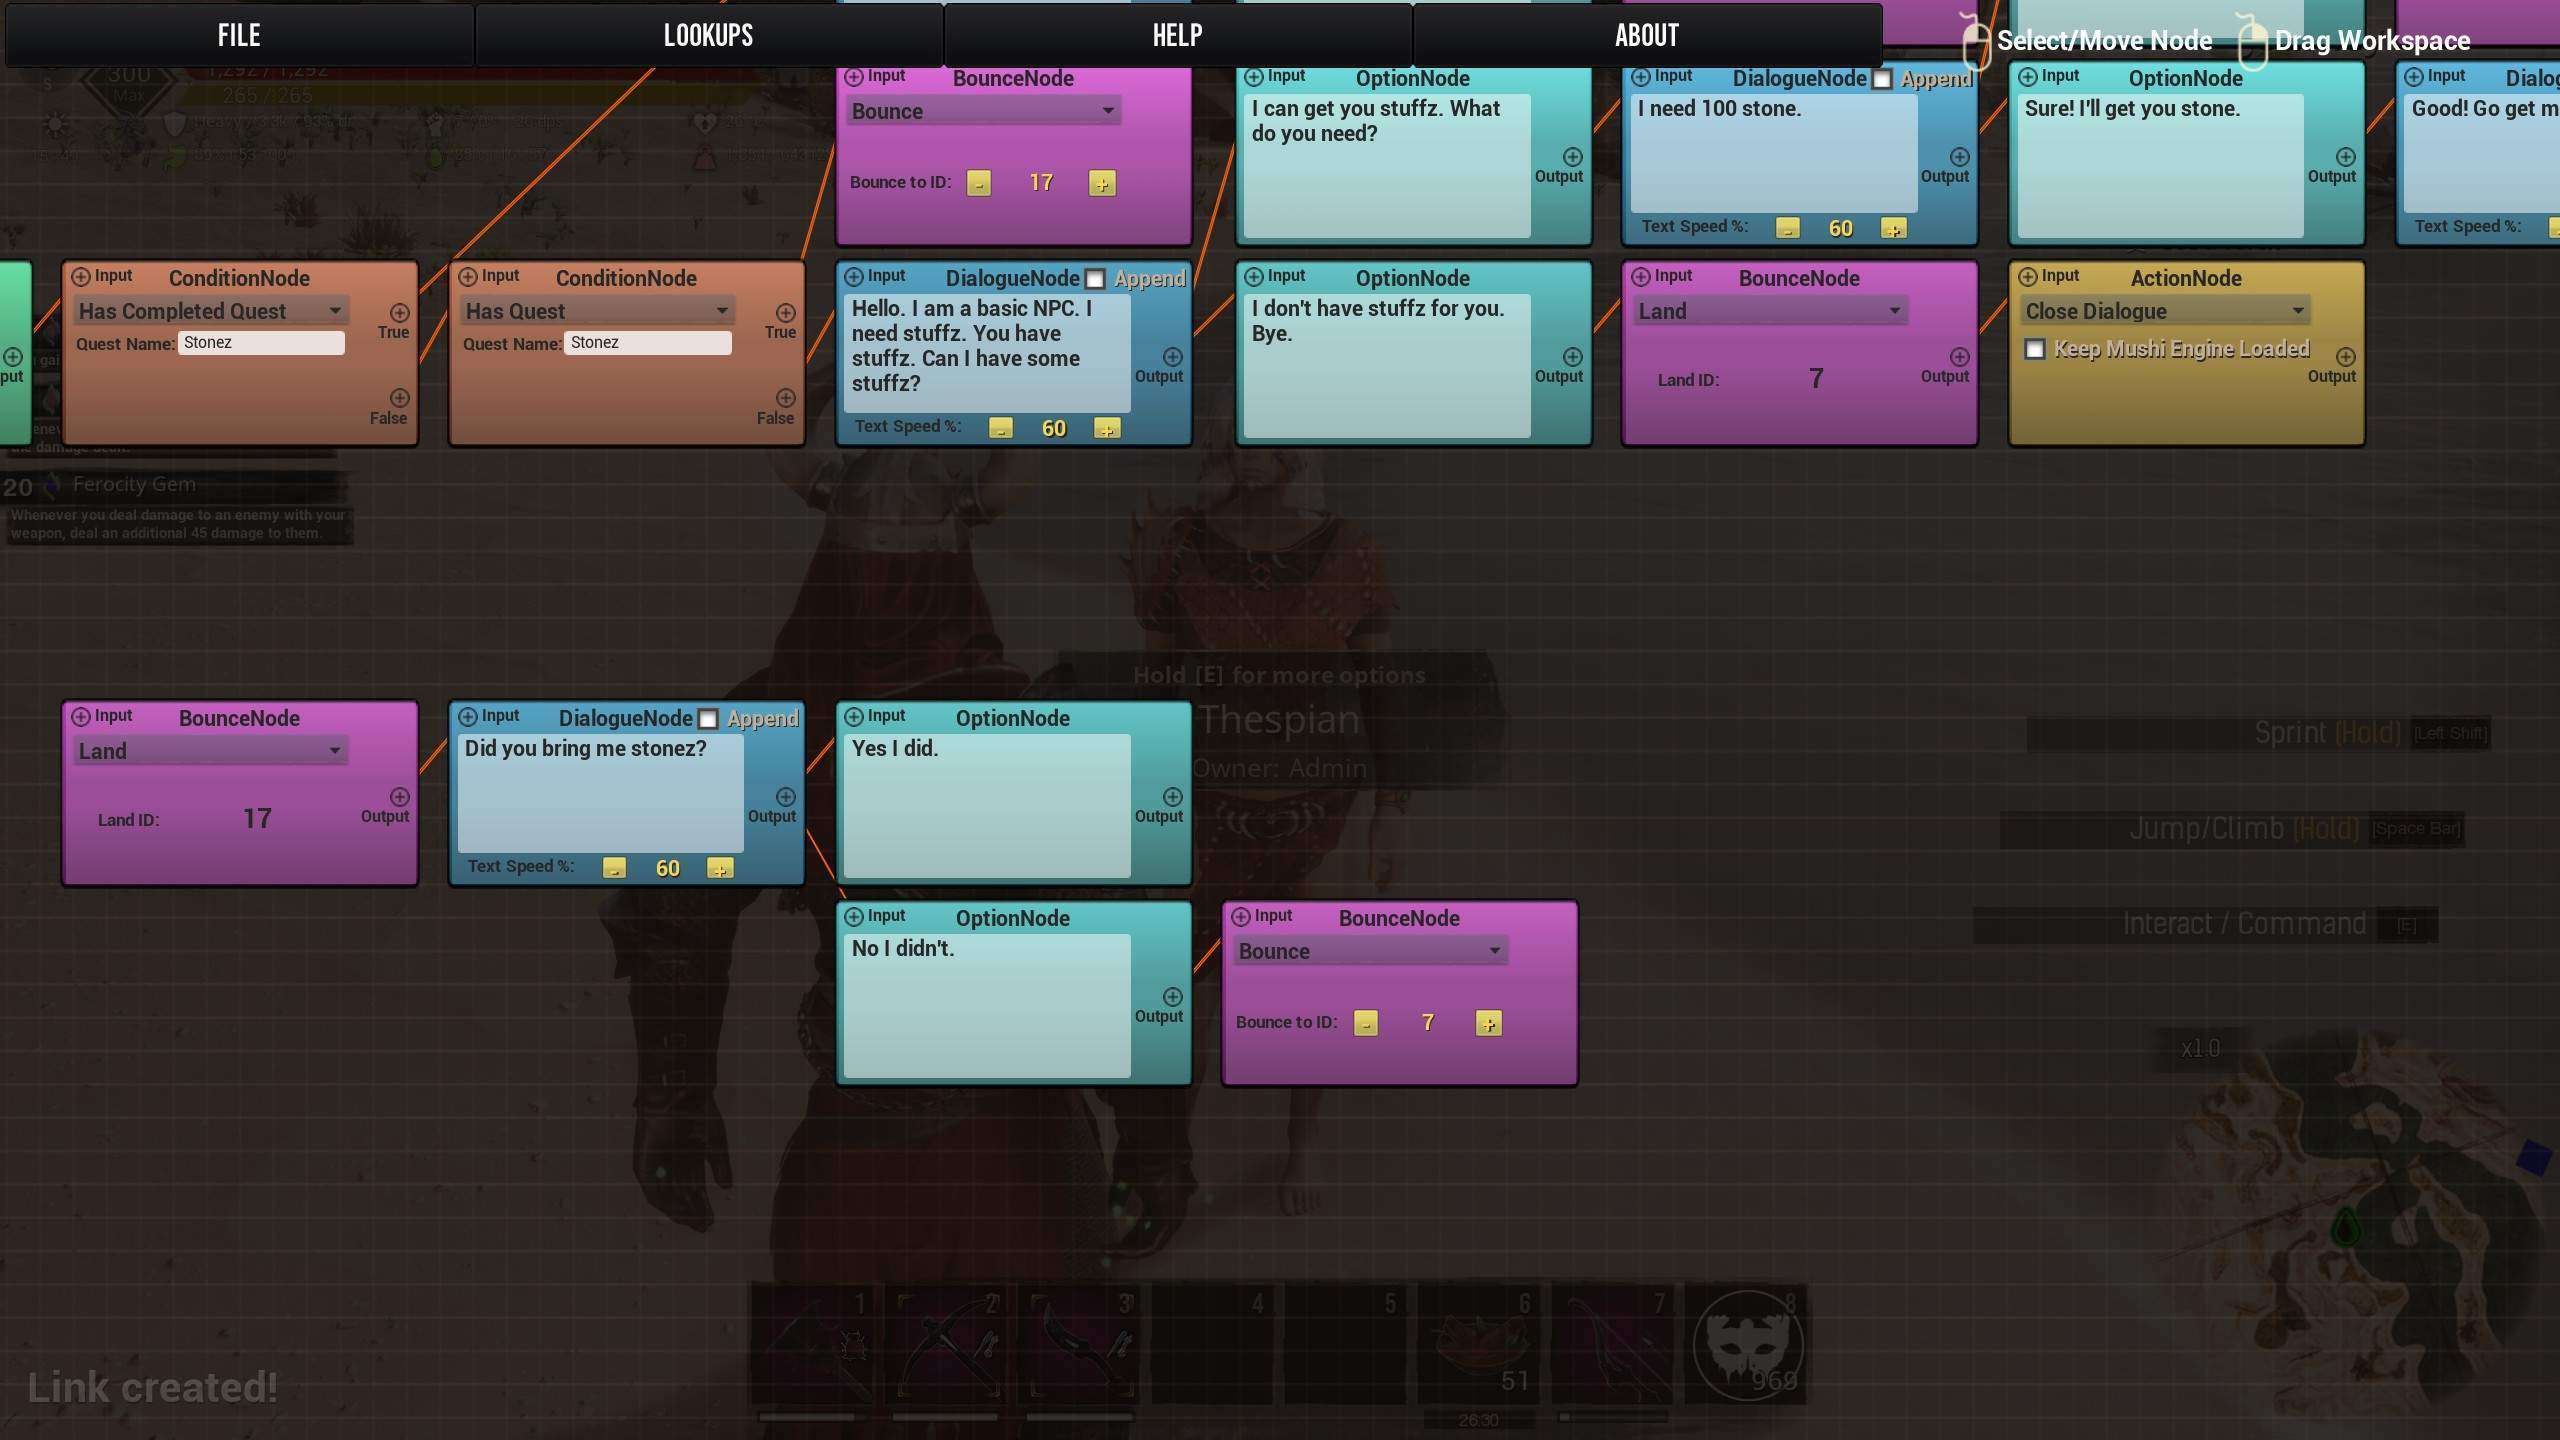
First, connect everything except the origin node together (more on that soon). Remember, A leads to B, leads to C. So, let’s start by connecting the output of our responses to the next steps. Remember, output connects to input. If I say something, the output should connect to the consequences of what I say. See image.

Good. Now that we have all our dialogue and options connected, we can start making things actually happen. First, we are going to make a bounce node. A bounce node is literally a placeholder. There are 2 types of bounce nodes. “bounce” and “landing” nodes.
- Bounce – Tells your script to bounce to the node with the ID that it references
- Landing – Is a landing point with a unique ID.
So, if I tell my script to bounce to ID 7, it bounces to a bounce node with an ID of 7.
However, this doesn’t mean much yet because bounce nodes are just like a track switch on a train track. I need to tell the script what to do after it bounces.
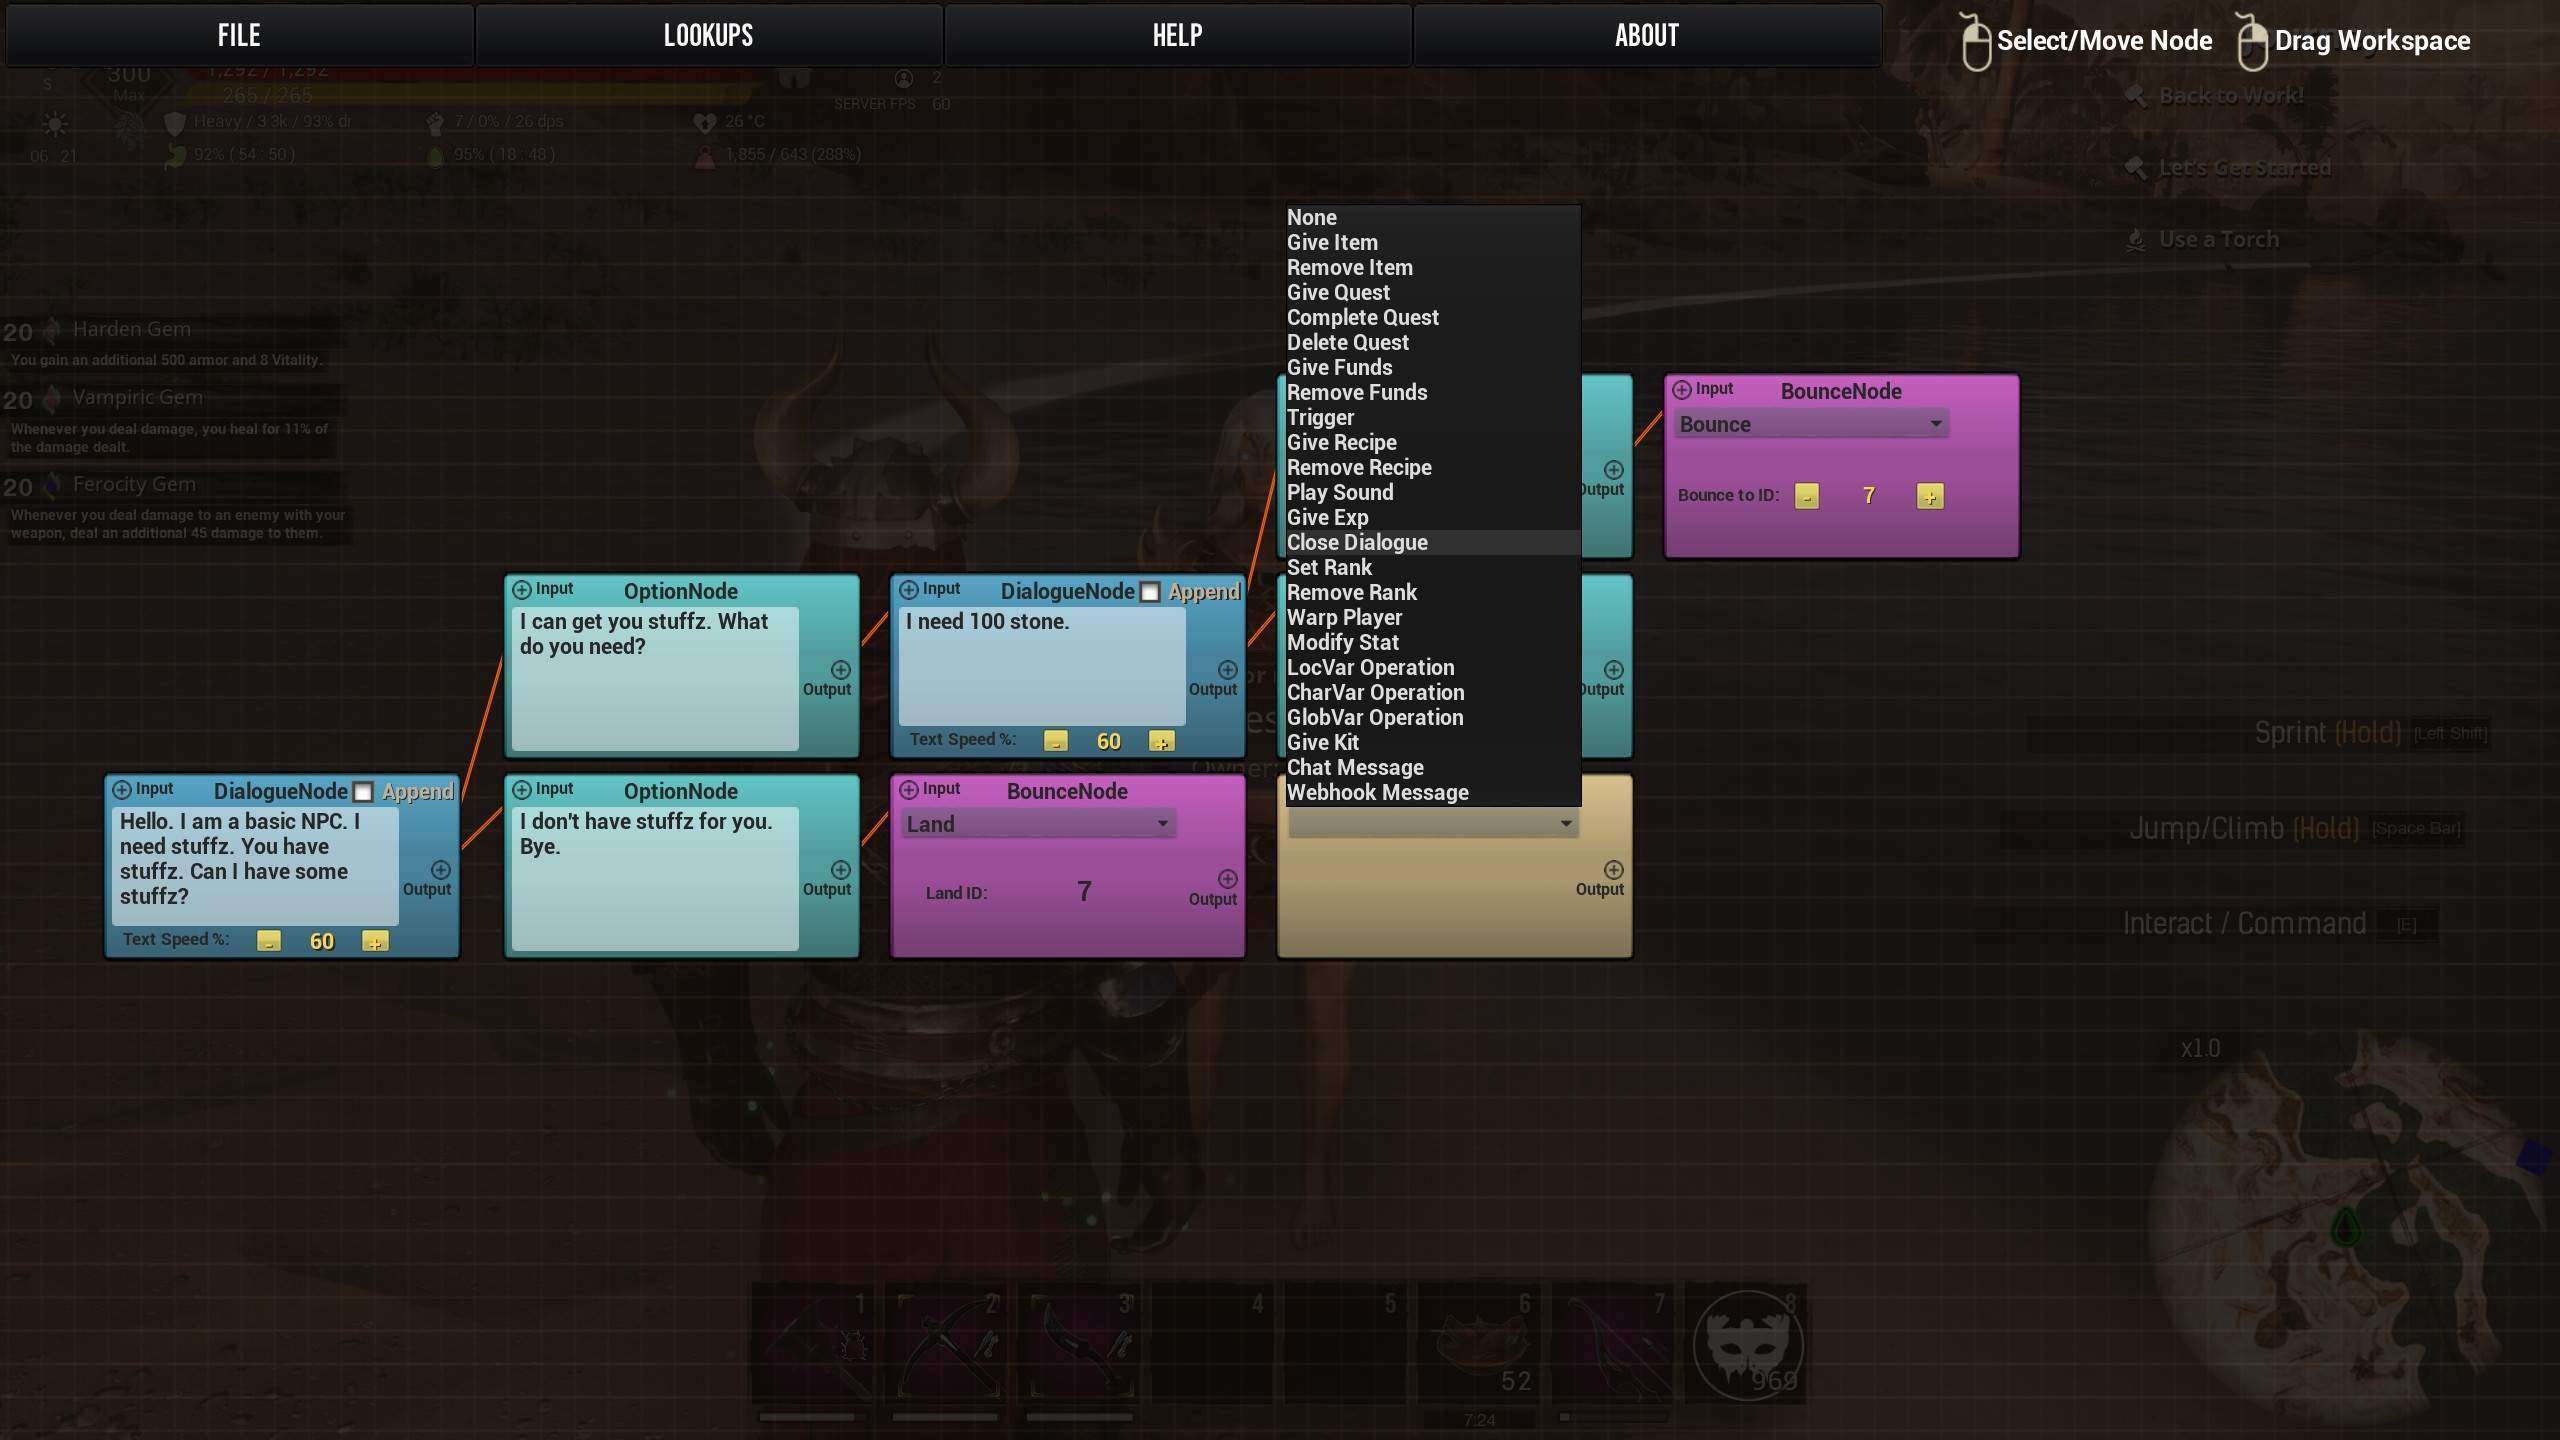
That is where the action node comes into play. This node does the majority of the hard work in your script.
First, we are going to create an action node that simply closes the dialogue. It’s as simple as it sounds. It literally closes the dialogue. By the way, if it isn’t obvious yet, this node is also reached by right clicking. All nodes are.

The layman’s translation is that, when someone says no to the quest, it bounces them down to the landing which then closes the dialogue. If they say no right away, it also bounces them to the action node which closes the dialogue. This way, any time a player chooses an option that closes the dialogue, we can simply reference the bounce node. Space saved!
One more note before we move on. You can add dialogue if you would like the NPC to say something before closing the screen, but that requires a wait node. That will be covered next.
Wait Nodes and Quests
Now that the player has chosen to accept the task, the NPC must give them a quest, otherwise this all means nothing. For this, we will make two things.
Action Node with “Give Quest”
- Just as before, right click and add an action node. Choose “Give Quest” from the dropdown menu. Name your quest whatever you would like, but keep in mind, the popup for quest names is very small. I suggest single or double word quest names. Make sure you select “Notify Player” so they will be aware that they even have a quest.
Wait Node
- After a quest is given, or if there is closing dialogue, be sure to add a wait node. It hangs for a set number of milliseconds so that the player can read any dialogue. Also, the quest popup need a second or so to show up for the player, so I recommend about 3 second (3000 milliseconds) in this case. See the screenshot.
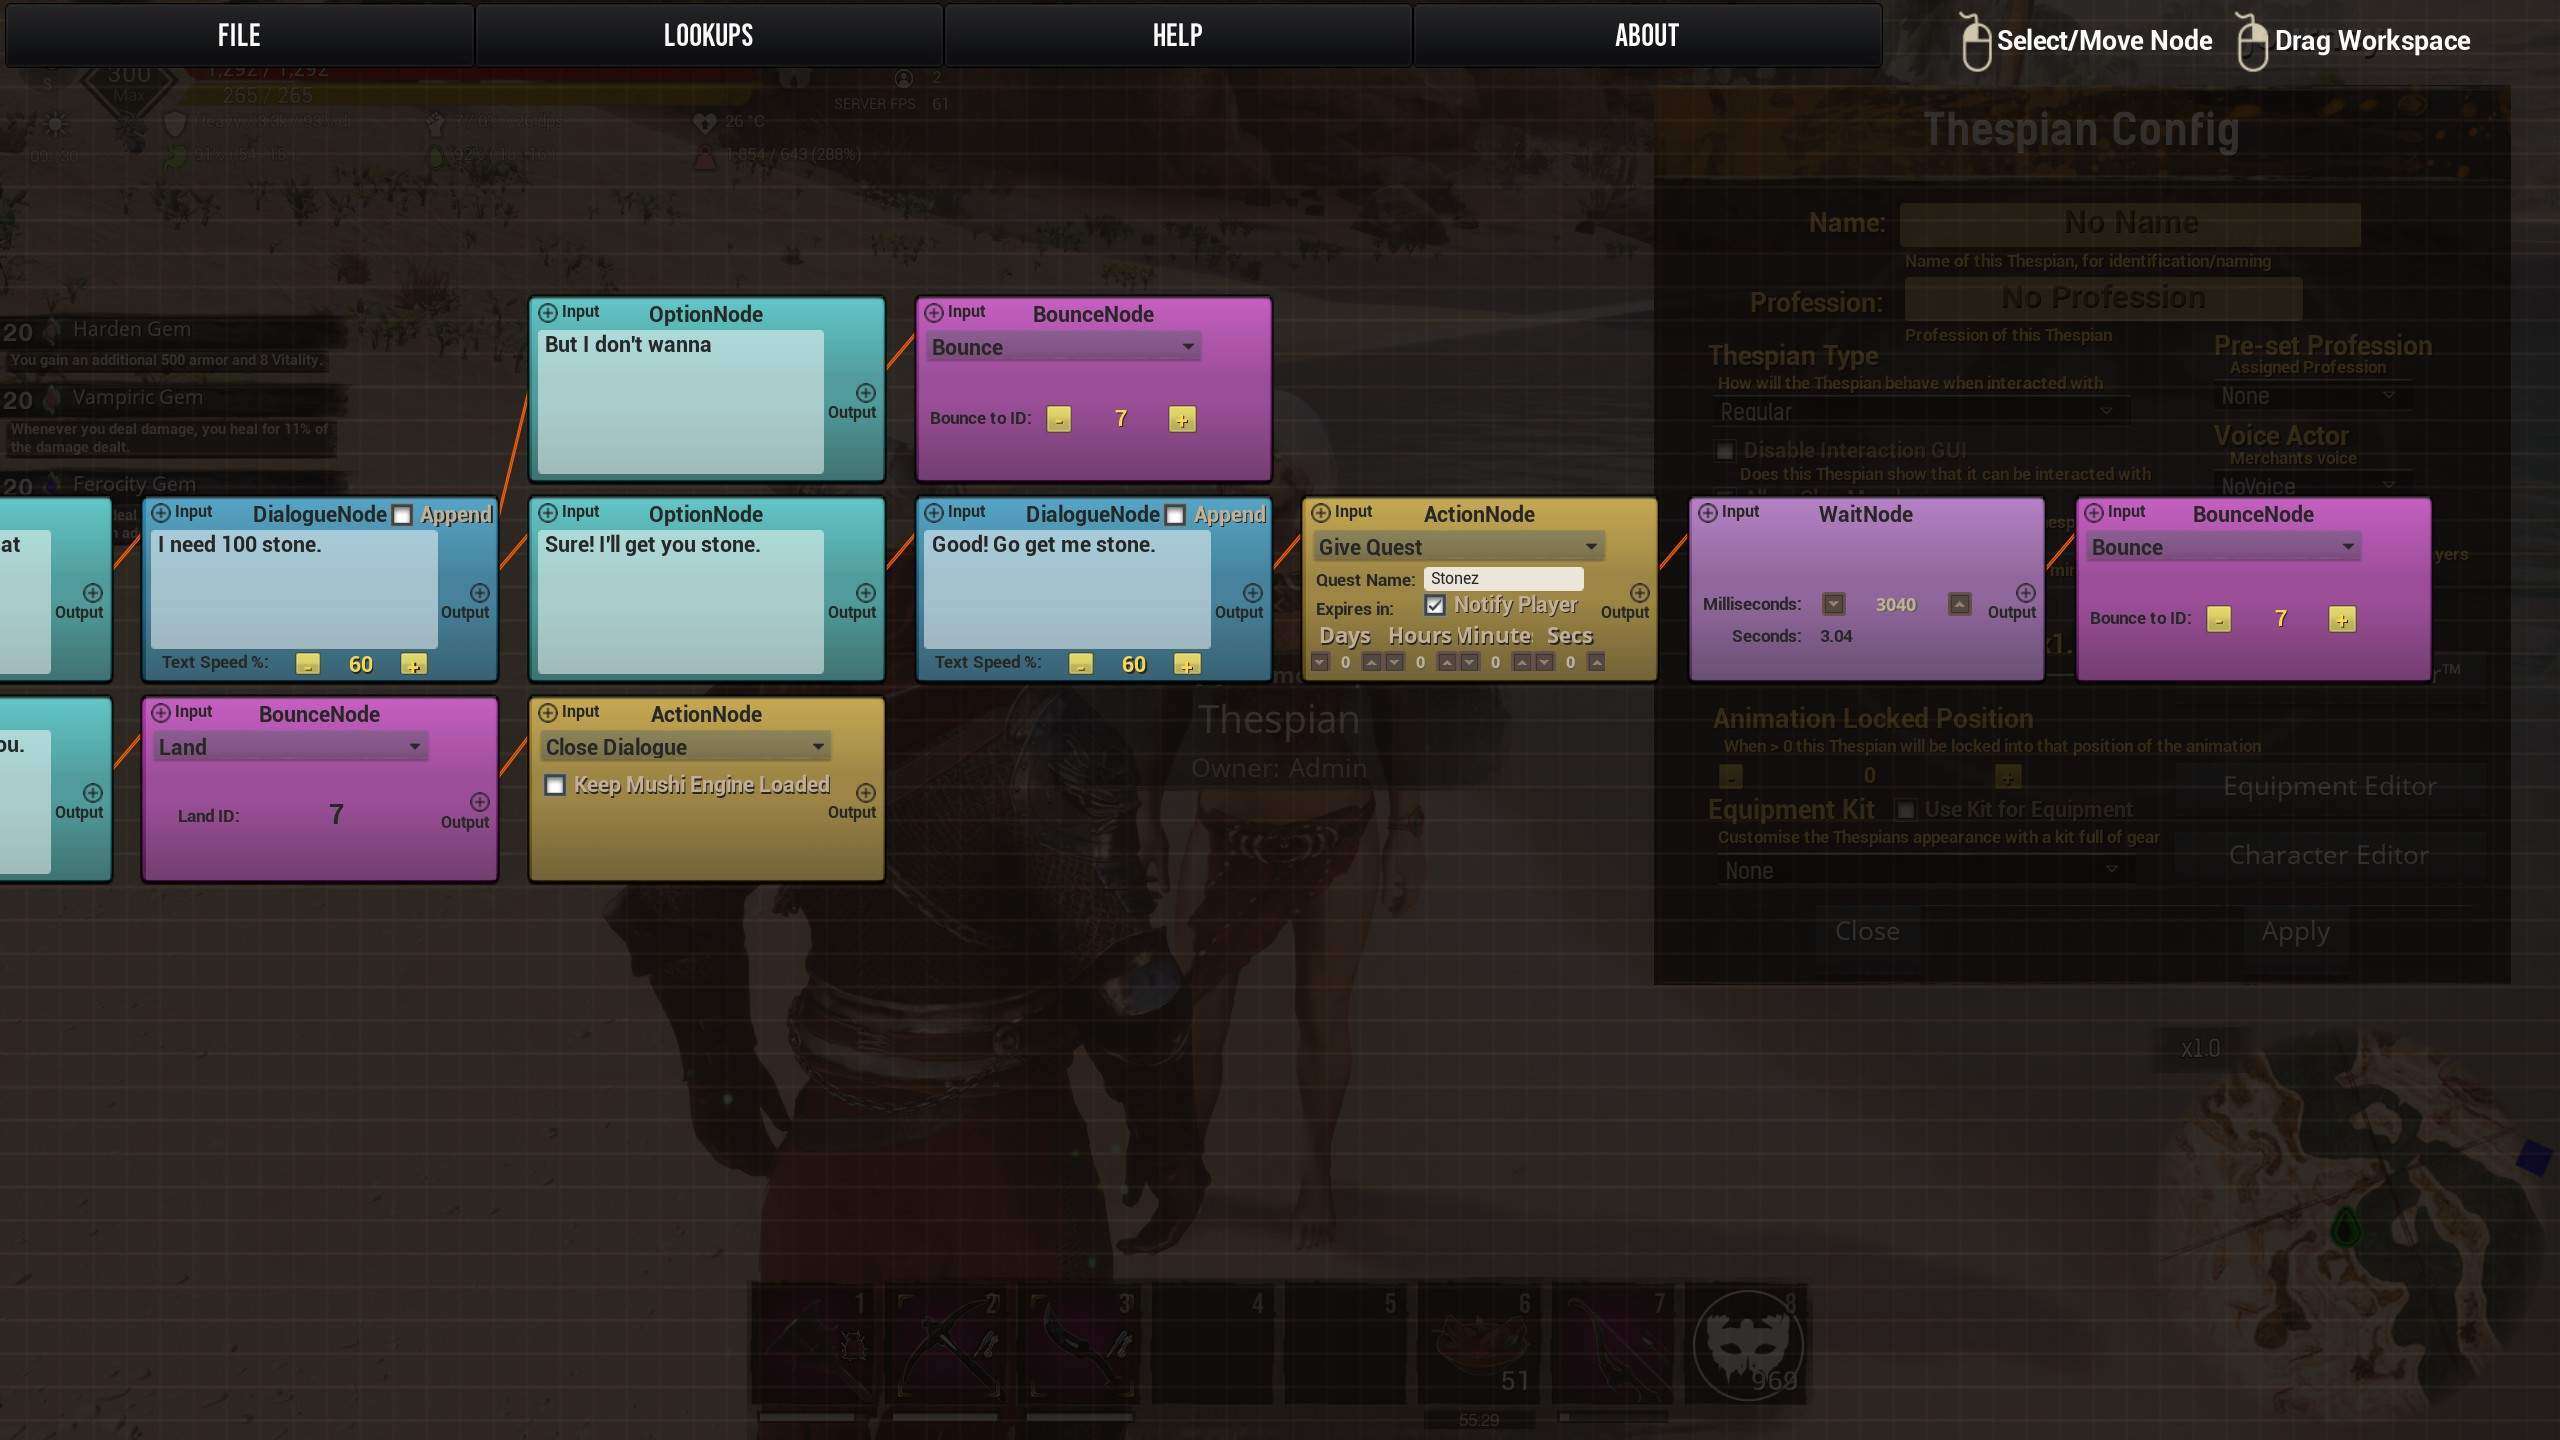
- You will notice we are borrowing that bounce node again. No need to make more nodes if we have one that is doing the job for us.The layman translation here is that the player is given a quest, the NPC says “Good, go get me some!” and 3 seconds is allowed for them to read this dialogue before the window closes.
Completing Quests or Failing Them
Let’s assume the player has their quest and has now returned.
People are not always honest, or not always aware. They may return without the items. How do I handle this and ensure the NPC doesn’t reward them for incomplete work?
Now we have condition nodes (added by right clicking). If you are familiar at all with programming, they are “IF/THEN” arguments essentially.
The script will now check if the player has completed the quest “Stonez.” If they have not, it will check if they have the quest at all. If they don’t, that means they never grabbed it in the first place. It defaults to the opening dialogue of the NPC.
See below.
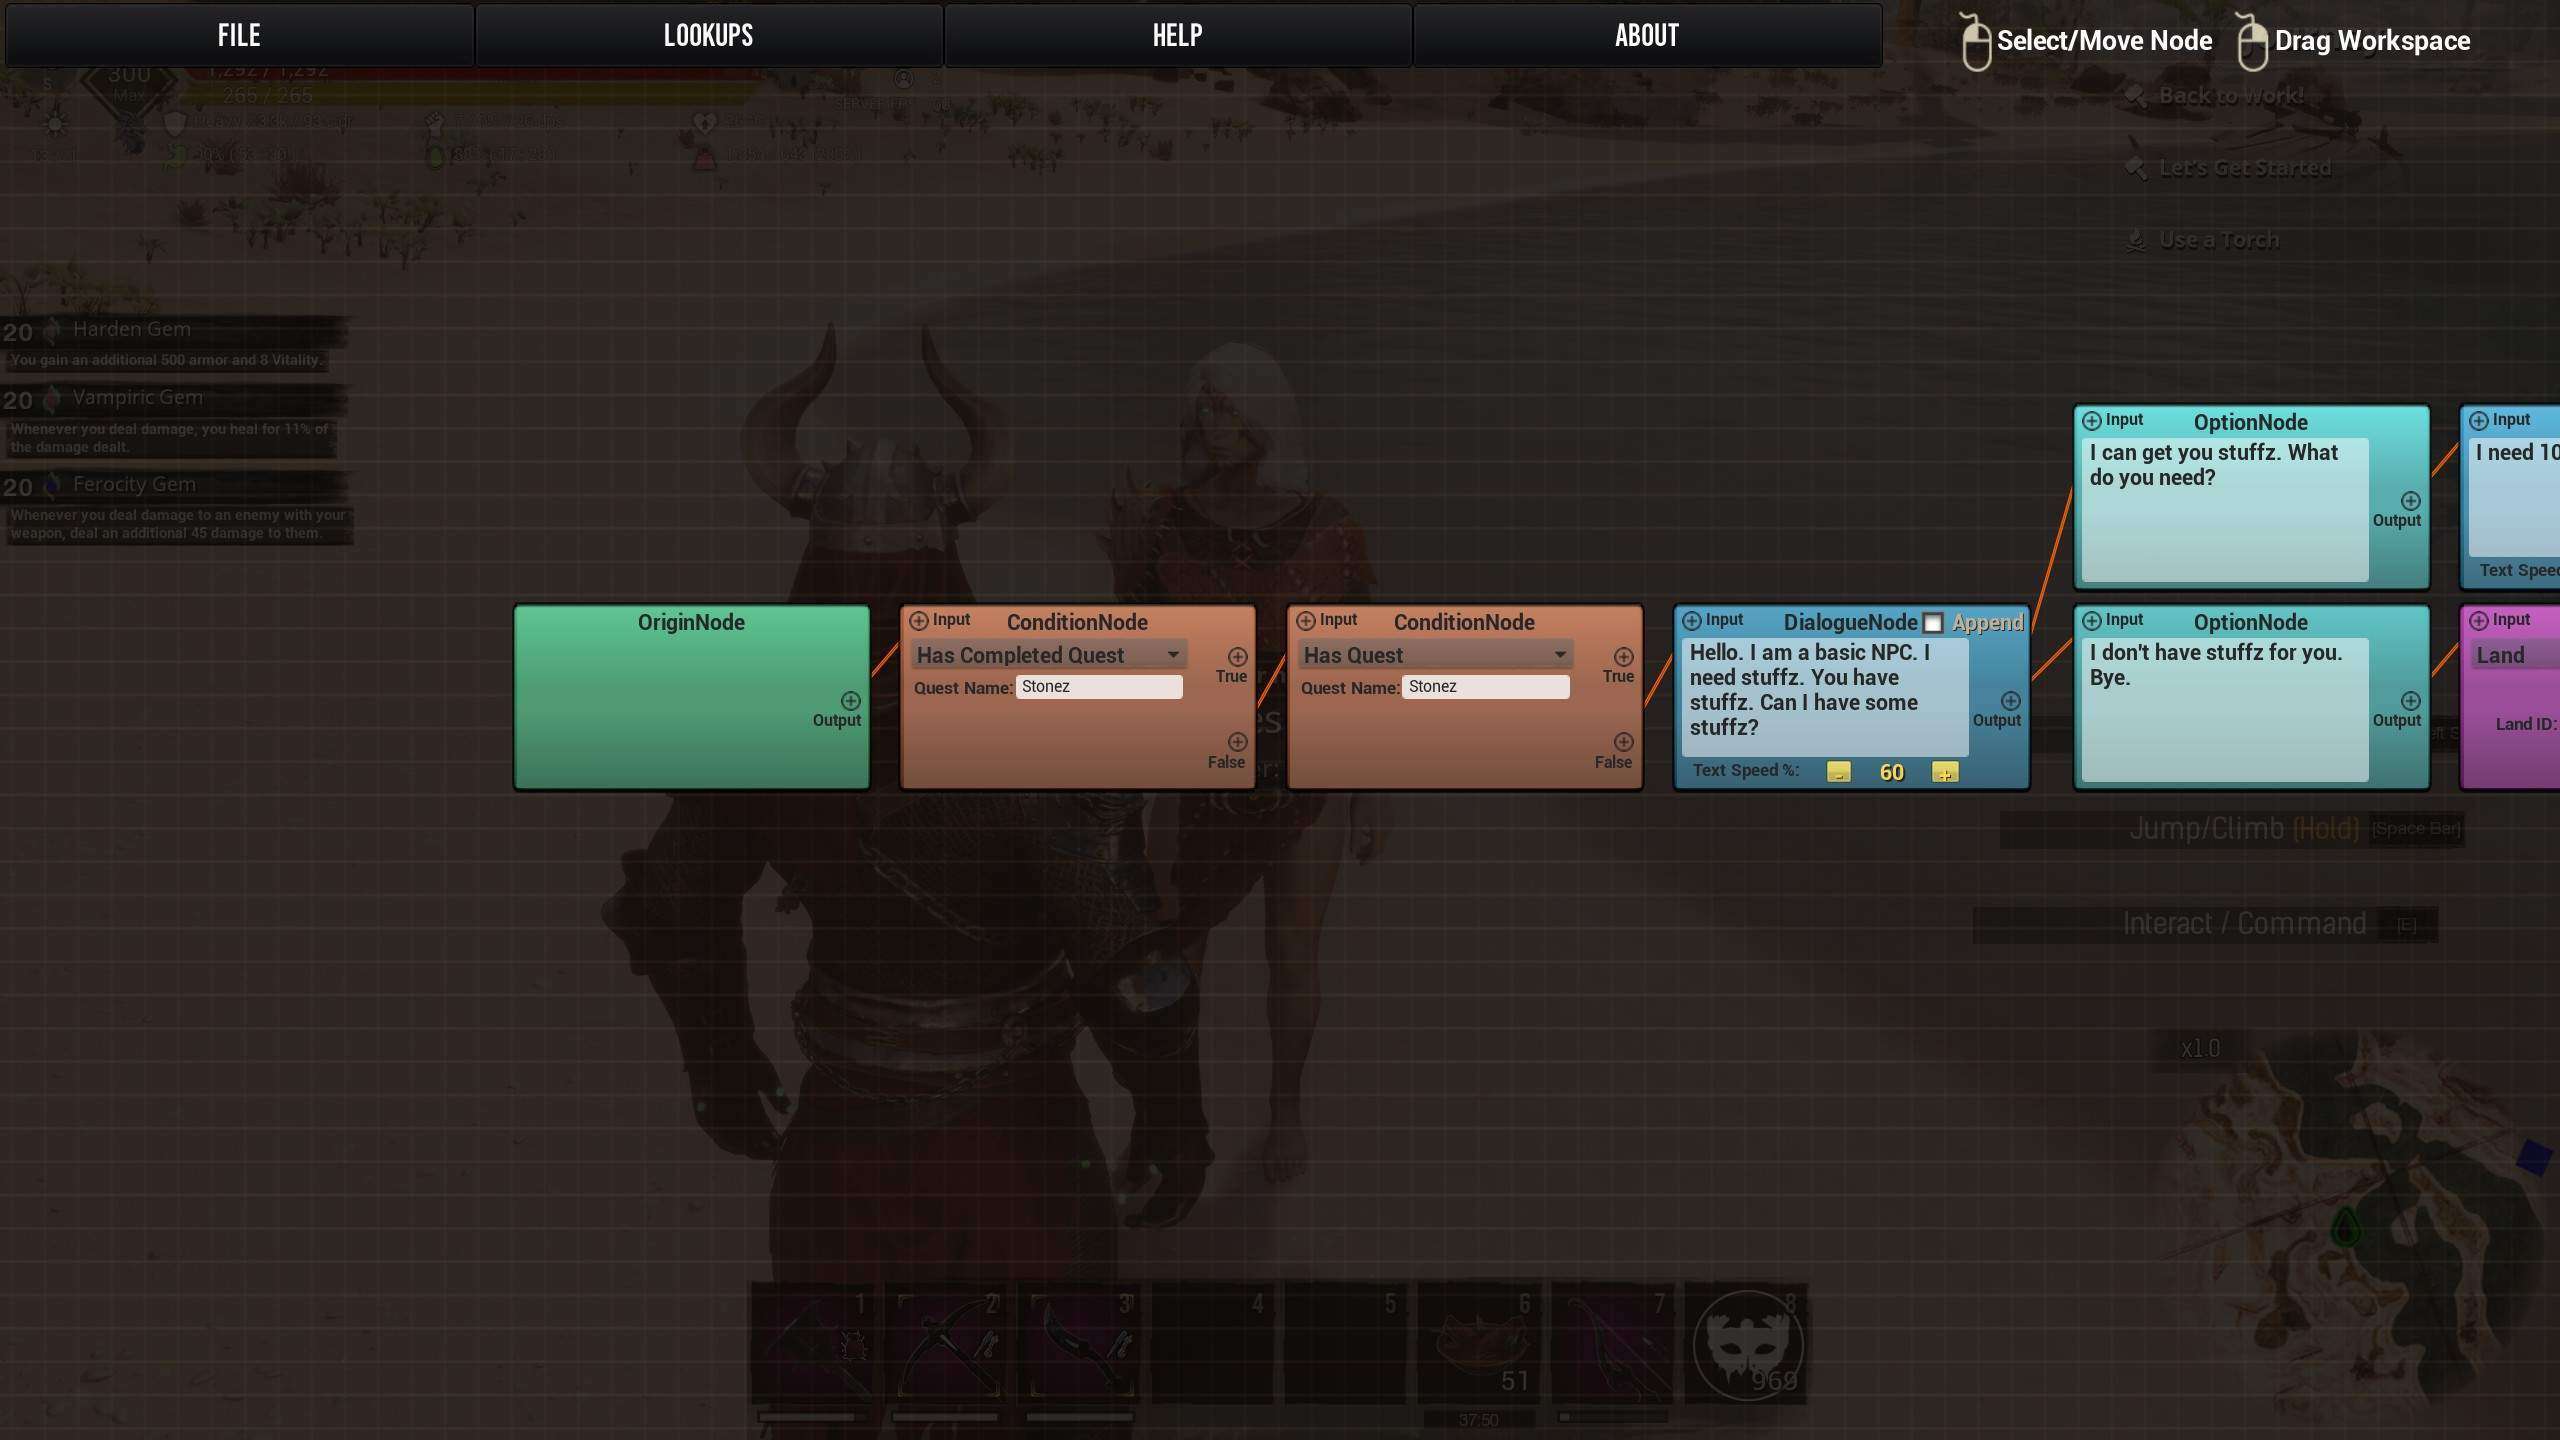
So, we know that if they don’t have the quest and have never received it, the NPC speaks to them with the normal dialogue we set up earlier.
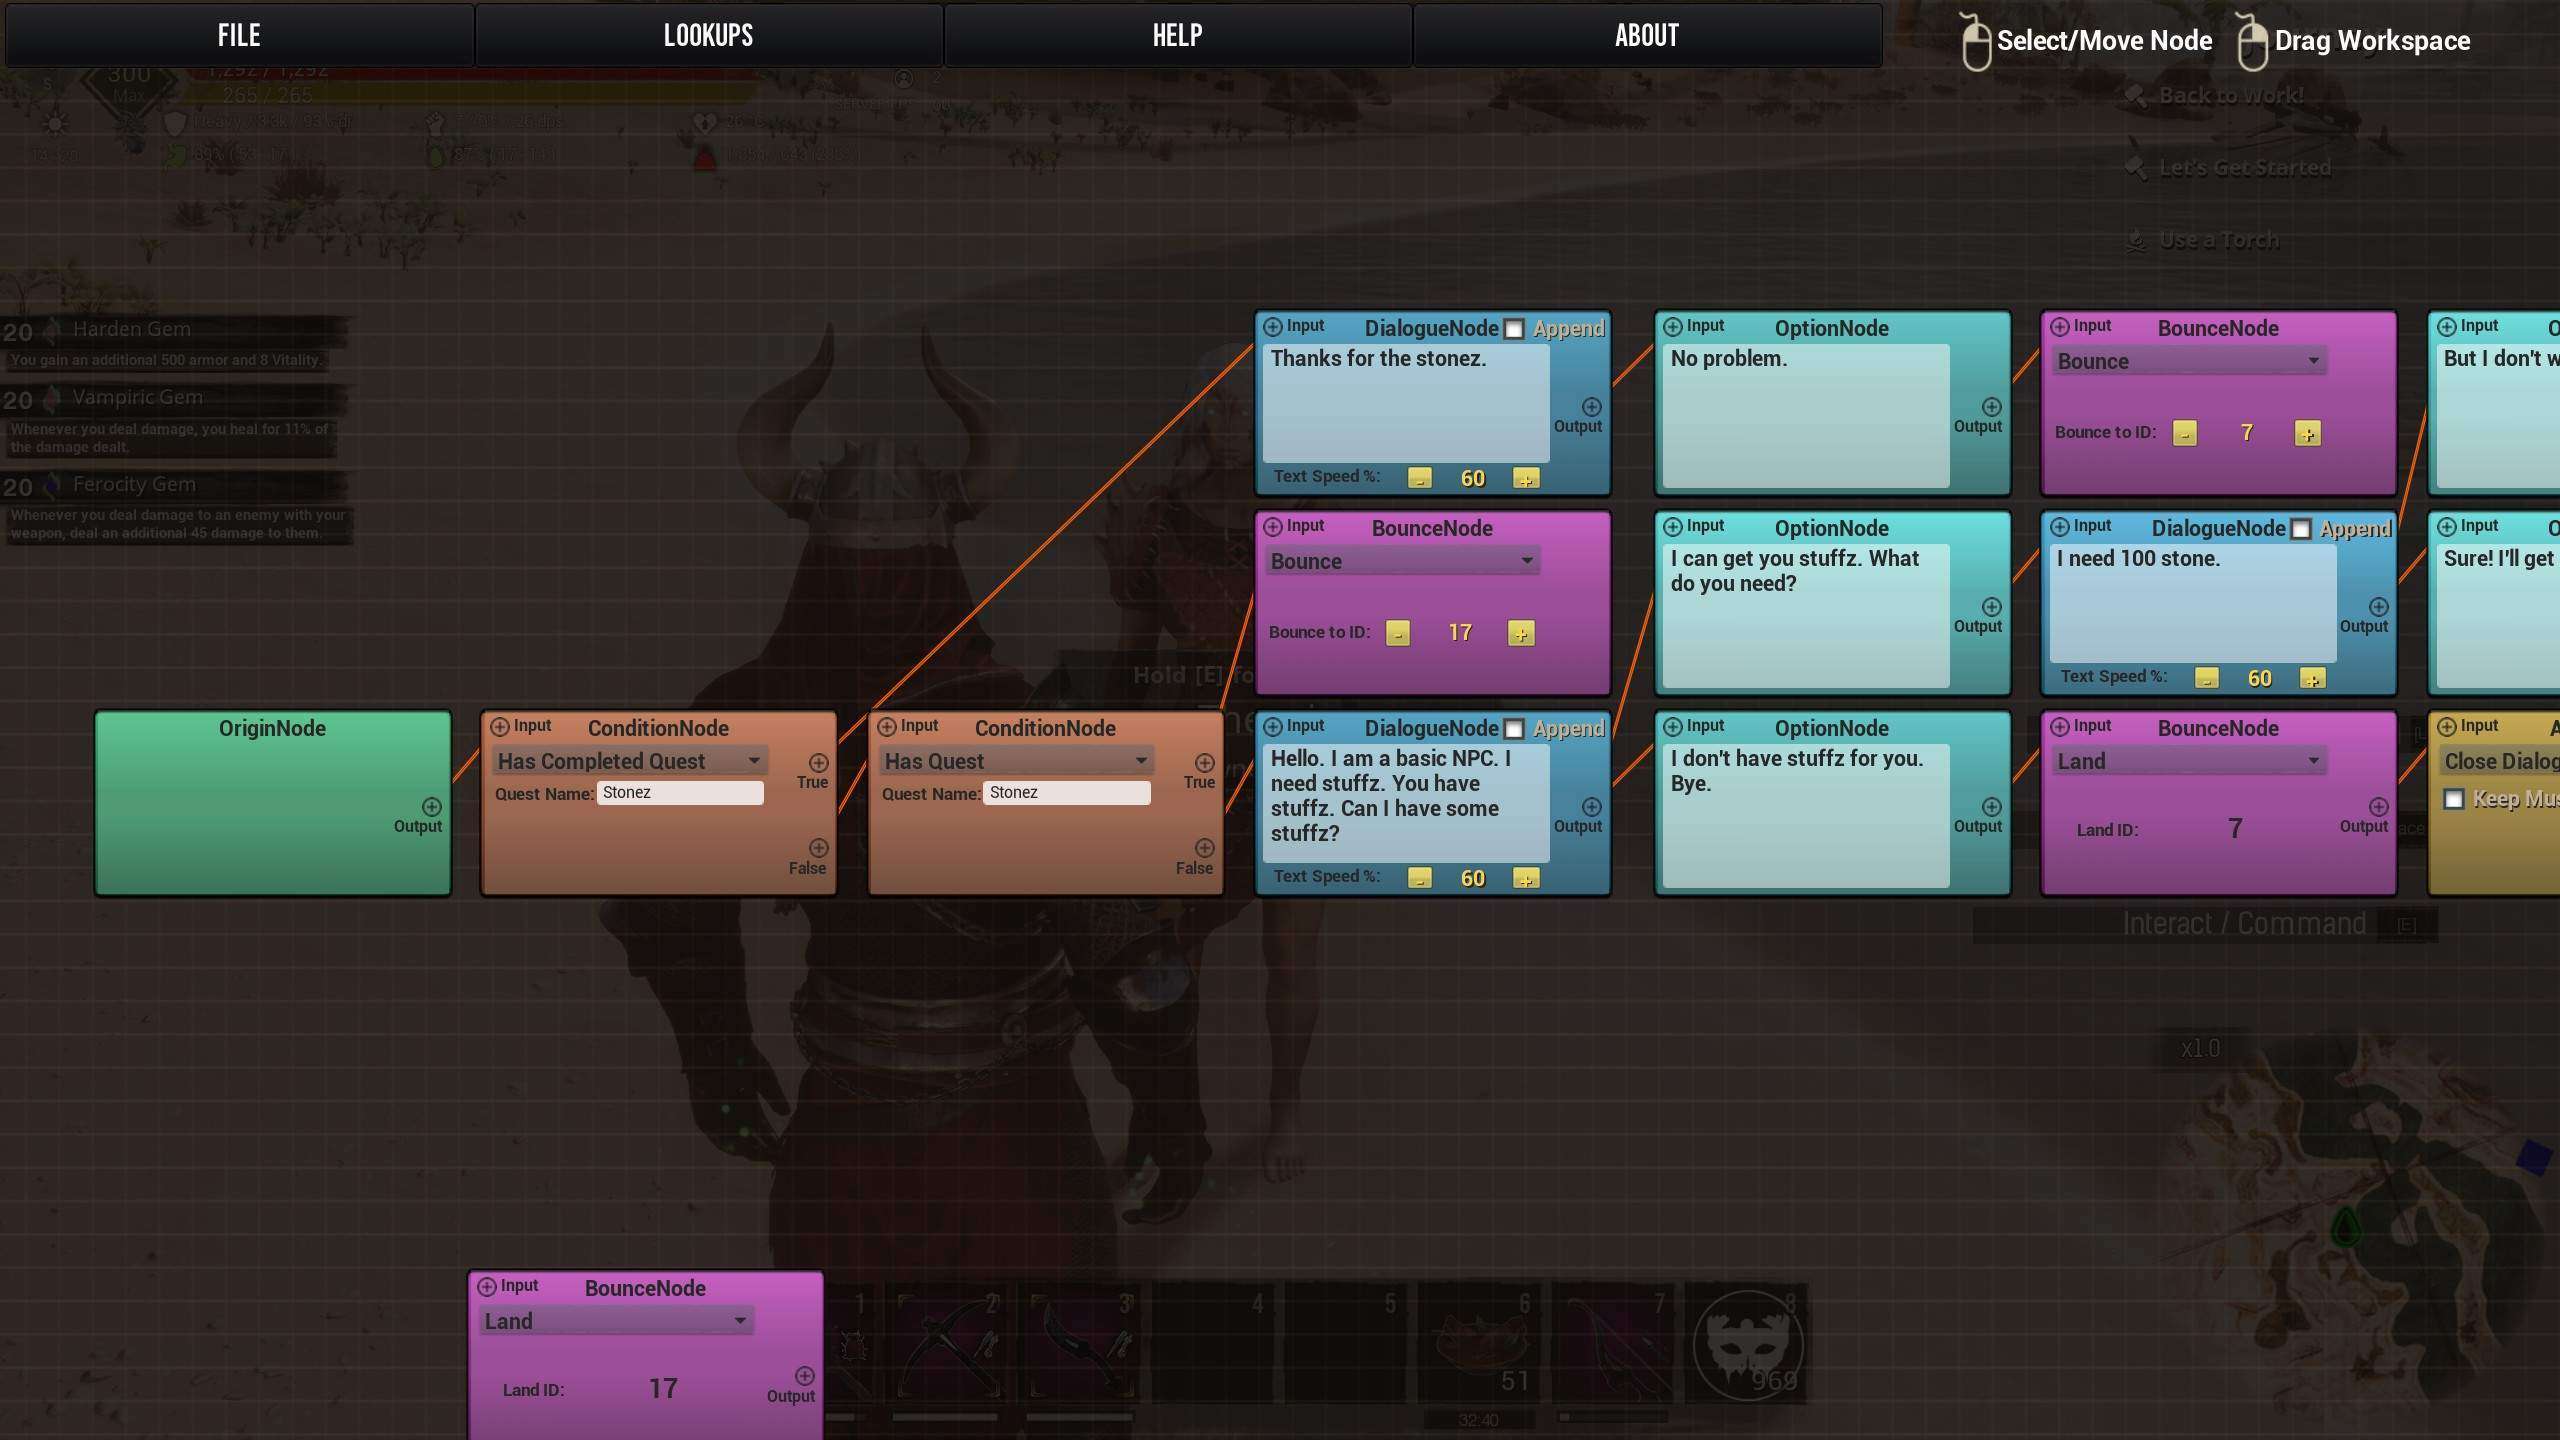
But what if they do have the quest? Well, we need to connect the “True” nodes in this case.
First, if they have already completed the quest, we need to tell the NPC to say something along the lines of “Thanks again” and close out the dialogue. That way, the quest won’t be infinitely repeated. I know it’s a bit backwards to do this first, but I am doing left to right on my nodes because that’s how I read 🙂
See the screenshot.
Now that we know what will happen if the player finished their quest and returned later, what happens if they are doing their quest and need to turn it in?
Well, we need to make an entirely new area for dialogue and options. This can be done using our good friend, Mr Bounce Node.
As before, we give the player some response options. If they say no, we bounce back to our node that closes the convo.
But what if they say yes? The script needs to check that they are telling the truth. Using a condition node, we will check if they indeed have the 100 stone in their inventory. To search for the stone ID, just click on the little magnifying glass after you select “Has Item” in your condition node.

Stone has an ID of 10001 (I think it’s the very first item in the data table).
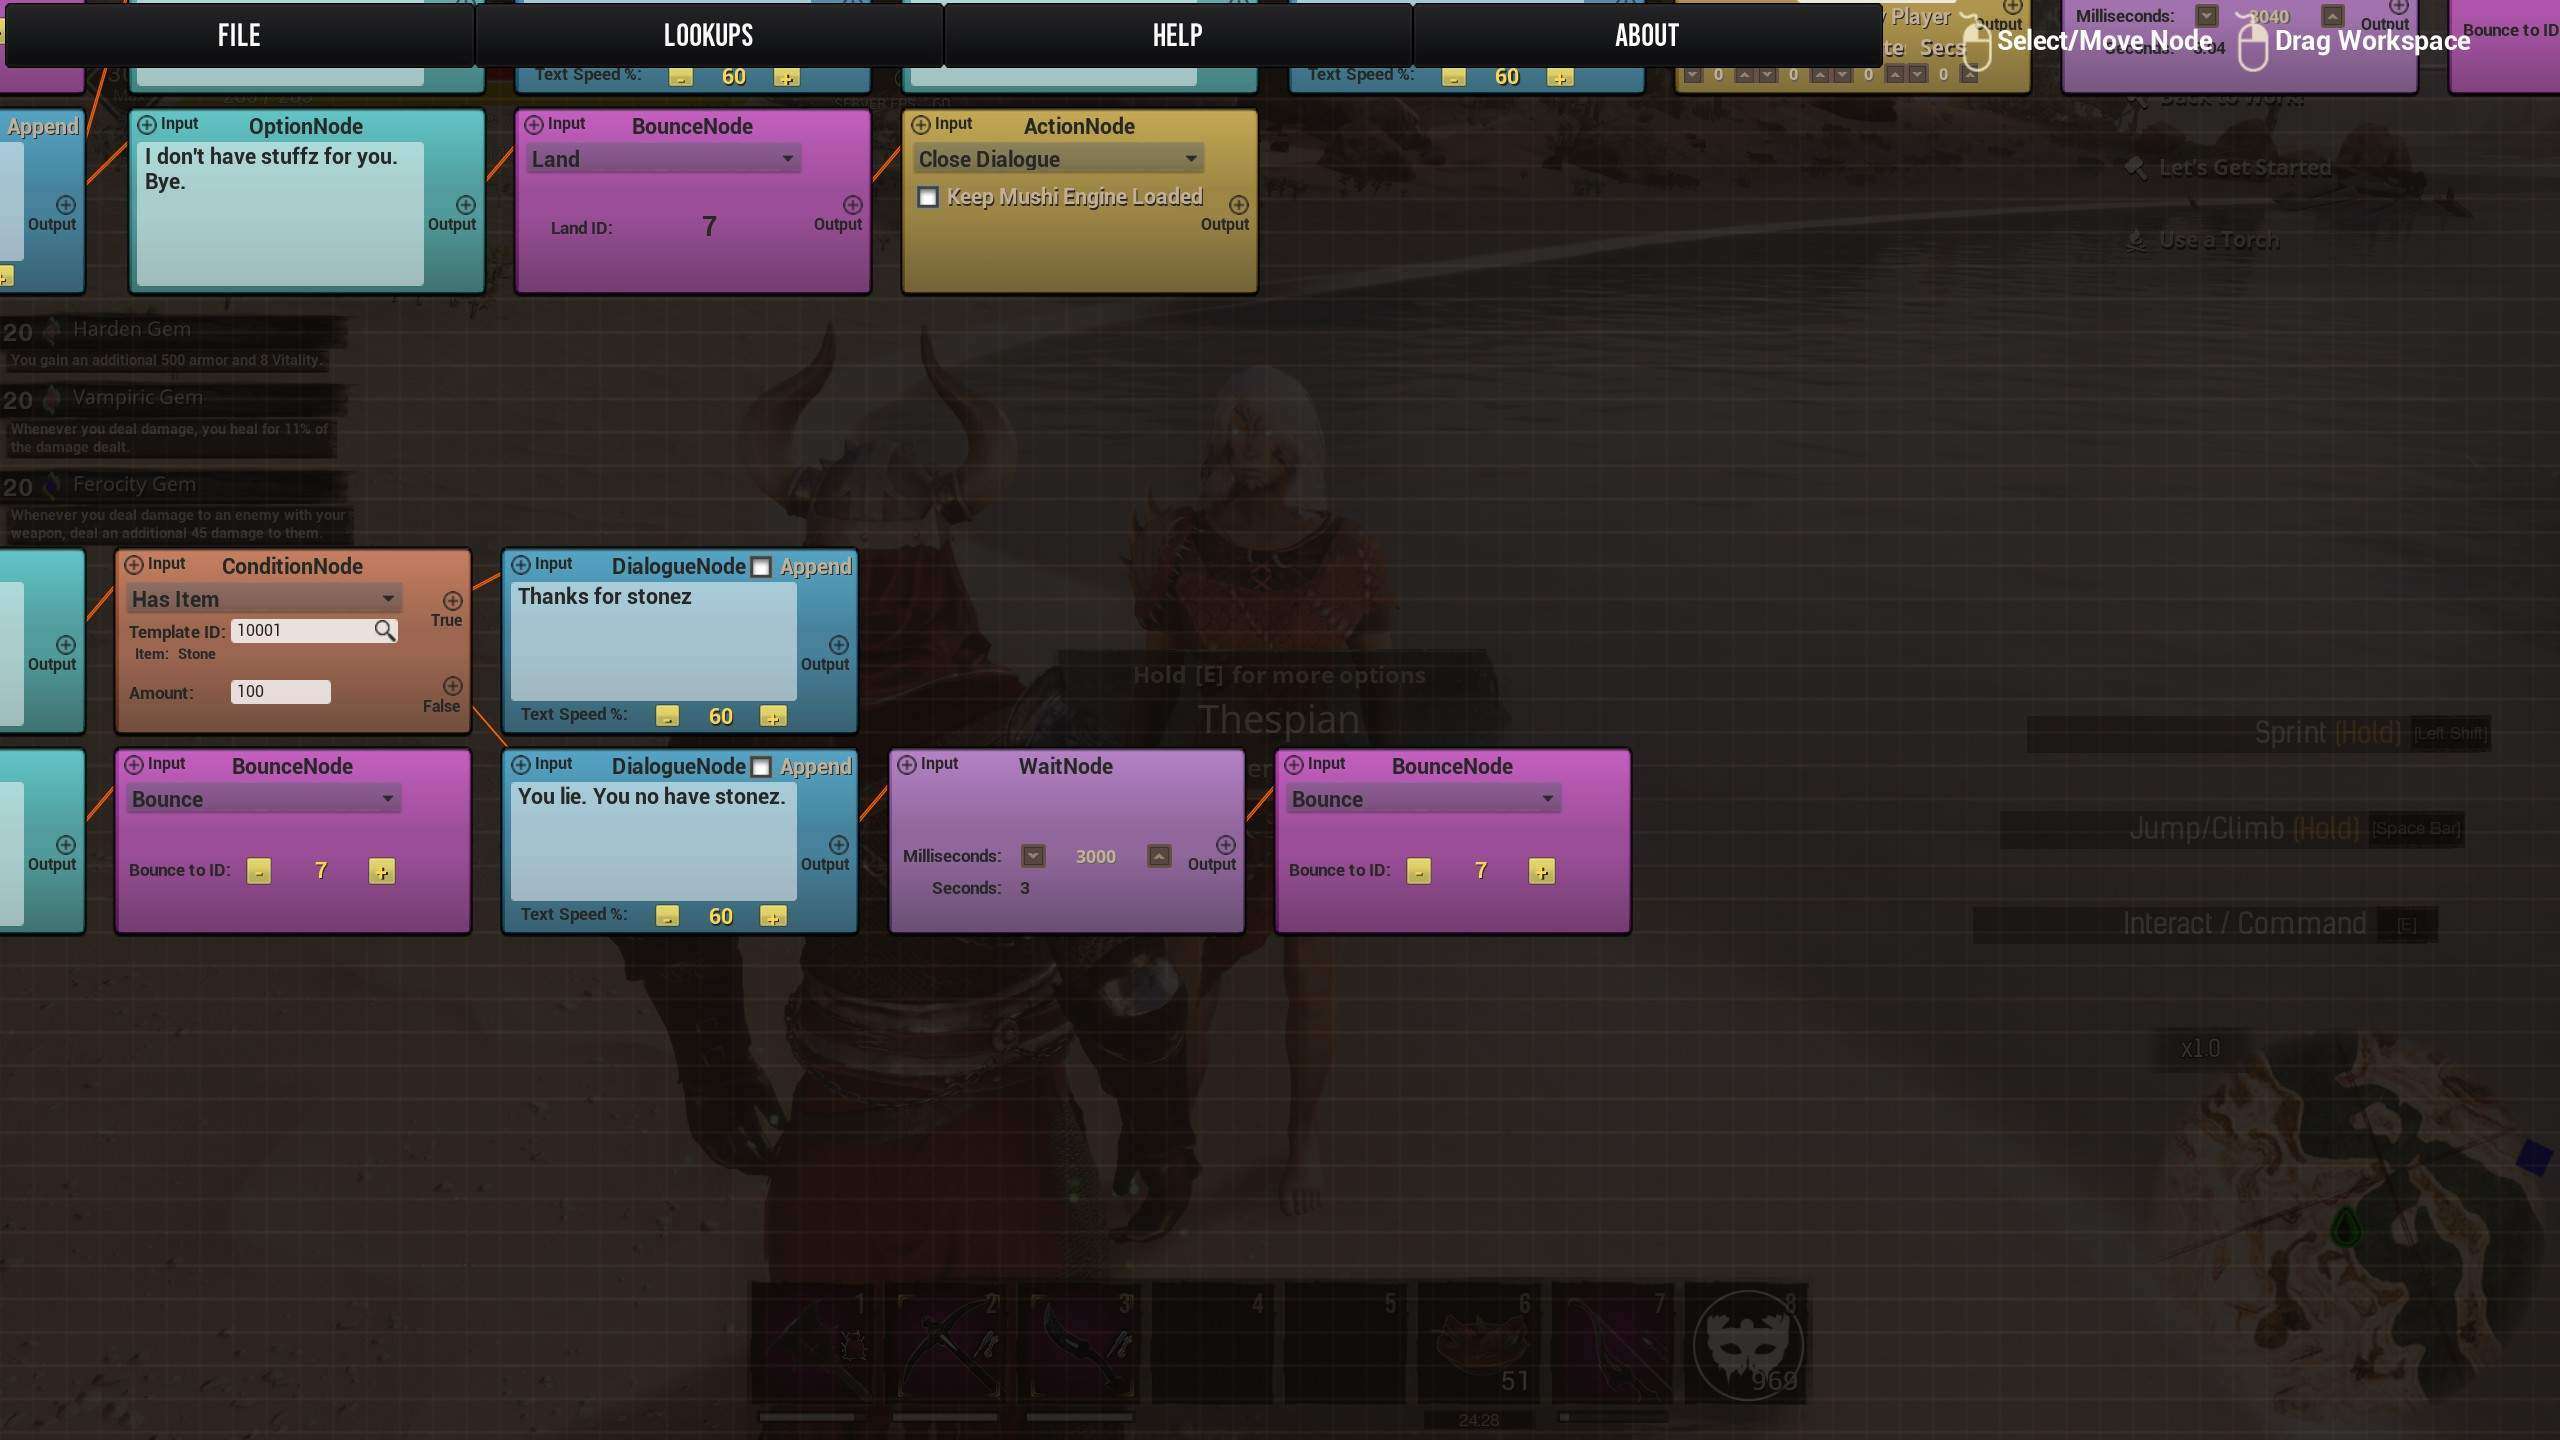
Look at the screenshot above. You will notice that the condition node has checked if they have the stone. If they do NOT have it, the NPC will accuse them of lying, wait 3 seconds, and bounce them to the node that closes the convo.
But what if they meet all the conditions? Well, then it’s time to close this quest and reward the player!
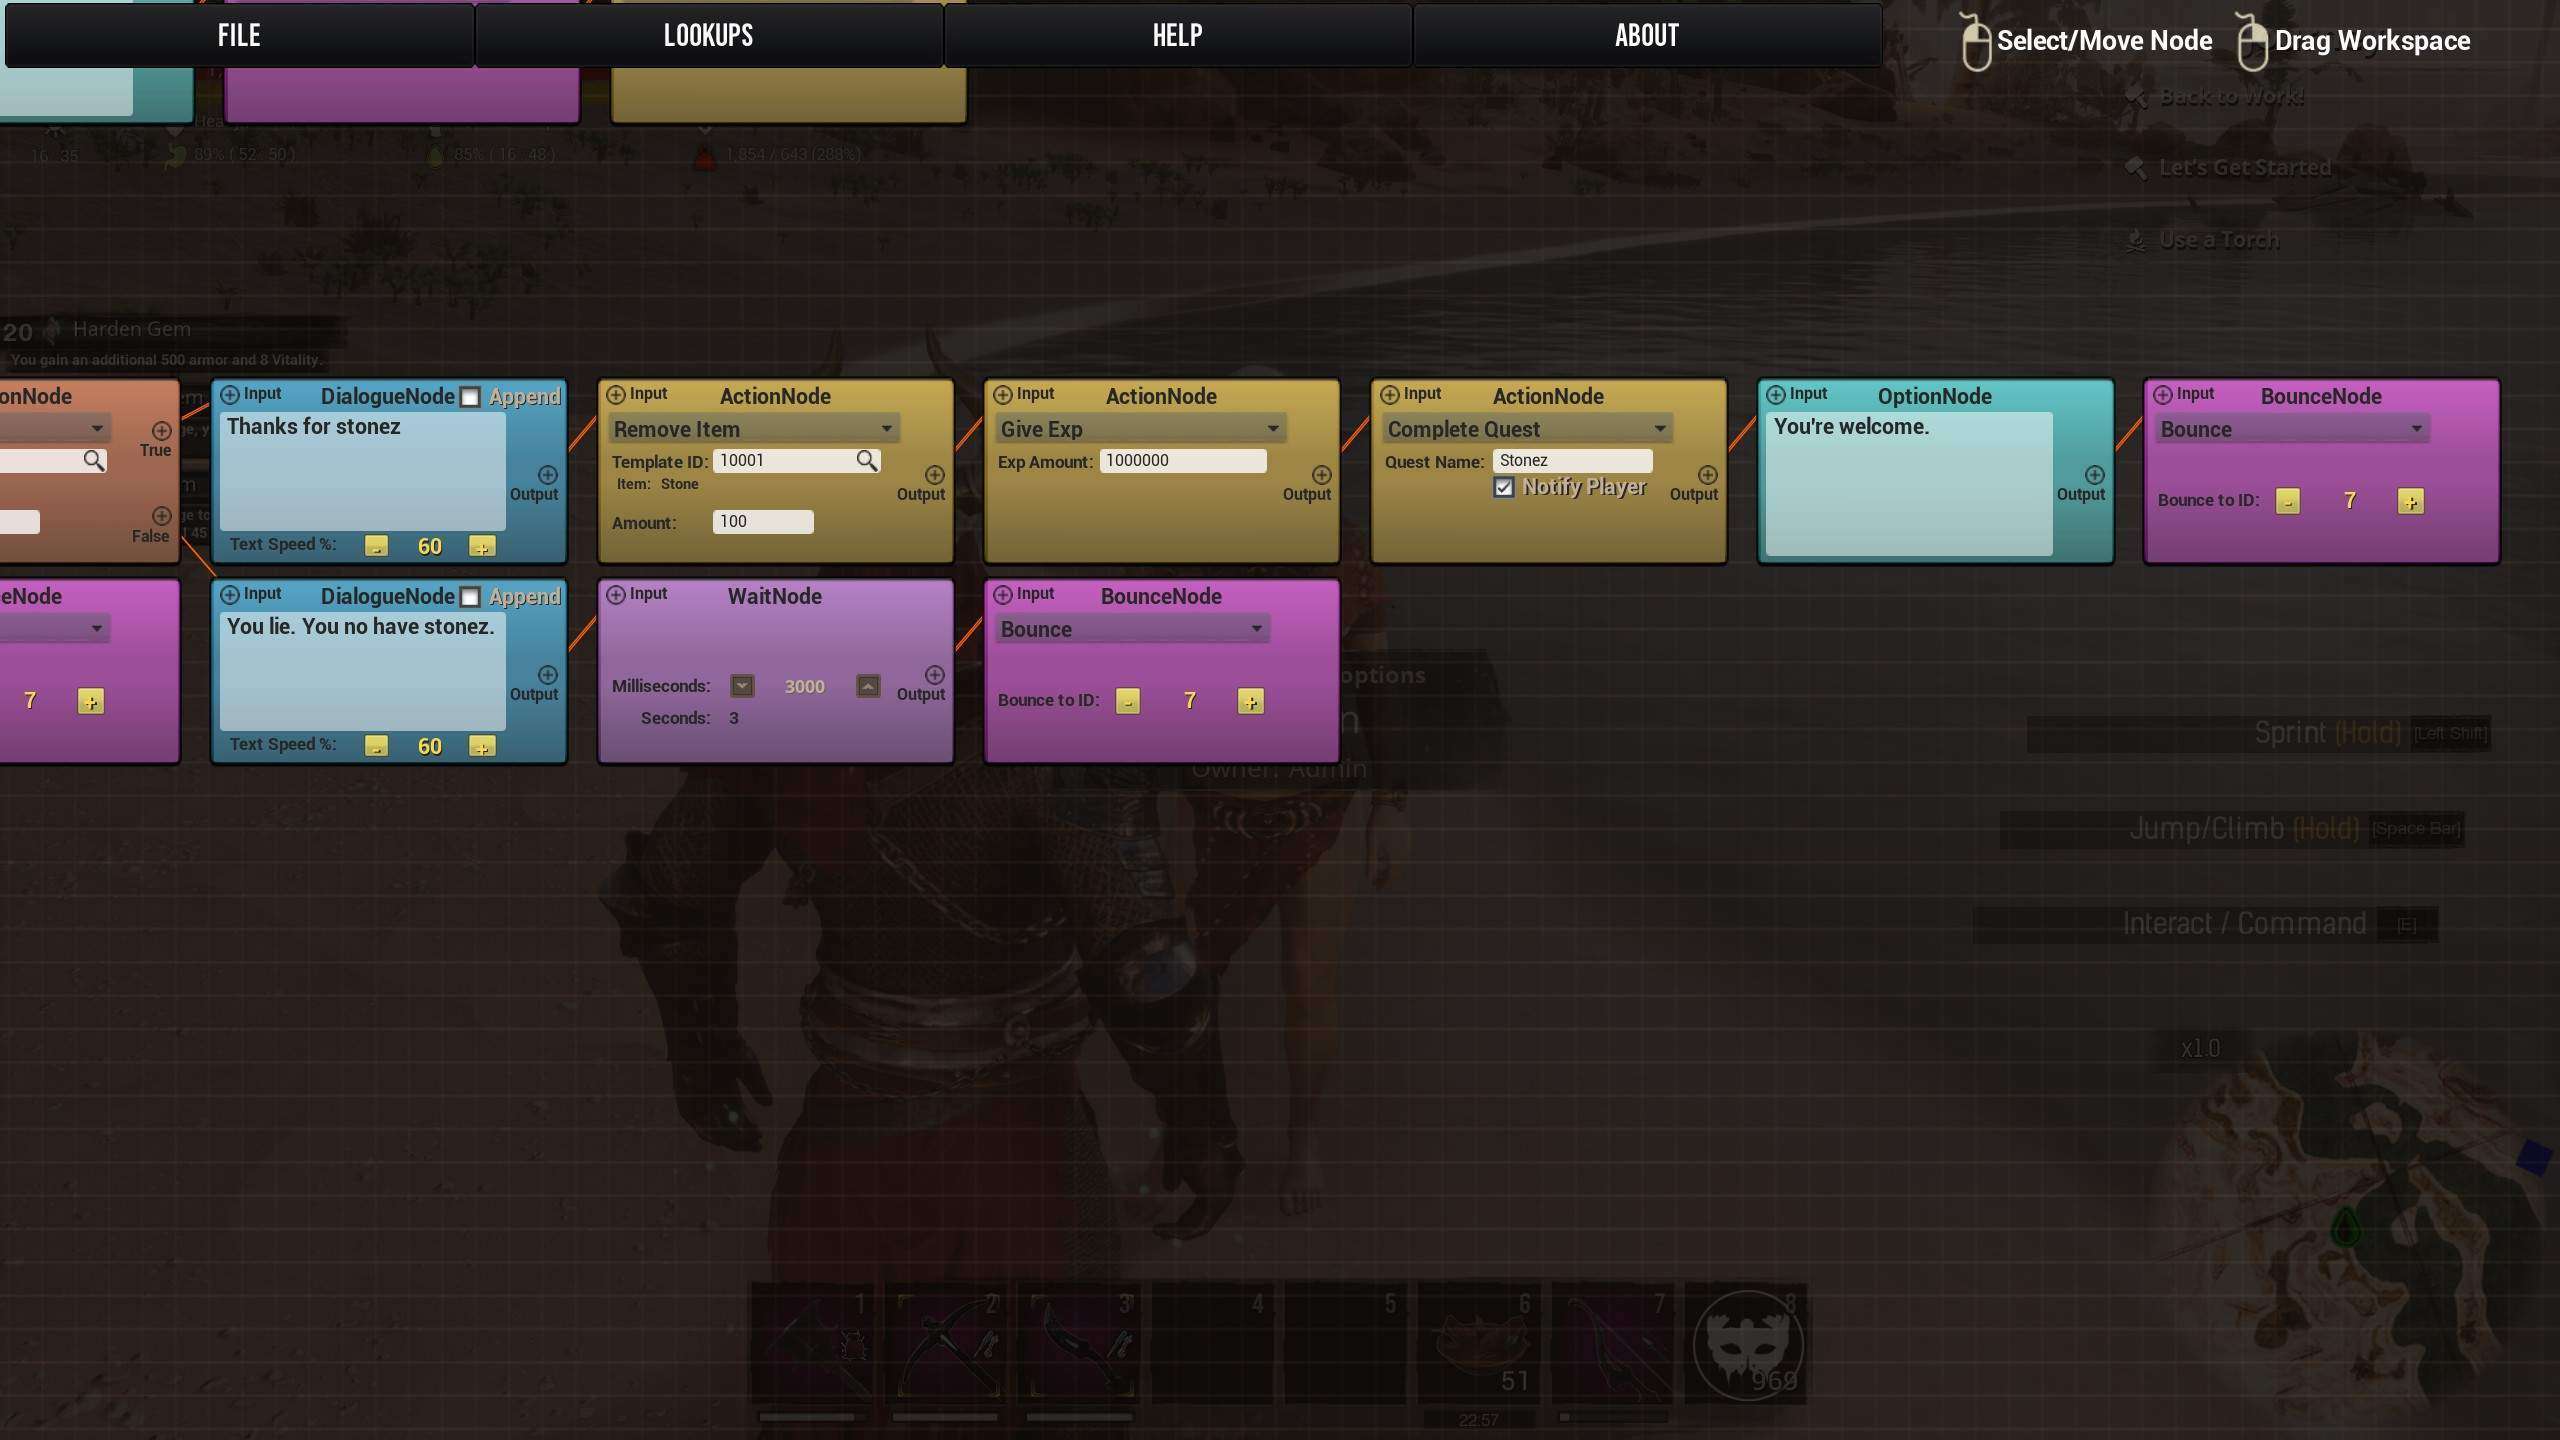
As you can see in the screenshot, we will have the NPC say thanks, remove the stone, reward the player with 1 million xp, and close the quest. The quest closure is important, otherwise the player can infinitely repeat it. Last, the player can say “thanks” through an option node. This is mostly so they can read the dialogue from the NPC before closing it out. It’s a good alternative to using a wait node.
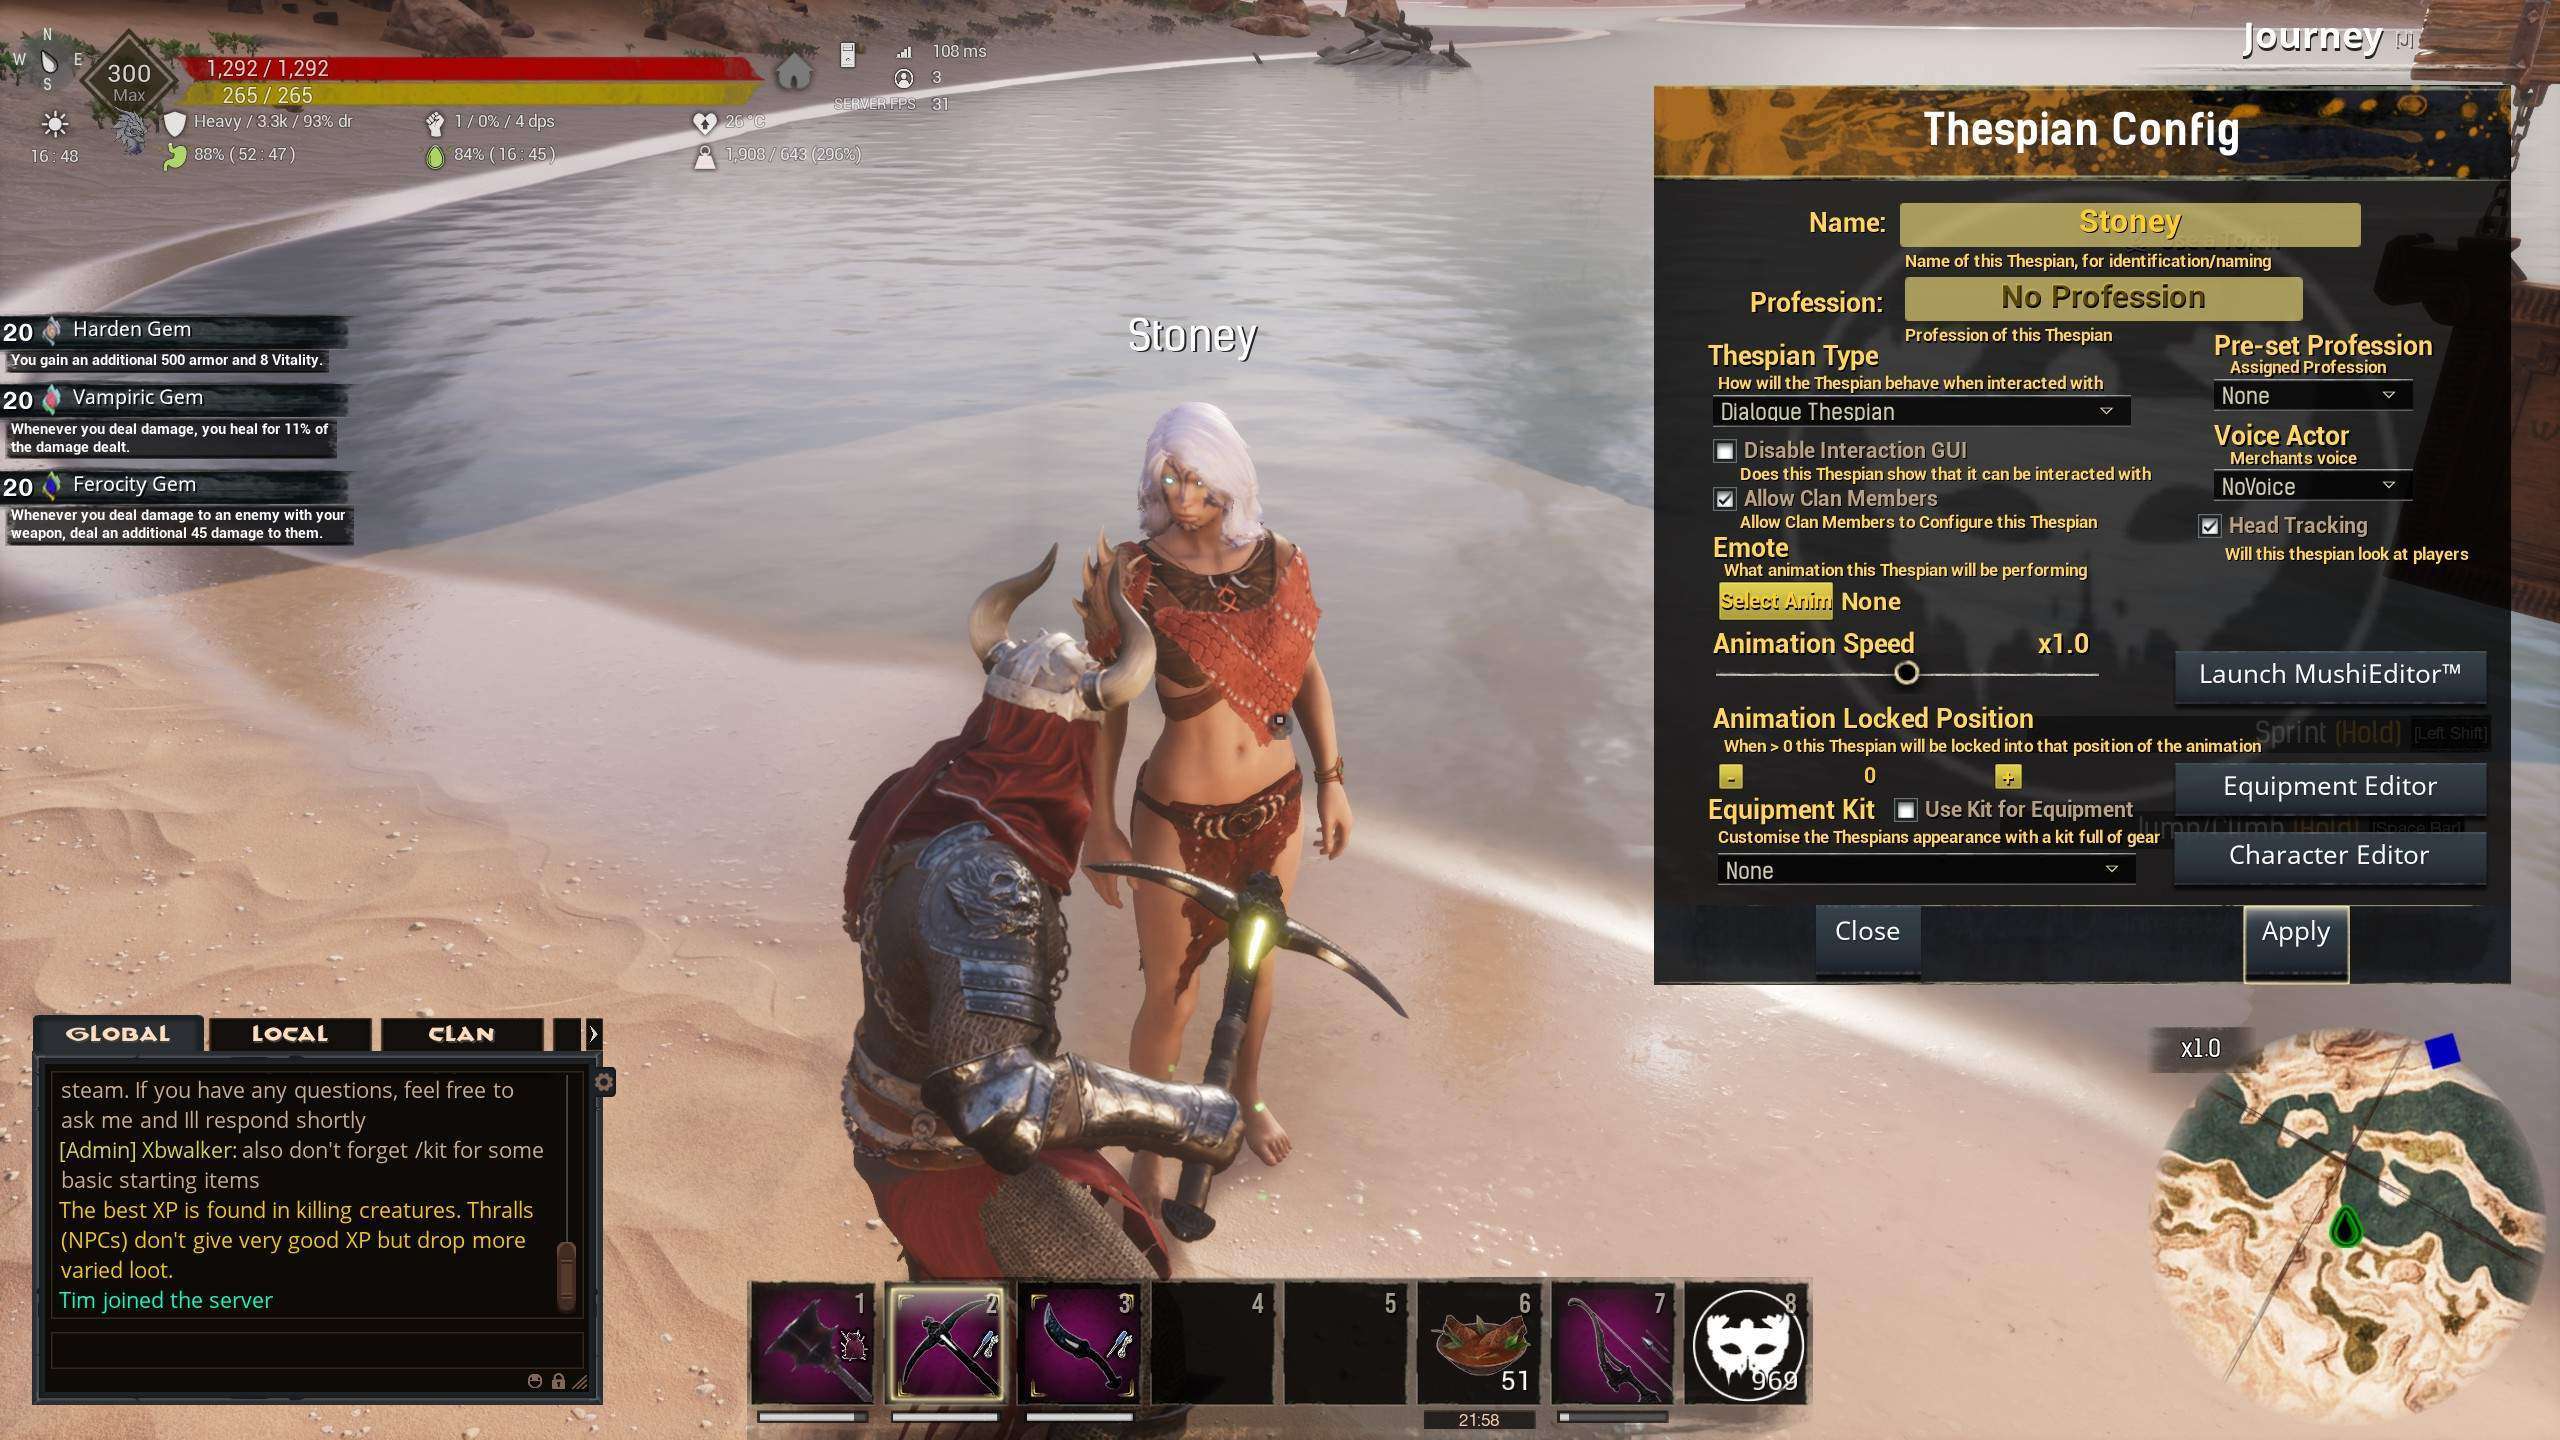
One last thing before closing comments. Be sure to save with Ctrl S or by going to file – save at the top left of mushi editor. Also, be sure to rename your NPC and change them to a dialogue thespian, otherwise the game won’t know to engage them in conversation when they are talked to.
See the screenshot.
Other Tricks for Good Quests
Just a few closing notes.
Though the player has completed the quest and received their reward, they have no way of knowing what the reward was. It simply is given to them without any fanfare. I recommend using one or two more action nodes.
These are done through action nodes by clicking the dropdown and choosing chat message.
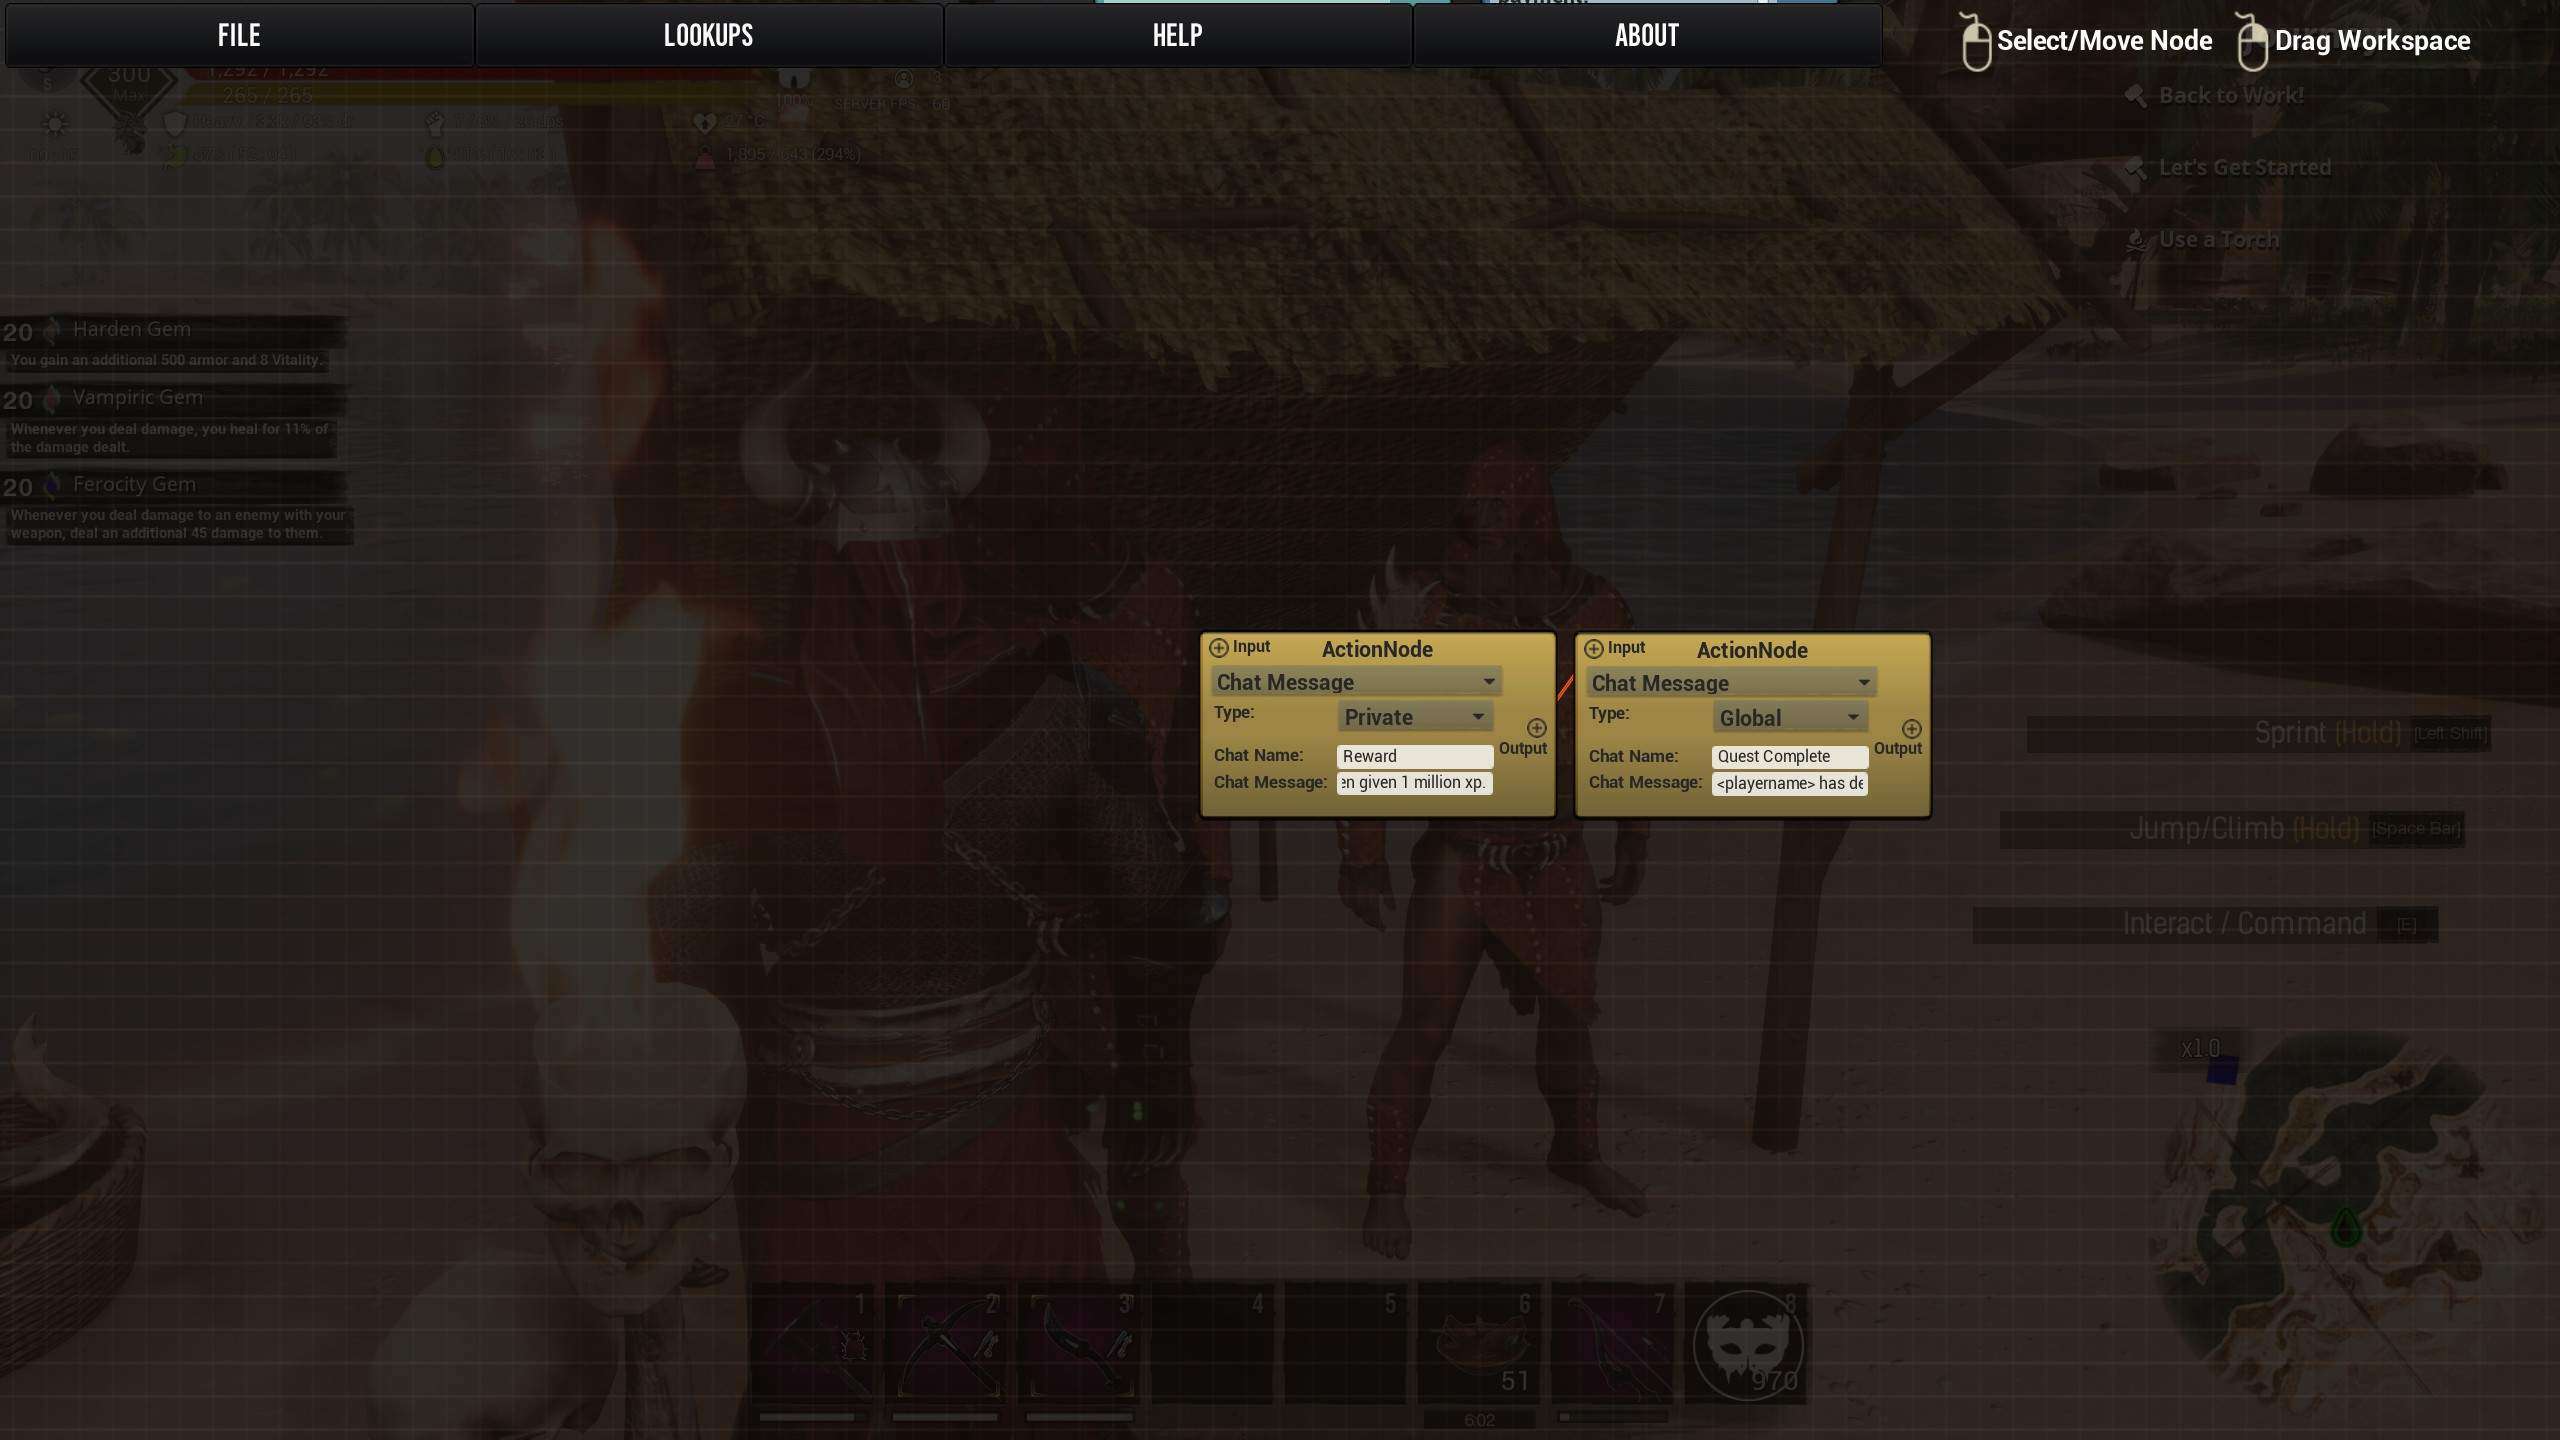
I had to use a different thespian because I deleted mine before this part of the tutorial haha. Sorry. You can watch the youtube vid for more in depth setup. But basically you want those two chat nodes in the same line as your quest rewards. They can all fire off at once.
In most of my quests, I have 2 chats. One is a private one informing them of their reward. The other is a public one informing the server of their accomplishment. <playername> has retrieved the stones for Stoney. Or something like that.
<playername> tells Mushi to reference the name of the player it is interacting with. For me, it would say “Xbwalker has retrieved the stones for Stoney” and announce it over global chat.

Be the first to comment