
Quick guide with video and images to help you beat The Knight (second boss in the King’s Leap challenge course).
Introduction
Note: Credit goes to Two Youts
The Knight is the second boss found within the King’s Leap challenge. As with the rest of the challenges found within this area, you will not be able to use any charms or weapons to defeat The Knight. Instead, your only way to defeat him is with parrying.
I chose to use Chalice as my playable character, as she gives you an extra hit point and allows you to dodge an attack by crouching and using the dash button. I’ve beaten him with Cuphead as well, but found Chalice allows you to be a little more daring with your attacks due to the extra hit point.
The rest of the guide will break down The Knight’s move set and how to defeat him.
The Basics
To defeat The Knight, you must parry his mane a total of 20 times. If you are a certain distance away from The Knight, he will not use his 3 moves and will instead taunt you (pictured). After taunting you twice, he will charge towards you very quickly and not enter his normal cooldown after attacking, making it virtually impossible to hit him.
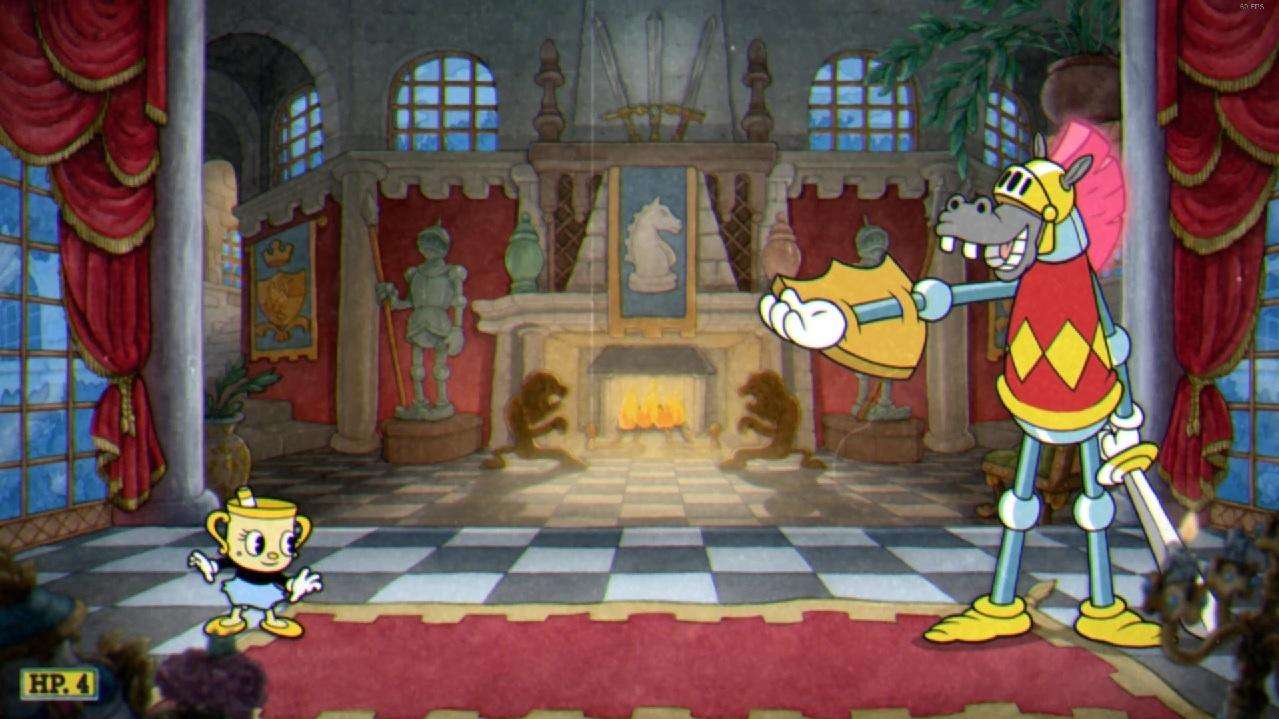
To avoid this, stay between him and the fireplace. All of his moves have a certain “tell” and can be reacted to, so there is no real danger in staying close to him.
The Knight’s Move-set
Once you are an appropriate distance away from The Knight, he will use 1 of 3 moves in a random order. The breakdown of the moves is as follows:
Attack #1 – Charge
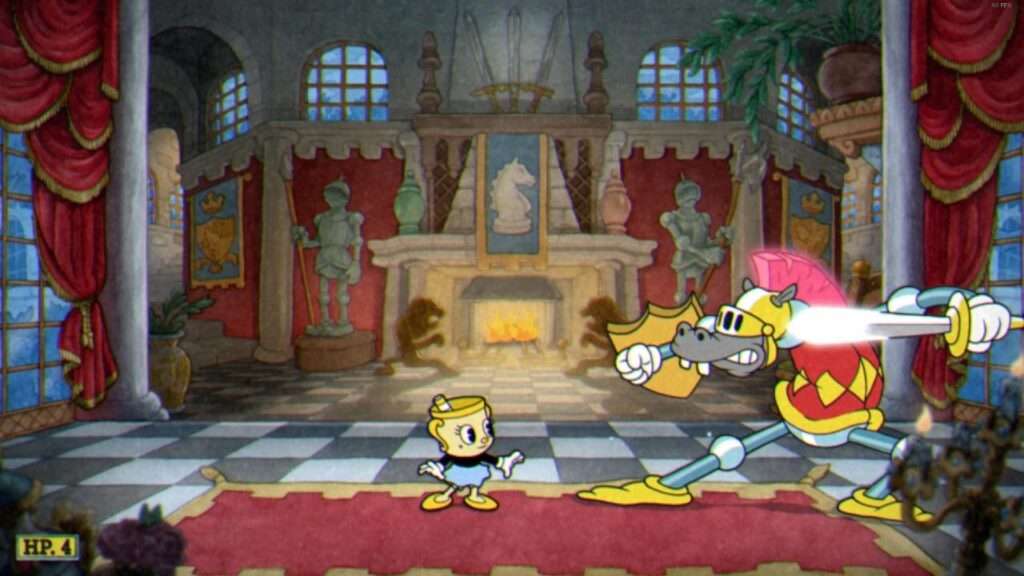
Before using his charge attack, The Knight will strike a pose (pictured). The actual attack is a full screen charge that can be avoided by double jumping over him mid-charge. While you are in the air and he is moving towards you, parry his mane by dashing into it.
Once he has completed the charge, he will recover for about 1 second. During this time, you can parry him twice. After the second parry, dash away to prepare yourself for his next attack.
Attack #2 – Upward Stab
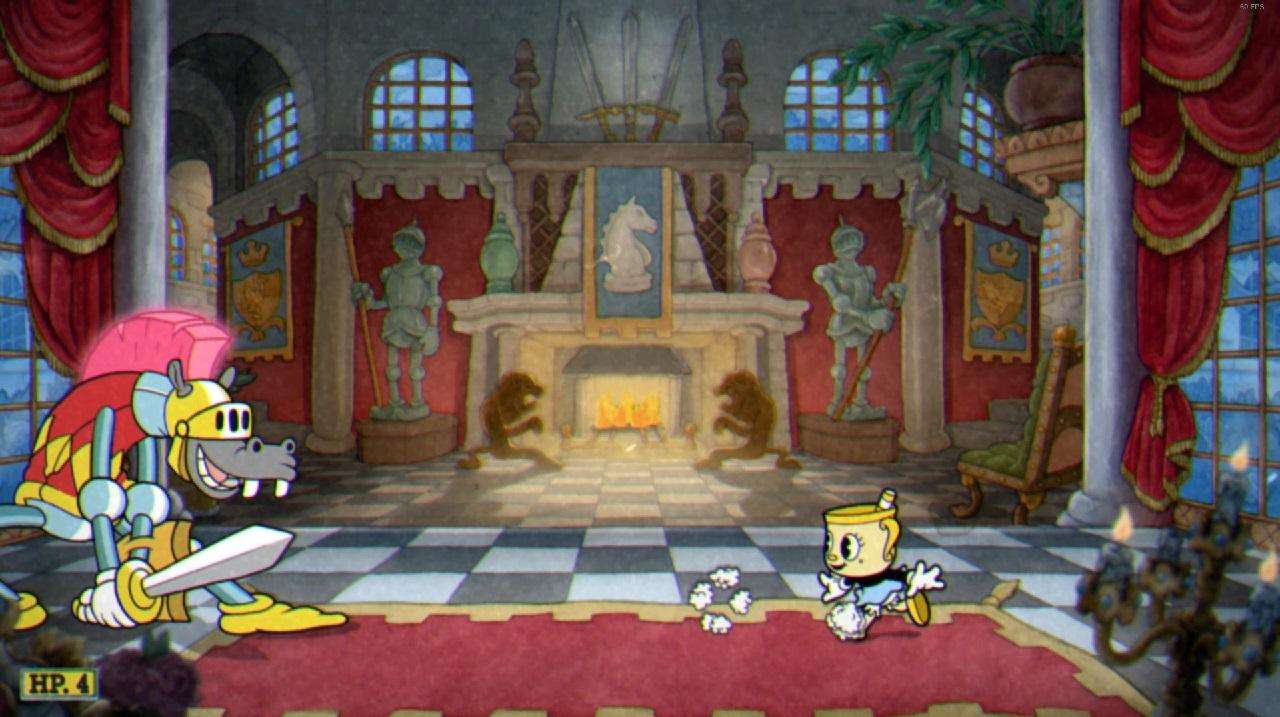
From what I have seen, this is the most common of The Knight’s moves. The Knight will pose (pictured) and then move his sword in an upward motion. To successfully parry his mane, jump once as soon as he strikes his pose, and then jump again when his sword reaches its maximum height. Then, dash into his exposed mane and quickly dash away. This move has the least amount of recovery time and only only for one quick hit.
Attack #3 – Overhead Slice
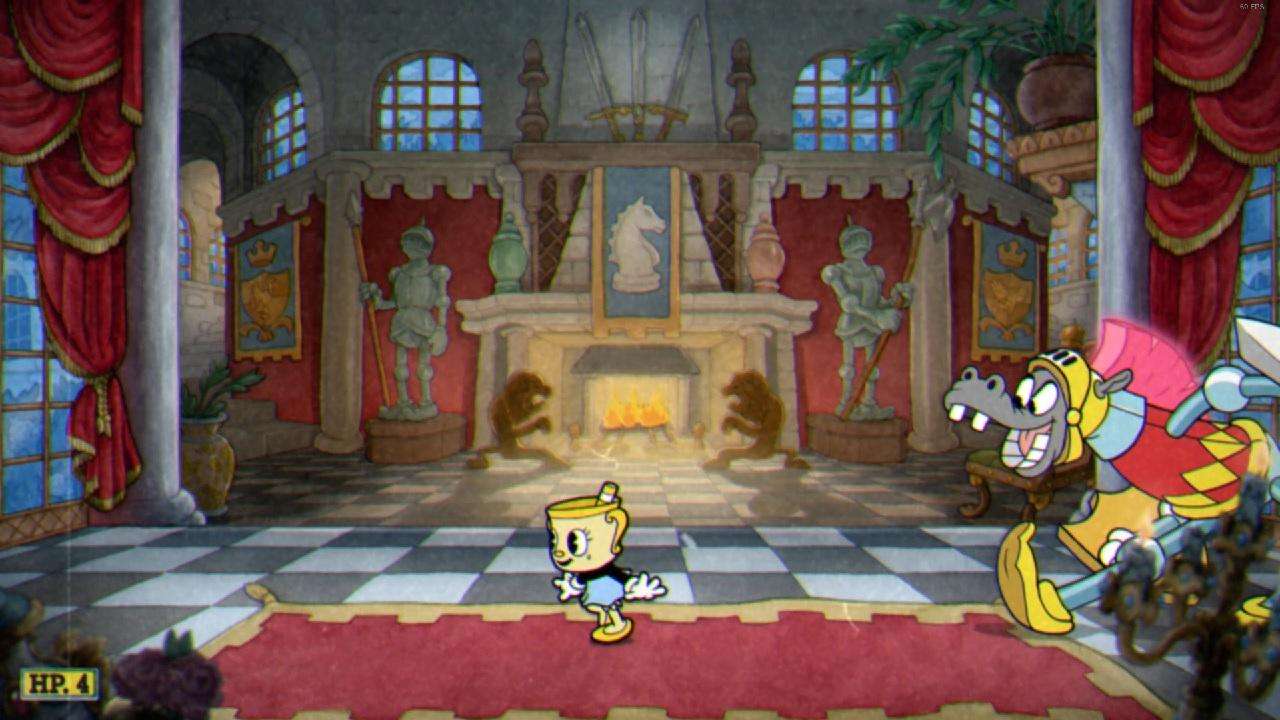
The Knight’s final move is an overhead slice that covers about half of the screen. His pose (pictured) is quick and only gives you about half a second of time to prepare for it. Once he finishes his move, he will go into an extended recovery period where you will be able to parry his mane twice. Note: If you have the timing down extremely well, it is possible to hit him three times during his recovery period, but if you’re playing on the safe side, just stick to doing it twice.
Extra Tips and Video Guide
If you ever happen to get hurt during one of The Knight’s attacks, don’t let your invulnerability go to waste. From my experience, you can easily get two hits in before you are able to be damaged again.
If you’re more of a visual learner, I’ve attached a YouTube video as well.


Be the first to comment