
Production and Trade
Note: Credit goes to Einauga
The main rule in production would be to first have your raw materials gathered before you kick off producing it into tools, let alone putting down the needed buildings before people have anything to work with.
As the game progresses and population grows, your people may find it harder to maintain storage levels. Immigration rates mostly relate to how well your settlement is doing in terms of production of food, of tools needed, and people to be clothed both in winter and summer, according to the latest fashion preferably. Keeping those items prioritized would be sensible.
Producing bundles of 5 or 10 of tools, but of basically everything, would be too, if only for the sake of reeling in tech points.
Limits and Surplus
Keeping in check the limits panel (F4) from the start can be very rewarding, not only in saving materials, but also not to burden your people with too many orders. Automatic settings may discard valuable materials if you haven’t set them to unlimited or otherwise, so it is advised to review them all at the start.
Recommended unlimited settings:
- Meat • Bones • Fruit • Raw Skin • Straw • Iron Ore
The key to a smooth chain of production is not to set high limits at once, but to set the limit just above what your need, so you have always spare materials, tools and clothes for new arrivals, or things to trade with. When workload can take a few more tasks, you can manually put in an extra order regularly so surplus increases gradually.
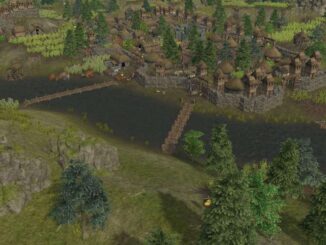
Storage
Storing items, clothes, food and tools can be done inside dwellings (tents, huts, houses) and storage tents, huts and warehouses, capable of housing more items, as well as granaries. Tents do not offer great conservation, but things will last longer than leaving them outside.
Over time when your settlement holds multiple storages, you could consider dividing them up, assigning each of them to hold a specific type of goods only. It’s very useful having storage of weapons (tools) nearby fortifications, so people can pick them up on their way to battle. The same goes for the convenience for weaving clothes, with raw materials and finished products being stored close by, or other trades like smithing.
Laying out wood and especially rock piles, notice you can exclude gathering certain rock there, so you can force people to bring materials to specific places, where you want them.
The same goes for which type of food to forage into which granary is locally most convenient.
Trading
Once you’ve built a hearth, you can start receiving traders, which will arrive in seasonal intervals, divided into charging low, average and high commissions on trade items. They do not always come in that exact order, but on average, they balance each other out over time.
Traders don’t always carry what you are in need of, nor will they accept animals you have excess of, but you can buy technologies and animals for your benefit. It will cost you mostly though, as mainly the high-commission traders often have these on offer. Surplus bones and flint make great change when trading, as they are often worth 1 credit and fill up nicely what you owe the trader.
Skipping or ignoring a trader, may have the consequence of the trader not returning later. That can lead to tricky situations when you’d be in dire need of a trader. Whether the weaponry you export can go indirectly to rivals and be attacked with during raids, is yet an enigma, but you might want to be on the safe side about that. Trading off confiscated (lesser) weapons, especially in later stages, is very rewarding.
Food Production
In the early stages of the game, supplying your people with sufficient food is fairly easy. It could be tempting to go out for a killing spree and gather as much food and raw materials as you can. Killing more animals or collecting more materials and food than you need, can process or store is redundant in the early stages and will increase workload unnecessarily. Most of it will decay or be of low quality and the labor it brings will averse your economy.
Alternatives
You will find fruit and bread to decay pretty soon, so try and find limits between your types of food that draws to eating (dried) meat and bread in winter, and fruit and pulses in summertime so you have as little as decay as possible. As mentioned before, avoid your people eating raw meat as it significantly drops morale levels, affecting their work ethos. It’s highly recommended to get to food drying as soon as possible to counteract that.
When you’re able to harvest grains and pulses, it’s wise to have prepared yourself by having a good stock of sickles. At this point, it’s convenient to have an alternative to fruit and meat, so you don’t run out as soon. With the actual domestication of grain and pulses, you can start building up some proper storage of non-perishable foods and hay and straw. It makes the big leap to a larger society easier creating a buffer.
Balance
When rolling out fields to plant your vegetables and cereals on, consider a person-labor-consume ratio of about 4 squares of food to be able to plant, harvest and eat per 1 person. One person will need about 2 meals per season, but will produce more in between.
Starting out with planting barley to build up straw reserves for future thatched buildings and livestock, the grain it initially yields is more than enough to bake bread from. Only when you are starting to seriously produce beer, planting extra grains (rye has most yield) comes to hand.
Unless you are in serious need of harvesting all the barley or pulses you can get hold of, do not prioritize any harvesting plots. In fact, large-scale priorities work aversely to your economy, so let your people finish as much as they can by themselves. Supply and demand will always eventually even out on one another and from that point on, you can start growing again.
Industriousness
At some point, you will want to give up hunting and live off domesticated animals, as it saves a lot of time, by industrialisation of your flow of livestock. Having expanded to 50+ people, you’ll be in need of a constant supply of food. To be able to sustain a larger growing livestock, you’ll be in need of large quantities of hay.
Look for, again, a balance between still having surplus of hay and straw by the end of summer, and the number of animals and thatched buildings that need maintenance as well, in accordance with the workload people can bear. Keep your food related work areas close by, or even as the centre of your settlement, as it helps harvesting a lot faster than having your people walk distances.
Individuals and animals can contract a disease, but also crops. This can lower your expected harvest a great deal, perhaps even causing famine. The occurrence of disease is randomly encrypted into the game, so you can hardly do anything to prevent it from happening, except for having means to create a buffer of alternative food in direct reply.
Harvests can fail, due to disease or having insufficient time to plant what you need. Having to deal with raids can hold up your routine with a devastating aftermath.

Be the first to comment