
This guide is made solely so you can cheese timely processes in the game and make things easier for yourself. This includes tips for each map which allows you to avoid perishing and accomplish tasks with as little effort as possible.
Table of Contents
Introduction
Note: Credit goes to Greenmovie13
To reiterate from the description of this guide, the sole purpose of this guide is to provide mechanics and techniques for lazy players, no matter their skill. Obviously, these techniques will not apply to reality like becoming a walking, living, breathing radio that only blasts earrape of Ram Ranch to repel your shadow demons.
Cursed Sand Ruins / Crypt of the Great Pyramid
There are many in this set of ruins, in particular for dealing with traps and objectives. Let’s go through them:
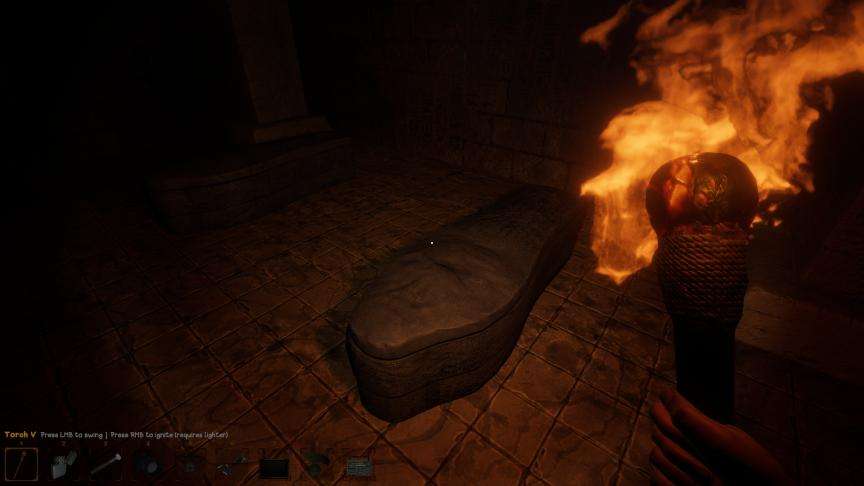
- The inner tomb doors prove no match for your camera, and if you press yourself up against it with a fully-upgraded camera and snap a photo, facing directly towards the sarcophagus, it should count for a photo of the inner tomb.

- In this set of ruins, oftentimes there will be a room with 4-5 sarcophagi, four of which are laying on the floor. Normally, to grab gold or take a photo of remains, you have to open them(this goes for whether they are on the floor or against the wall). Instead, for taking photographs, you can press yourself against the sarcophagus door and snap a photo that way(this works for all that are pressed against the wall if there is a mummy inside, and also works for the skeleton if it is in the prison chamber while it is still locked), while with the ones on the floor you have to get on top of them and crouch, looking straight down. For the gold inside any of them, you walk on top of them and stand around the chest area of the sarcophagus(the widest section of it).

- The swinging axes trap is a bane for many players both new and experienced, as its random activation time and short swings can easily chip away at your health, especially if you rush through them. To be as lazy and safe as possible, standing in front of the first slot in the hallway and waiting a few seconds should set them off, preventing you from being slashed while walking through them. This trigger can be anywhere from a split second to several, so there is no telling whether you’d make it through the first axe without taking damage.

- The boulder traps usually do not catch anyone by surprise except for the one with loot on the side of the corridor. For all other boulder traps in these ruins, they can be avoided simply by just walking straight through them, as they never activate and damage you while you are running through them since you pass too quickly for the boulder to reach you. As for the unique type of boulder trap, it is considerably tricky to master, since the amount of time it gives you before it triggers after hitting the trap is random and can give you little to no time to avoid it. While avoiding it and surviving unscathed is tricky, the method is rather simple and relies on a trigger that goes off when you get within range of gold piles to collect them(to my knowledge), and simply requires you to be as quick and precise as possible to get in and get out. The amount of time you have to avoid the trap also varies on where the gold is placed, and currently in my opinion it’s very hard to avoid the trap consistently. The best strategy involves using your distance to your advantage and hovering your cursor over the gold when you’re close enough to reach it, and quickly running up and out of the trap.
Temple of the Pharaoh / Undercroft of Akar
The tips and tricks in this map aren’t as many compared to the sand ruins, but some are similar to concepts shared earlier:
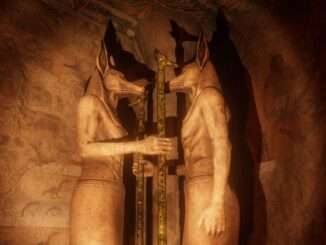
- The golden sarcophagi work the same way as the ones in the sand ruins, where you walk up to the case and snap a photo, which counts as evidence of remains. All of the golden sarcophagi contain a mummy in them, so you don’t need to check.
- A lot of players complete the snake trap puzzle as soon as they can, and in consequence suffer to the wrath of the snake, the most annoying creature in the game so far. In general, the best strategy I have found in my time of lazily succeeding in this game is to the puzzle last before I open the inner tomb to minimize health loss from that little cretin, but in worst-case scenarios, another explorer may trigger it early either because their bird-brain sees shiny gold that they must acquire by any means or because they’re used to doing it early. In order to be as lazy as possible and avoid the snake while not checking your surroundings so frequently, you have to stick to the edges of rooms against the walls, and never walk through the center of rooms whenever possible. If you do ever have a pathway where you cannot avoid the snake without crossing its path directly, there are two options. Either repel the snake with a well-timed swing or with an amulet, or let it pass first. Going through an area where the snake can travel through should be taken with caution if the snake is loose, so make sure you look in any direction you can and keep your ears open for its hissing before doing so, particularly for transitions between rooms in the tomb. When you swing your torch and successfully repel the snake, it will move at a slightly faster speed towards the snake room and hide back where it was before the puzzle was completed. The time it stays there varies, and either is randomized or dependent on difficulty, or also includes map size as a factor(which I have been unable to test yet).
- The overhead boulders in those thin corridors are easily avoidable most of the time at least, as long as you keep running through and don’t stop. However, if the boulder is above the other side of the corridor when you enter it, proceed with extreme caution: there is a small chance it can trigger before you get far enough for it to not end up crushing you. Fake it out and try to hit the trigger towards the start of the platform in case it ends up triggering early and otherwise causing you to die a gruesome fate of being crushed by something that is not a giant foot, which is the only good way to end up being crushed because Monty Python is funny. If it does not trigger in roughly the first 25-30% of the way into the platform, then just make a break for it, as it should not be able to crush you if you’re running then.
Sunken Dune Shrine / Hidden City of the Sahara
This map is personally the one I get lost the most in, whether from the stair rooms that act as corners between rooms or from how it”s a bit harder to tell where you’ve been at times. While none of the tips here are focused on preventing that, do note that if you do get lost, that you shouldn’t panic unless you are playing solo. In that case, maybe work on navigation skills or something, I don’t know. I’m lazy.
- To start, the sarcophagi in this tomb function the same way as the others, allowing you to take photos through their lids and collecting gold through the ones laying down without opening them. I never open these sarcophagi due to the minge-lords that sometimes come bursting out of open tombs(which I have sometimes been able to use to my advantage to identify disturbed tombs early if I’m playing solo).
- Speaking of these eight-legged dirtbags, they do almost nothing, and are pretty much there just to annoy you. These freaks can generate webs in room transitions, which you can always walk through. The only downside that I have found to these is that they can cause vision obstruction with the camera, preventing photos of the mejai from being taken from the other side(either that or I’m just terrible at taking photos). These webs should not be confused with those that you have to use your torch to burn through, which spawn in three specific areas(and maybe more): the entrance to the lower level of the tomb, the room transition to some dead ends with a sarcophagi laying down in the middle of them, and the dead-end room with gold and a canopic jar case on the other side.
- The sand pits are pathways, whether long or short, that inhibit your ability to move swiftly through the ruins(unless you’re a VR player, then you somehow have legs that are so strong that they can withstand a large amount of force from them exerted by the sand, causing you to move unperturbed). They almost always have gold piles in them, which you typically have to use your divining rod or metal detector to find. As a lazy gamer, I do not have time for this and don’t care enough to use my metal detector, so I have found a way to gather as much gold as possible with these while always having enough in the end to complete the gold collectibles objective, on any difficulty and any map size. Whenever I go through these sand pits, I roleplay as a typical American vehicle and stay on the right side of the corridor, but not exactly up against the wall. The position does take some practice and experimenting, but whenever you travel through these pits you will find most of the gold piles that are in the pits when done correctly, assuming you go both ways and have got the technique down. In every expedition I have done so far, the gold piles in the sand pits spawn away from the center of the path. I’m too lazy to go into the game’s code and find out the areas where they do spawn, so if you want to be absolutely sure you can do it and tell me so I can update this to be more accurate. This goes for anything else in this guide that you want to be more accurate if it wasn’t already, because I’m lazy and don’t want to do all of that for a guide that I’ve spent numerous hours making.
- The spike path puzzle for this map has darts, which almost never get you unless you’re foolish enough to walk through the center of the path or miscalculate where the dart is if you’re walking perpendicularly from its trajectory. The solution to this puzzle is quite simple, however. The layout of the puzzle has four spike plates in the ground in two rows, the first row having them spaced apart from each other while the second row does not have that space between them. Since I am lazy I will explain this simply without making things complicated. The correct path is always the same between the two rows of spikes, so that if the correct spike plate is the second from the right in the first row, it is also the same for the second. This means that you will never end up walking in a straight line from start to finish in the spike puzzle and will have to move a bit to adjust for the second row of spikes.
- While there are no boulders on both this map and the oasis map, there are other hazards that take its place. The swinging spikes on chains, in my opinion, can be as harmful and deadly as the swinging axes in the cursed sand ruins. I say this because I have never had an instance where they have not dealt damage to me twice in one hit. This can happen if they swing closed before you finish walking through them, or if you walk against them while they are starting to swing back out. Don’t get impatient with these as they can cost you, even though it is possible to run through it without stopping and without getting hit. This is inconsistent, so at the worst you’d have to stop only once to get through the swinging spikes. Just don’t be impatient.
Sobek Oasis
My least favorite map for several reasons. It’s very appealing in a few ways, but it’s a bit stressful with some of the stupid things that get you so often in this map.
- First off,the sarcophagi are the same as the others yada yada.
- The crocodiles are the literal embodiment of a troublesome child, randomly deciding to attack you when they’re feeling rebellious and then screaming like weak, worthless water babies when you attack them. I love bullying them. All things aside, the crocodiles, like the snakes, are warded off by your torch. What a lot of players don’t know is that the amulet also works for the crocodile, just like the snakes. This is useful against Necreph when these buttheads are chasing you while hunchback venom is staring at you and making silent curses on your head before he telefrags you. While you can outrun them, sometimes that’s hard when you reach a dead end, which is where the amulet comes in handy. Onto the next tip, when you drop down into the water areas beneath the platforms in certain places throughout the map, if you time your swing and land on top of them, you can ward them away without them attacking you first. This is helpful if they are right on top of some gold or a case that you want to get that’s underwater. I have never encountered a player as of currently that has drained the water before grabbing loot down there, so I’d imagine every player that has had an underwater experience with these fiends knows what I’m talking about.
- The treasury levers are something I wouldn’t include in this guide had it been for them never spawning in the inner tomb. In all cases I have got a treasury on this map, one lever spawns at the entrance to the ruins. The other spawns in one of two places(potentially more):
1. On a pillar in the center of a four-way intersection.
2. Underwater underneath the bridge that runs straight across this pool.
Since on other maps the habit of preparing for a treasury lever being in the inner tomb is natural, it can sometimes be disorienting when you assume it can spawn in the inner tomb on the oasis. - The rolling spike logs are yet another hazard that replaces the swinging axes on the cursed sand ruins, and I find them to be more annoying sometimes, especially if you are in a hurry. Each branch of this room has a set of two spiked logs, which normally you’d have to stand in between to not get hurt. However, since this is sort of precise, my lazy self has found a flawless bypass so you can pass not one, but two logs. When the log in front of you that’s closest to you is just starting to move back up, running forwards as soon as you can without it damaging you allows you to get through the pair of logs unscathed. The precision of this timing depends on which direction you are facing, in or out, but no matter what this strategy will always work if executed just right. It’s not hard to learn, but does require you to know when the logs will hurt you.
- Next, let’s talk about the flooded corridor. The thing that most players hate because they have to enter the inner tomb to drain it so they don’t get hurt from drowning and having to deal with scaly water babies that snap at you when you disturb them. Normally, you have to wait for the pokey spikes to retract before you can pass them, but once they shoot out from the walls, if you walk through the center of the corridor, you won’t take damage from them. This is due to their hitbox only being far enough to reach you if you’re right in the middle of this passageway when they poke out, as their max length is slightly longer than the length they rest at before retracting. This means that in any instance besides them shooting out, you can walk between them without getting hurt as long as you are going straight down the middle. Kind of a useless lazy tip, but it can save some time if you’re in a hurry.
- Ah, yes. The most RNG puzzle of them all: the moving block puzzle. This is some inconsistent garbage that has no visible pattern to when they shoot out and how long they stay retracted into the wall for. It seems to me that the higher the difficulty, the harder it is to cross, unless I’m just that unlucky. The best strategy that minimizes your trips back to above the water is to wait for the block in front of you to shoot out, and while it’s retracting start running forwards. Before it shoots back out in most cases, you should be past it and between it and the next moving block. Repeat this process until you reach the other side. When you do, feel free to complain about how stupid this puzzle is while you’re picking up the gold on the other side.
Be the first to comment