
Chapter 1 – Fighting Chance
Note: There are 5 Collectibles in Act III: Chapter 1
Once you get off the chopper with Del and Baird, you’ll meet Paduk. After learning about the cosmodrome’s layout, you and Del will need to head out to try and find more information about the Hammer of Dawn.
After the Act III intro cinematic ends, walk around the pool table and head down the stairs.

Cut left and head through the doorway to meet Baird outside and pick up a new module for Jack. This Hijack module will allow him to temporarily take control of enemy troops.
Test it out on the Stump in the pit on the left, then head back inside, cross through the security checkpoint metal detectors, and head through the door to meet back up with Paduk.

After meeting with Paduk and learning about the adaptation of the Swarm, head left and loop around the tank.

Continue past the obsidian trees and open the gate on the left to initiate a cutscene, after which you’ll have access to the Skiff.

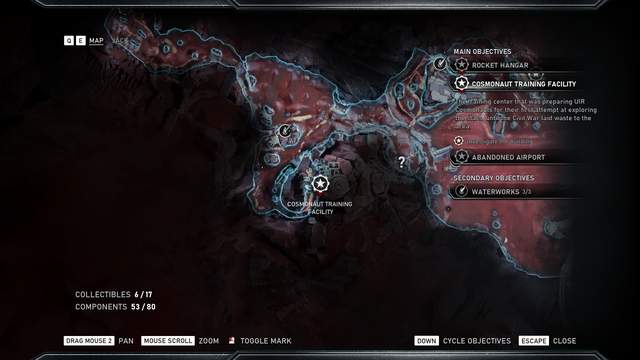
Ride down and, as soon as the area opens up, follow the cliffs on the right side until you reach the Cosmonaut Training Facility.

Walk up the slope and enter through the broken section of wall just to the right of the golden cosmonaut statue. Open the door, follow the path around the corner, then slide down the slope and head right.

Back up and look up and to the right and you’ll see a small vent. Send Jack through to have him open the path forward, and use Pulse if you are having trouble finding the duct.

Head through the door and take a right. Follow the path all the way to the end, then duck through the wreckage and turn left. Continue along the narrow walkway, then loop around and head down the stairs and you’ll be attacked by Swarm in the next hallway.

There is a Scion/Bastion combination at the end of the row, so use any heavy weapons you have to take out the Bastion, then end the Scion.
Use Jack’s Hijack ability to gain control of whichever Swarm is the strongest to help give yourself some breathing room during the fight. (Fun Fact: Swarm you have Hijacked can even revive you if you go down.)
Note: There is a Cryo Cannon on the right side of the hallway just after the encounter begins, so use that if some of the stronger enemies get close. You can also knock down some of the filing cabinets to create more cover as you advance.
After the fight is over, climb the stairs at the end of the row, then kick open the double doors and take a left.

Drop down into the next area, then follow the walkway to the left and have Jack activate the crane.

It will fail, so aim right to spot another crane, then have Jack move that one to open a pathway forward.

Head through the small tunnel, then aim up and slightly to the left to find another crane for Jack to move. After Jack lifts the machinery, take out the Rejects, then climb the ramp to the right and circle around to the left.

Aim up and to the right to find another crane port. Have Jack lower the crane to create a walkway, then cross it and follow the pathway around. Drop down and head up the sandy slope, then turn right and cut through the crashed Condor.
Follow the path and take the first right to find a Reject with its back turned. Take it out and several more crawling Rejects will emerge from the sand. Dispatch them, then follow the path to the left, drop down, and proceed through the tunnel. Turn left at the end and open the door to reach the main building.

As soon as you enter, move to the consoles on the left and the right and activate them, then have Jack access the port down the stairs and to the left to get the centrifuge moving.
Head down the hall to the right, then take the exit on the left to slide down the slope and engage the DeeBees surrounding the centrifuge.
Note: If you proceed carefully, and time your attacks for the period while the DeeBee are emitting blue light, you can take out the entire room of Rejects without attracting attention.

Once the Rejects are destroyed, approach the left side of the centrifuge base, then activate the levers you find there, and the Swarm will appear. Hunker down near the centrifuge and Hijack a Hunter at every opportunity to help clear out each wave of Drones, Hunters, and Juvies.
After two waves, one of the walls will explode and a new wave with a Scion will appear. Take it out and the centrifuge will start to spin out of control as a Snatcher appears.
Note: If you position yourself on the platform just inside the spinning centrifuge, you can take out quite a few approaching Swarm, up to and including the Snatcher at the end. This can make the encounter much shorter, as long as you can survive the hail of gunfire. Be sure to upgrade Stim or Cloak to make it easier.
After they’ve all been dispatched, cross the gap and climb the path of rubble to the left and you’ll find the beacons.

JD will carry it, so follow the path up the stairs to the left, then take the first set of double doors on the right. Follow the path left, then slide down the ramp to enter the storm.

The Swarm will begin advancing on you through the storm, so Hijack the Drone or Hunter which hops on the turret to create a pincer attack, then pick them off one by one. Advance by shooting down the fulgarite formations to create new cover.
Note: If you are having trouble with enemies in cover, there is a Dropshot on the left side of the area, behind the flapping metal barrier.
Once the Swarm are defeated, cross the range, climb the ramping path and have Jack start ripping the door, which is welded shut.
Juvies, Poppers, Drones, Hunters, Scions, and Bastions will emerge from the other side of the ravine and begin charging across the gap, so hop on a turret and take them out. The lightning striking the sand will create fulgarite deposits which will obstruct your view, so shoot down any which enter your view as you mow down the enemy.

Once they are all gone, head through the door and into the complex, then follow the hallway to the left and open the door at the end to exit and return to the Skiff.

Head back to the airport and give the beacon to Baird, then pick up the Barrier module for Jack and the Swarm will attack.
Head around the path to the left, then grab a Mulcher and use Barrier to advance on the Psion and kill it. Take out the rest of the Swarm in the area, then head through the gate to defend Baird’s ride home.

Grab another heavy weapon and Hijack the Stump to make quick work of the remaining Drones and Hunters.
The final two enemies will be a pair of Scions, so Hijack one and take out the other, then use heavy weapons to take out the remaining Scion, which should be low on life from attacking its former ally.
Once the battle is through, hop back on the Skiff and head down the slopes again and you’ll receive a message from Paduk.

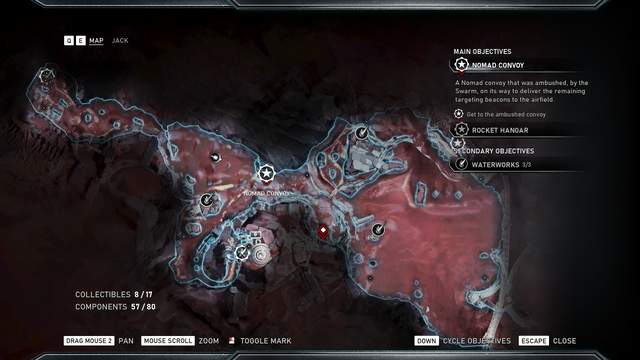
The Nomad Convoy has been attacked near the ruins of the old city (the corridor filled with fulgarite spikes), so continue on until you reach them, then enter the ring of vehicles to defend them.
During this encounter, you’ll need to dispatch several Pouncers, so Hijack one, then focus fire on the others to make quick work of them.
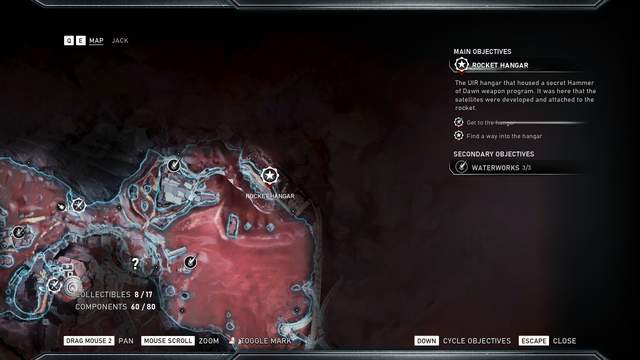
Once the battle is over, approach the nomads at the end of the row to make sure the beacons are safe, then head back to the Skiff and continue down the slopes to the Rocket Hangar.
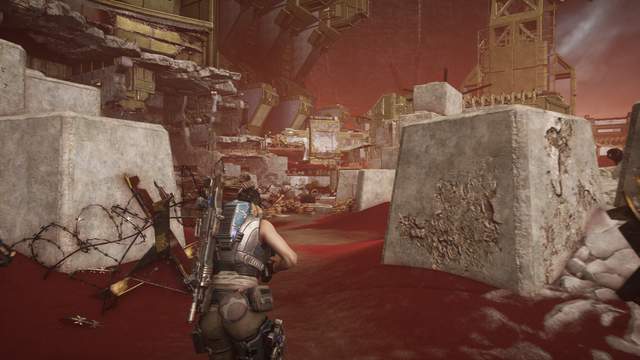
The Swarm won’t notice you are there, so take out as many as you can with stealth, then Hijack one of the turrets to split the Swarm’s focus and make it easier to take them down. There are heavy weapons around the area, so grab a Mulcher and take them out.
As you approach the entrance to the complex, more Swarm will emerge. Focus on killing the Poppers first, then take out the Juvies and, finally, the Drones and Hunters. Use Frag Grenades, the turrets, and shoot the red canisters to take out groups of enemies with explosions.
Once they are dealt with, climb the hill, then head down the slope and open the door to enter the facility and bring an end to the chapter.
You May Also Like
- Act I / Chapter 1 Walkthrough (Shot In The Dark).
- Act I / Chapter 2 Walkthrough (Diplomacy).
- Act I / Chapter 3 Walkthrough (This Is War).
- Act I / Chapter 4 Walkthrough (The Tide Turns).
- Act II / Chapter 1 Walkthrough (Recruitment Drive).
- Act II / Chapter 2 Walkthrough (Into The Wild).
- Act II / Chapter 3 Walkthrough (Forest For The Trees).
- Act II / Chapter 4 Walkthrough (The Source Of It All).
- Act II / Chapter 5 Walkthrough (Dirtier Little Secrets).
- All Collectibles Guide.
- ALL GUIDES →


Be the first to comment