Union Artilley
The Union Army entered the war with a strong advantage in artillery. It had ample manufacturing capacity in Northern factories, and it had a well-trained and professional officer corps manning that branch of the service. Brig. Gen. Henry J. Hunt, who was the chief of artillery for the Army of the Potomac for part of the war, was well recognized as a most efficient organizer of artillery forces, and he had few peers in the practice of the sciences of gunnery and logistics. Another example was John Gibbon, the author of the influential Artillerist’s Manual published in 1863 (although Gibbon would achieve considerably more fame as an infantry general during the war). Shortly after the outbreak of war, Brig. Gen. James Wolfe Ripley, Chief of Ordnance, ordered the conversion of old smoothbores into rifled cannon and the manufacture of Parrott guns.
Confederate Artillery
The North had a big advantage in artillery during the Civil War. Why? They could make way more weapons in their factories. Meanwhile, the South couldn’t get many weapons from other countries because the North’s ships were blocking their ports.
The South had to make do by stealing Northern cannons during battles or from places like Harpers Ferry. Fun fact: about 2/3 of all Southern cannons were actually stolen from the North! When the South tried making their own cannons, they often turned out pretty bad because they didn’t have good metal or skilled workers.
Their ammunition was also a problem. The fuses that made shells explode would go off at the wrong time – either too early or too late. Not great when you’re trying to hit something!
The Northern artillery crews started out good and got even better as the war went on. Southern soldiers learned to really fear attacking Northern positions that had artillery backup. One Southern commander even said something like “When you combine Northern artillery with their infantry, nobody can beat that army.”
This proved true in several big battles. The Northern artillery absolutely wrecked the Southern army during the Seven Days Battles (especially at Malvern Hill) and at Gettysburg.
Bottom line: The North’s superior manufacturing and better artillery played a huge role in winning the war.
Types of Artillery Units
There are two types of Artillery Units: 1. Foot and 2. Horse.
Foot Artillery: Left click on a unit’s area or its flag and move it forward to your desired location. Your artillerymen will push their guns forward and remain actively engaged in the fight. You can push your artillery unit(s) forward to use canister shot. This is devastating in a frontal attack, but even more so with enfilading fire against an attacking enemy brigade.
Horse Artillery: Left click on a unit’s area or its flag and drag to create a red movement arrow to your desired location. Your artillery unit will ‘limber up,’ or lift the trail of the gun and attach it to the limber so that the gun can be moved by the horses.
Positioning of Artillery Units
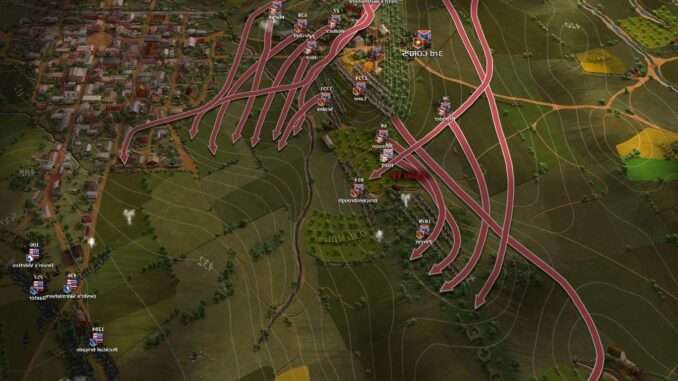
Map: The map was created by blending satellite imagery, topographical research data and historical maps into a unique, clear art style. All major terrain features such as houses, ridges, hills and forests are depicted as accurately as possible. The game also features all the mechanics to make full use of the map: cover, movement, line of sight, fields of fire, and more.
The map features accurate topographical information of the historical battlefield. Every hill, ridge, house and boulder will impact visibility in the game. Units have their spotting ranges adjusted according to their role, with generals, cavalry and artillery having higher view ranges than infantry. As you position them at strategic locations, your army’s visibility increases, while the units use their individual Line of Sight (LoS) to target local threats. Therefore, it is very important to secure multiple elevated positions to see further and cover more areas with your artillery.
Elevation: Select M key to add/remove the elevation lines on the map.
This game comes with an accurate Fog of War system that simulates Line of Sight (LoS). Simply, units can only spot what they can directly see. It is important to understand LoS when selecting positions.
Every unit sees and reacts according to its individual Line of Sight. You may be able to see a hostile unit because it is inside the LoS of at least one of your units, but this does not mean that all of your units can see it as well. Objects such as buildings, trees or hills and even friendly units block LoS.
On the other hand, high ground increases a unit’s LoS and firing range, but can also make it more vulnerable to hostile artillery. Use the terrain wisely to make your guns more effective or to protect them from enemy fire.
Place artillery batteries on ridges and hills to gain a wider view of the battlefield and be able to bombard the enemy from a distance. Losing the high ground can result in a decreased visibility of the battleground and reduced artillery effectiveness, as most of your cannons will not be able to aim directly at enemy forces.
Establish a strong defensive line on a ridge with your artillery. Having better artillery positions than your enemy, will force him to either advance or withdraw.
Always protect your artillery units with some infantry, if possible. If the enemy charges your strong defensive artillery positions, use canister shot. Once, the enemy brigade wavers, then, charge him with your infantry.
Place artillery in strategic positions that provide continuous line of fire and is protected by nearby houses or between two houses from enemy cannon fire while it can shoot directly in front.
Place artillery in cover to fire at the enemy flank and prevent them from advancing.
Do not bunch up your cannons on top of one another. Cannons spread out and hitting the same target from many directions, converging fire, will devastate enemy morale.
Use ‘bounding overwatch’ when moving your artillery batteries. Bounding overwatch or leap frogging is a military infantry tactic of alternating movement of coordinated units to allow, if necessary, suppressive fire in support of offensive forward “Fire and Movement” or defensive “Center Peel or more commonly, Australian Peel” disengagement. You can use this tactic, whether, you are advancing or retreating. If advancing, (Fire and Movement.) one battery supports (Overwatch) by continuing to fire while the other battery moves forward (Bounding). Once, the moving battery is in place and firing, the trail battery, then, moves forward. This technique can also be use when withdrawing (Center Peel.).
Artillery Controls
Individual Unit Line of Sight: By default, when you select a unit, its individual Line of Sight appears. Checking a unit’s LoS, will give you a precise view of the area it can see and fire upon. This is extremely useful for your artillery units, which rely on positioning to cover large areas with their firepower. By default, the individual LoS of units is visible for some time when you select them.
On the Main Menu, Options, Gameplay. You can change the way that the unit LoS is triggered and adjust its intensity and the fade out time.
Auto: Enabled by default. In this state, your artillery will use the most suitable ammunition for the current target’s range or in other words, allow your battery commanders to decide the ammunition type based upon the target they are firing upon.
Solid/Shell/Canister: Left click the Solid/Shell/Canister buttons to specify an ammunition type to use. Ammo types have different effective ranges and loading times.
- Solid shot has the longest range and fastest rate of fire, but is the least powerful.
- Shells have medium range and longer reloads, but can devastate nearby enemy formations due to their explosive charge.
- Canister has a very short range, very slow rate of fire and is the deadliest. If you want your guns to increase their CONDITION, click on CANISTER. They will only fire when an enemy unit is within canister range.
Tips, Tricks and Traps of Using Artillery
Counterbattery Fire
Dispense with counterbattery fire and concentrate on the enemy infantry. Counterbattery fire takes too long and uses too much ammunition (Condition – Morale directly effects and is affected by a unit’s condition. This factor is a combination of the current physical state of the unit and an ‘abstracted’ status of its ammunition and supplies. The unit’s condition is affected by its speed, terrain and the distances it has to cover. The use of firepower increases unit fatigue and the need for resupply. You have to be cautious when using RUN or CHARGE to conserve a unit’s condition. Constant assaults will exhaust and disorganize them. A unit in bad condition will lose its morale more quickly. You can replenish a unit’s condition by placing it in a safe location and near a General.). A good rule of thumb is, if the enemy artillery is hurting your infantry more than you are hurting theirs, then you engage in counterbattery fire.
The most effective way to use artillery in counter-battery fire is with converging fire. When two or more batteries combine to lay a crossfire on a target.
“Artillery conquers and infantry occupies.” JFC Fuller
The infantry is the Queen of Battle and cavalry cannot be counted upon to break well led infantry in a defensive position. Artillery, the King of Battle, although able to break enemy infantry when sufficiently massed or carefully orchestrated to achieve converging fire is unable to exploit its own success. Echoing the informed sentiment of the time . . . “The infantry is the real force of the Army and decided the success of battles.”
Napoleon
“Great battles are won with artillery.” Napoleon
During the Napoleonic Wars, the main difference between the Coalition Forces and the French artillery lay not in the quality of the gunners or guns, but in the way in which they were used. Napoleon used artillery offensively, whereas, the Coalition Allies used theirs to defend their cavalry and infantry. Their batteries of reserve joined the battle, either one-by-one on the request of local divisional commanders or were sent by the commander-in-chief if he felt that part of his line was too weak or too hardly pressed. In contrast, Napoleon’s artillery prepared the way for the final blow that would decide the battle.
Napoleon was well known for concentrating his artillery into “Grande Batteries.” “Artillery, like other arms, must be collected in mass if one wishes to attain a decisive result.” In order to achieve this, Napoleon organized his artillery into Grande Batteries for a flank or frontal attack. In a frontal attack, Grande Batteries were used to weaken the enemy center before an infantry or cavalry assault.
Bring up one or two of your cannons on either side or both sides of a brigade to use canister shot. Foot artillery works best. But first, switch to CANISTER and the canister range fan will appear. Slowly advance your cannons until the range fan starts to cover the enemy brigade formation. This is trickier and more time consuming when using horse artillery as they have to unlimber their guns. Both types of artillery take practice, practice and more practice to employ. Finally, canister is devastating up close and even more so, if you can rake the enemy brigade with enfilade fire.


Be the first to comment