
Table of Contents
General Overview
Note: Credit goes to David.Dragonheart
Before we begin, the monsters are… quite scary. Each with their own unique patterns of attack, patrol, and (my least favorite) “Standby” (where they sit there for ****ing decades, picking their noses while I hide in a God’s forsaken cabinet!). But thankfully, a few methods of survival against them are universal. These tips will be helpful in any event:
- Lights are your ally, and your enemy. Certain monsters are easier/harder to spot in the light/darkness, as well as certain obstacles.
- If you dont know the monster that your run will have, either A) avoid finding out by being a lucky SOB with a sneaky beaky pair of buns, or B) lure it out and hide where you can see/hear it. This is, in itself, risky as balls, as certain monsters are more… dumb. But this can make it easy for you if you want to know what to hide from and expect.
- The monster can destroy ANY of the 3 escape routes. I never seen how the game responds to all 3 being gone, but try to avoid finding out. Plan your escapes with what RNGesus gives you. Almost all helicopter bits? Rather than put each one in seperately, place them near the copter so when you got all you need, its all in one spot. Same for life raft and Submarine.
- Each monster reacts to different traps. Steam pipes and pitfalls work against them, but for one, one trap may not work as well. Same with “weapons”.
- Flashlight: your best friend. The ship is ****ing dark without power, do you expect to walk around without a light? While it does run out of juice at some point, tossing it wont make noise. So thats handy. Glowsticks are good for markers ONLY, I find, since they cant be turned off. Mark floors you been to or rooms of note cleared.
- If you break line-of-sight with monster during chase, you better not hide in a dead-end room. That hardly spells “smart”. If you can, take as many turns away as you can, and look to hide when you are far enough away. If it catches up, it may not immediately know where you are.
- Breakables like cups or bottles… not 100% useful. They break if you drop them, and are probably going to fill that hotbar you got. See any, take what you need, keep what you got, and ignore the rest if you dont need a refill.
With this being said, lets get onto the show!
Brute
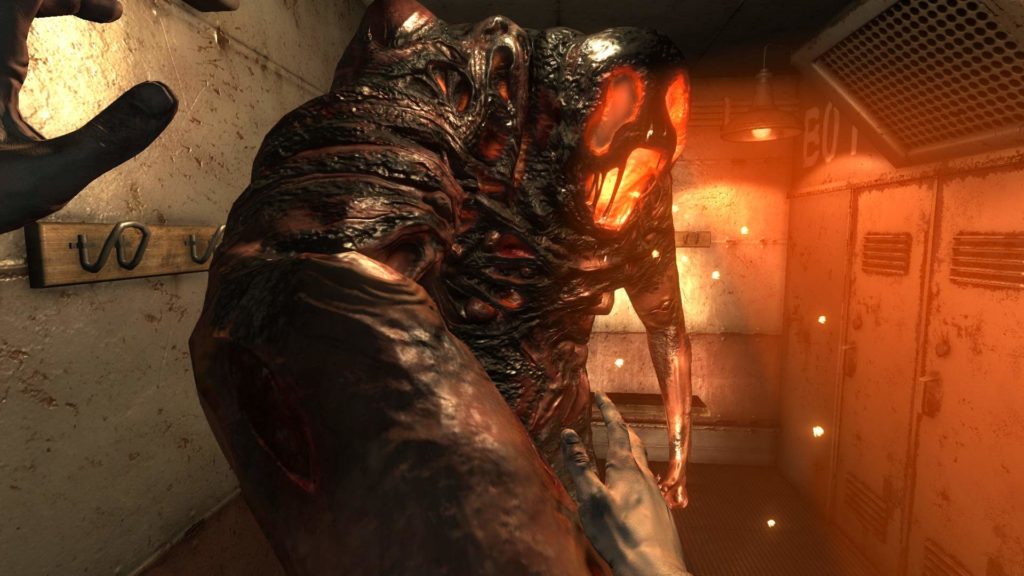
Ah, The Brute. Big, towering, bulky Brute. Like that jock from your late-60’s high school movies, this boy is fast, strong, but not bright. Easy to fool, but not to escape from.
Firstly, his body:
- Molten skin suggests he was… well… on fire. Using Flare guns or Fire pools against him will end badly for you. He doesnt get stunned. (You get an achievement for the stupidity in trying, though!)
- His eyes: that glow, makes him easy to spot in the dark spots in the ship. What also helps is that light is AHEAD of him a short range. You see that rounding the corner, you better duck and hide!
- He is fast, and able to keep up in straight halls. HOWEVER, his large frame and speed give him a hard time in corners.
His intelligence (or lack thereof) is my favorite part of him. Distractions against him will keep him out of your hair for a bit. He will stay in the area for a bit where you made noise. This DOES come at a price: he can end up staying where you are hiding for longer than you’d like.
His size and power serve him well: locked doors will serve him no trouble. You’d be better off leaving them open so you can HEAR him coming. BUT it makes pitfall traps in the crew quarters area his… nemesis. Make him run over one, and he will get stunned for a second. His speed makes him a nightmare in small areas, so be careful!
This thing makes a lot of noise. Roaring and thumping around. Shouldnt be hard to avoid, if you can hear it before it sees you. Kind of deaf, though. You can often run behind him and he doesnt even notice. Just… dont rely on it.
ASSESSMENT: fireproof body. Use Fire Extinguisher to stun, and run like ****!
Hunter (or Huntress?)
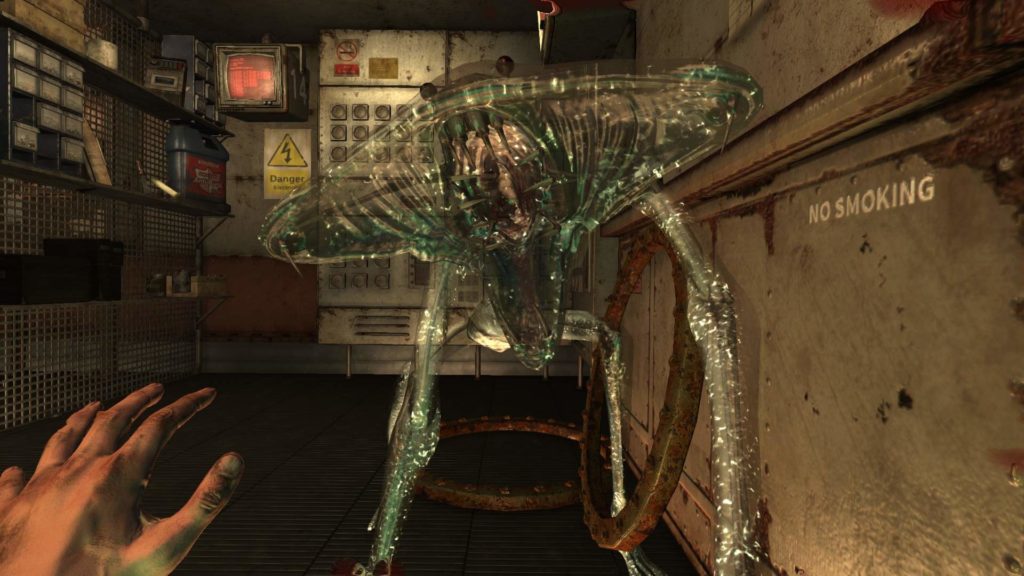
I dont know WHAT you’d call it, but I dont think its pleasant regardless. Nasty bugger, but unlike the Brute, this one should be treated with more… refined… tactics.
Body:
- Skin is transparent, similar to a tinted glass: in dark areas, this thing is harder to spot immediately.
- Slender and light frame make this thing slower and weaker: while still able to kill in one shot, this thing takes longer to take down locked doors. It makes it easier to avoid, however. You can EASILY outrun it.
- Skin must be sensitive, as fire and flare guns work VERY well. Fire, especially, as it makes it retreat and hide for a while.
The Hunter is easy to identify before the others, because of its unique enviromental cue: Eggs on walls, ceilings, and floors. ESPECIALLY the Cargo Bay area, and some crew quarter zones.

The Hunter uses these as ambush points, bursting from them to attack if you are too close or pass one. It also hides in the vents for much of the game, coming out to patrol or attack. This can be a REALLY scary sight when it DROPS inches from your face! This DOESNT mean it spotted you, since it needs to finish that animation, so BOOK IT and HIDE YOUR TASTY GIBBLETS!
When out and about, it makes periodic “screeches”, and nasty… sloppy… footsteps. Imagine the sound of stepping on nasty, moldy and moist moss while barefoot. That noise.
ASSESSMENT: you see nasty throbbing herpes on walls, you know keep away.
Fiend

This boy is tricky as he is smart. Nasty as he is crafty.
Body:
- Lack of legs. Pitfalls dont work, BUT it doesnt chase you very fast. Its the slowest.
This thing is smart: always somewhat aware of your position on the map. It will hover in the area you are in, but never too close. But if distracted, it leaves quickly. The Rec Room TV has a use in that case, as you can hide in the room with it, and leave after the Fiend leaves the room. Just… go the other way. Its slow, not stupid.
In a chase, it has 2 NASTY tricks:
- If line of sight isnt broken soon enough, the thing will make purple… tendril-cracks… on your screen, accompanied by a creepy audio track which gets louder the longer its on. If you dont break LOS soon enough, you’ll get stunned for a couple seconds, which can spell death.
- If its telekinetic stun didnt sound bad enough, if can temporarily block doorways, and lock doors if they can be locked. I only encountered this once, and I was on the side with the lock, so I escaped without issue, but beware regardless.
While this has a very quiet hum near it, its enviromental cue is what you need to watch for: lights flicker and short out in close proximity to it. This INCLUDES the flashlight! That thing will be a lifesaver when hiding! In lower decks, where lights flicker regardless, the flashlight is ALL you will need. It checks hiding places semi-frequently, and makes note of rooms it left, so if you have him, make sure to leave the room how you found it AFTER you are done looting.
ASSESSMENT: Smart AF. Easy to run from, before it gives you annoying Fortnite tips and tricks.
Escape Route: Helicopter
At the center of the ship, topside, there lies a helicopter. I find this to be the most common form of escape from the monster, and easy for its handy traps built in!
- 4 Staircases leading to it, 2 on each side. A Steam Pipe blows steam down a staircase on each side, which you can switch with a handy valve.
- Wide area to circle the monster around, only before the escape-prep
You will need:
- Helicopter keys
- Bolt Cutters
- 2 Gas Cans
Cut the cables tying the Heli down to its helipad. Using the same bolt cutters, crack open the containers on the helipad. One contains a pump, which you use 2 gas cans to fill after carrying the hose-pipe to the heli’s gas tank. Use the helicopter keys on the doors, and turn the pump on. Keep the monster away from the pump, or else this will fail. How, is your decision. Luring it away using yourself works for me.
When done, jump in and you escaped.
Escape Route: Life Raft
Located on the back of the ship, above the Crew Quarters and just below the Captain’s chambers, lies a torn Life Raft, which also dangles off the edge. It will need repairs before use, and you will need to push it to the ship edge.
You will need:
- Duct Tape (Use this AFTER taping up the cameras on the Crew Quarter halls. It doesnt get used up on those, unlike the raft)
- Chain Spool
- Air Pump (USUALLY located near the raft, but RNG dictates where it spawns. I just noticed it spawns nearby)
When you have what you need, you’ll need to pull the raft up to repair. Use the duct tape on it. Place the Chain Spool on the crane NEXT to the raft. Use the air pump on the raft until it inflates fully (dont stop until it stops you). Using the crane controls, move the crane arm OVER the raft and connect the hook to the raft, and then move it over the edge of the ship, then drop the raft with the controls into the water. This is especially hard, as the controls can be destroyed, as well as you have to make 2 distractions. The raft will be accessible from the main deck BELOW, do not jump off the edge you found the raft. (While the average human COULD survive that fall if they land the right way, apparently you’ll explode on landing. I mean, its gonna ****ing hurt, but not instantly kill you. ) Reach the raft and escape. Done.
Escape Route: Submarine
Located deep in the bowels of the ship, lay a Submarine bay(WHY in a cargo ship, I havent a clue). This one is hard, and can be glitchy. But it can be done.
You’ll need:
- Submarine battery
- Submarine Headlight (only 1)
- Welding kit (this is what glitches for me)
- Fuse (you spawn with one, and they spawn on map randomly, though usually rare)
You’ll need to place the fuse in the terminal above the sub, so do this first. Place the headlight in the front of the sub, in the corner. The Battery on its battery port, and repair the damaged panel with the welding kit (THIS bugs with me all the time). Slam that startup button on the console when this is done, and all the doors to the sub bay will shut. The monster will attempt to enter by smashing these doors open, but the Hunter will attempt the vents. Use the wheeled cart to block the doors/vents to prevent the entry. HOWEVER, there is a drop on the opposite of the stairs on the console level, so you can jump down and lure the beast away. After the startup cycle is done, jump in that sub and… well, I got no pun for this.
Stash Rooms
Scattered throughout the ship, there are doors that cannot be opened my normal means. There are 2 kinds.
- Metal, powered doors with a fuse box located nearby.
- Broken wood/metal doors, with a chunk taken out of the top half of it.
These rooms will have a handy item for you, for either an escape route, backpack to increase inventory size, or even a handy flare gun.
Doors that are broken, you’ll need to have help. The monster will be useful. Throw a distraction item (radio, egg timer, breakable, etc ) INTO the room, and hide somewhere safe nearby. The monster will break that room open. Doing this will net you “I love it when a plan comes together” achievement, and you can rest easy knowing the monster will wander AWAY from you afterwards.
Powered doors have a handy added function: if you shut the monster in the room, and cut the power from the box, you can trap it in the room, earning “Now think about what you done” achievement, and some time to do… stuff. Now, I noticed that the Hunter tends to escape from this room fairly quickly, but they never stay for long, so use this as a way to get some distance or get a objective done with some time buffer.

Be the first to comment