In this guide, I describe how to get the Serenity Now achievement, which took me a damn long time to do.
How to Serenity Now Achievement
Basic Rundown
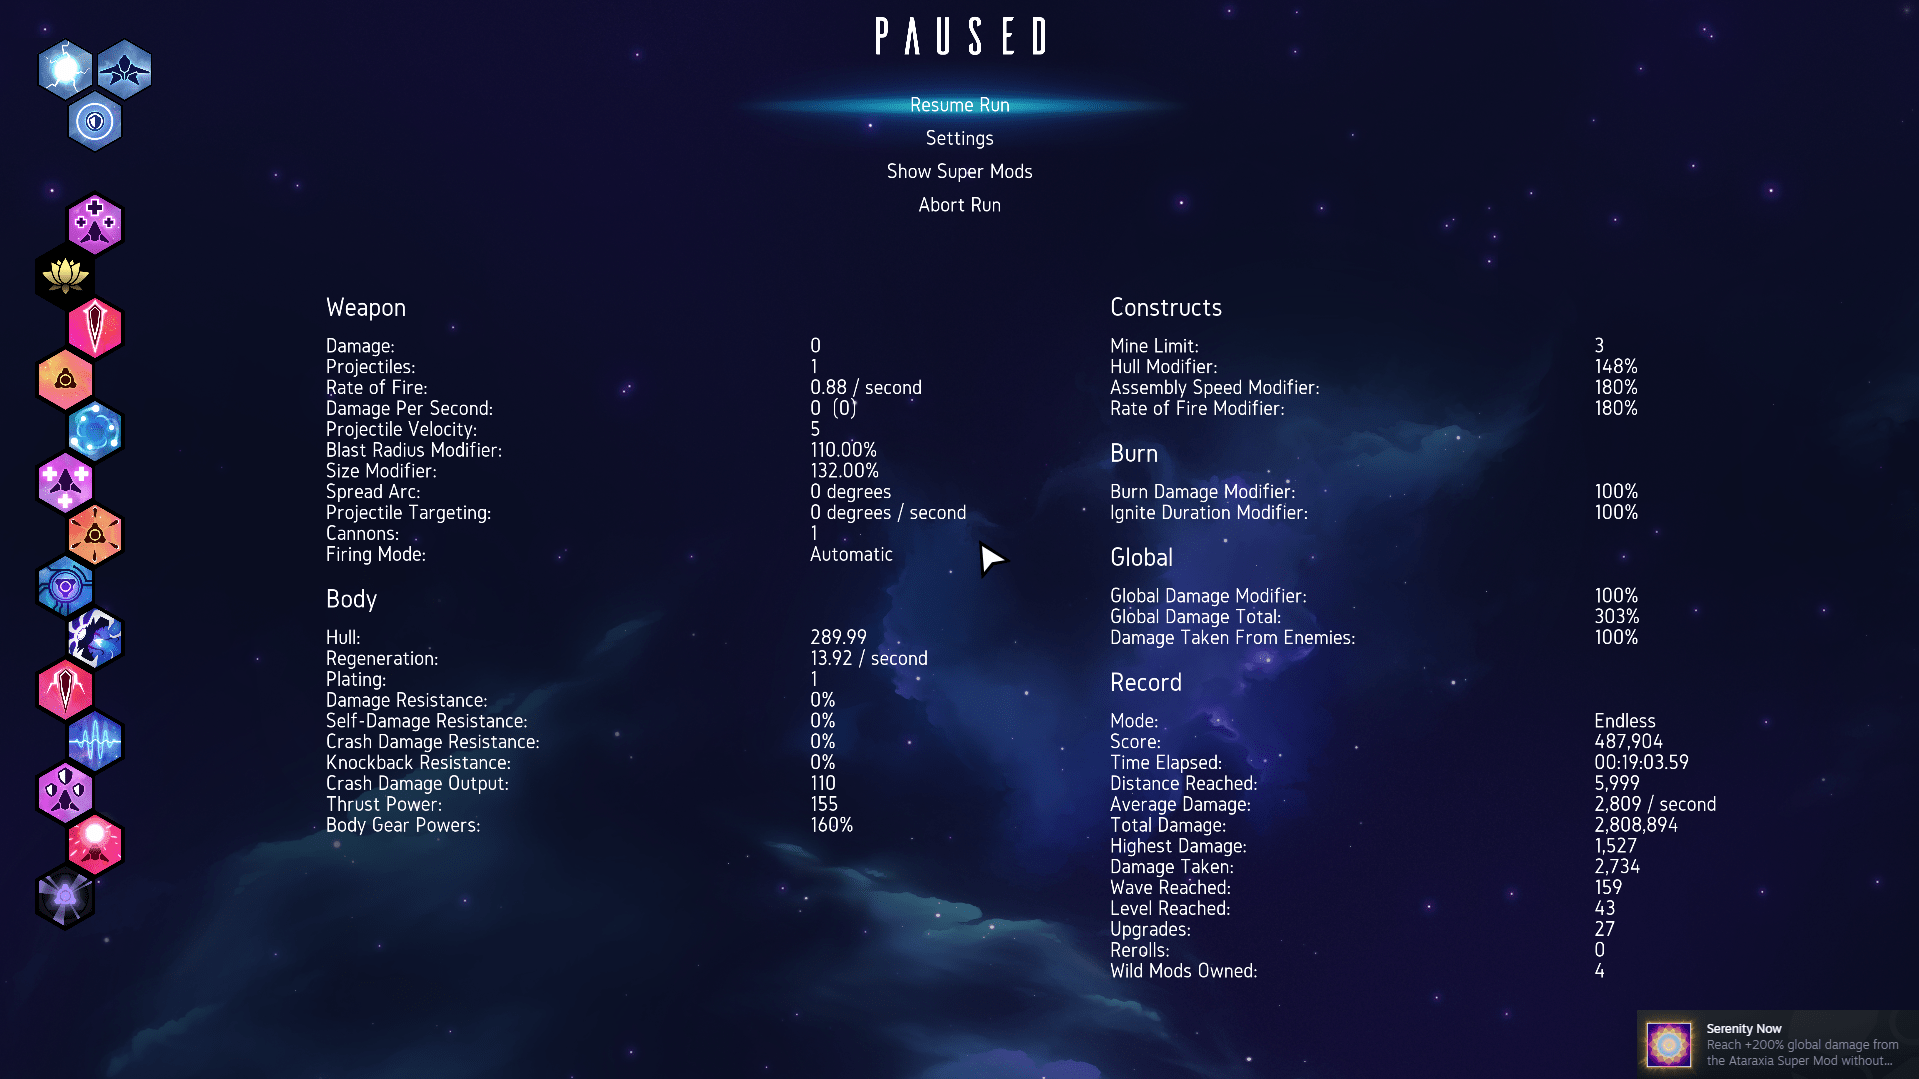
Alright, so Serenity Now is pretty simple in concept: get to 200% global damage with Ataraxia, without using draft mode. To be exact, you need at least 27 unspent upgrade points to get Ataraxia to this point. This can technically be done with any build if you last long enough; but with scaling difficulty over time, and the fact that each level up takes exponentially more XP after a certain point, creating a build that doesn’t take much investment but can go a long way is necessary.
Build Rundown
I would suggest using a Starchitect build:
The Starchitect build focuses on using loaded mines, combined with a charge weapon, to make screen-wide destruction. There’s a lot of freedom with what mods to pick, but keep in mind that the more you pick, the longer you will have to survive in the long run, so pick wisely.
For Gear, your weapon will be either Thermal Lance or Vortex; both are good, but Vortex seems to do the better than thermal lance with low investment. I would suggest forgoing a shield in favor of Rapid Reconstruction, but this is up to you. Your body will be Architect.
Once done picking gear, I would suggest holding onto your upgrade points until you have 4 or 5, getting Ataraxia as soon as possible is important; also, if you don’t open the menu before you have 4 points, you’ll have a chance for Ataraxia to appear immediately. Ataraxia’s bonuses are no joke, and if you find yourself out of rerolls to find the next mod you want, having it on will guarantee you get stronger without needing to waste an upgrade point. It’s also kinda required for the achievement.
After Ataraxia, you’re going to want to get Mines and Loaded Mines. Make sure you have mines set to MANUAL deploy, as this will let you control when they explode, and allow them to charge to full strength before exploding.
That’s all the necessary mods, but I’d suggest getting at least a few more.
Recommended Mods:
Regeneration and Rapid Reconstruction will greatly help your survivability, and considering Ataraxia’s innate health boost might be the only two defensive mods you need.
Mine Specialist, a Wild Mod, is INCREDIBLY effective. With one mod, you increase everything about your mine by 15%, which is particularly noticeable for gaining additional beams with Thermal Lance.
Magnitude, Payload, Charged Shot, and Charged Mines are very powerful damage boosts, and worth the upgrade points. Charged Mines in particular is very useful, greatly increasing the power and size of your mines effects. Do note, however, that charged shot alone isn’t nearly as good a boon.
Bravado is a useful wild mod, increasing your stats by 10% and Architech’s unique powers by 15%. This is useful for increasing Mine damage and build speed, but mainly for creating aditional Thermal Lances. This will add onto the bonuses gained from Ataraxia at 5 and 10 upgrade points stored. Do note that it makes all future enemies their stronger variants.
Vital Bond can help your mines stay around/charge longer, which can increase their effectiveness, especially when you get a good mine placement you want to keep around for longer. However, it requires a completed construct upgrade tree, so you’ll need to pick up Retribution for it.
Grandeur grants 2 additional levels, so picking it can be a good idea. Do note that the thrust and rotation speed penalties can make dodging the fast attacks that appear later on difficult.
Quantum Decoherence grants 5 additional levels at the cost of no longer being able to reroll. ONLY pick this if you have all necessary mods and most of the others you want, or if you’re confident in your RNG. On the other hand, if you already have all the mods you want, I would suggest using any rerolls you pick up to try and get this, since at that point it’s free upgrade points.
After that, there are a few mods which can help, but might not be worth the investment
Meh Mods:
Candescence and Purification increase burn damage, which is the main damage of both of these weapons. If you decide to get Purification, pick Purge to get to it instead of Corrosion, since Corrosion penalizes weapon damage.
Orbs of Discоrd are decent, and don’t do any harm, but might not be worth the investment.
Blast Radius and the other mods in its tree can help, particularly with the Thermal Lance size and damage, but might not be worth the upgrade points.
Apex Machinery is an option if you didn’t pick Rapid Reconstruction, and will greatly increase the power of your mines, particularly Thermal Lance as it will certainly increase the number of Lances. However, It requires Shielded Constructs and Elegant Construction, which is a steep investment and removes your shield entirely. There might be some synergy with Bastion, but that would require even more investment to show results. Only pick this if you really want the extra lance.
- Movement mods, like in the Thrust and Stabilization trees can help you dodge, but remember at 20 upgrade points stored you’ll get infinite hyperboost and every point saved grants +1% Thrust.
- Defensive mods can help survivability, but I would avoid overinvesting; remember that Ataraxia grants +1% Hull and Shields per level saved, and at 20 you gain Infinite Hyperboost.
Gameplay
Remember, you don’t need all of these mods, just enough to carry you to 27 stockpiled upgrade points.
Now, the general gameplay of the Starchitect is to place your mines in key areas of the screen and allow their charge effects to destroy the enemy. For Thermal Lance, this will be a spinning star slicing through foes, and for Vortex, this will be a short lived gravity wells that explode into giant shocking areas of doom. If you picked Vortex, you’ll be launching mines more often, while with Thermal Lance you’ll want to focus more on positioning and making the full use out of a well placed mine’s uptime. Be careful about deploying mines too close to enemies, especially without Charged Mines, since they will likely explode prematurely.
I wish everyone luck on getting Serenity Now, and I hope this guide helped you out.
This is the build I had when I got the achievement:


Be the first to comment