
A super cool guide that will help you at any point of the game.
Table of Contents
How to Play
Note: Credit goes to Ejsonic
Portal can seem overly complicated at first, but with practice the game can become fun and simple here are the 6 tips I have for you and a list of controls.
Tip 1
Remember the basic game play. In Portal, you have to use portals to complete puzzles and move onto the next one. There are two portals blue and orange. When you go in one portal, you come out the other. However, not all surfaces can have a portal on them.
Tip 2
Pick things up. Using the “E” button, you can pick objects up. Almost all objects can be picked up. This will become essential if you want to solve every puzzle in Portal.
Tip 3
Keep momentum in mind In Portal, many puzzles are solved by the laws of momentum. Momentum is kept through portals, so when you are falling at a fast velocity into one portal, you will come out of the other portal at a fast velocity. This is useful for levels in which you need to jump a long distance otherwise unreachable.
Tip 4
Cubes are your friend. In Portal, you will frequently be given cubes to solve puzzles. You may ask, How can a cube help me solve a puzzle? It will help you more than you think. When a cube is given to you, it is usually for the purpose of placing on buttons to open doors to advance. They can also be used as shields against turrets and energy balls.
Tip 5
Turrets are your enemies. In certain levels, you have to fight against turrets. Once these turrets point their laser sights at you and lock on, you will be shot at relentlessly, and without proper cover, die very quickly. To stop a turret, it must be knocked down. This can be done many ways. Shooting a portal below the turret usually does an adequate job. However, you can also shoot down a turret with another turret, or knock down a turret by running at it. Another way is to shoot a portal above the turret and a portal under a cube to knock the turret over. When protection is needed, you can use many objects to protect yourself. A cube or another turret can help you with that job.
Tip 6
Solve the energy ball puzzles. In order to go on to the next puzzle, you might have to solve energy ball puzzles. These energy balls are electric balls that fly and bounce off of walls. In order to solve these puzzles, you need to get these balls back to their holders using portals. Once they lock into their holders, something, such as a lift, will activate. However, watch out. If these energy balls contact you, you will die! Much like turrets, use items such as cubes to protect yourself from them.
Controls
W = Move Forward
A = Move Left
D = Move Right
S = Move Back
Left Click = Place Blue Portal
Right Click = Place Orange Portal
Space Bar = Jump
Ctrl = Duck
E = Pick Up Things Press Buttons And More
Esc = Pause Game
Characters
Chell
Chell is the player-character in both Portal games. She is a silent protagonist outside of small grunts during physical tasks. Very little truthful information is known about Chell; while GLaDOS makes many statements to Chell’s background and history (not very nice statements), but GLaDOS herself admits she is unreliable. The only real fact that is used through the series is that Chell’s parents gave her away. Whether they did it intentionally or not is unknown.
Doug Rattmann
Doug Rattmann is the person who wrote the messages on the walls in Rattmann dens.
GLaDOS
GLaDOS is an acronym for Genetic Lifeform and Disk Operating System, is a evil artificial intelligence computer system that controls Aperture laboratories, and is the primary antagonist for the Portal series. She awakens the player-character Chell in the first game, tasking her through the dangerous testing courses, but Chell manages to escape and appears to destroy her.
Announcer
The Announcer is a minor character in Portal. After the destruction of GLaDOS at the end of Portal, the Announcer appears to have taken over the Aperture Science facility in her absence as a back-up system, maintaining primary functions and stasis chambers. He continues this duty until the events of Portal 2. He is an AI system designed to work in extreme and low power conditions to keep research and testing going, so science can still be done. Although, unlike most robots and AI in Aperture such as GLaDOS and Turrets the Announcer does not have a physical presence and displays no hints of sentience. Instead, he rather is or is a part of the basic system of Aperture, his lines similar to computer alerts and triggered in the same fashion. He shows no ability to record results from a test, no recognition of Chell being the one who destroyed GLaDOS and no desire to change tests within the facility or create new inventions. He can, however, read files, detect life and the overall condition of the facility, operate the sprinkler system, as well as override the main AI in situations like stalemate procedures. Indicated by his presence behind the scenes of Aperture especially concerning the production of Turrets, the Announcer maintains many ancillary functions that the main AI doesn’t overlook but can utilize, and continues to make sure that minuscule problems are taken care of and that the main AI knows of any major problems occurring within Aperture.
Weighted Companion Cube
Weighted Companion Cubes are variants of Weighted Storage Cubes that are used in the testing chambers. They are differentiated from regular Storage Cubes with small pink hearts on its external surface, instead of an Aperture Science logo. In Portal, during test chamber 17 Chell is given a Weighted Companion Cube by GLaDOS told by her that it will be her faithful companion for the duration of the test. Chell must use the Cube to complete the chamber, at which point GLaDOS requires her to incinerate the Cube before being able to progress further. Another Companion Cube is seen at the end of the game, standing next to the cake. Companion Cubes are also mentioned a lot in the Ratman dens in Portal.
Turrets
Aperture Science Sentry Turrets are sleek, thin robots that stand on three legs. They project a laser that acts as an aiming device. When a player enters its range and line of sight, the sides open up to reveal machine guns which will shoot at the player. Several hits cause the player to die. The player can disable turrets by knocking them over or grabbing them with the portal gun and dropping them (into water, acid, from great height, etc.) Turrets speak with a high, childlike voice. They have polite manners and say things such as “Are you still there?” when the player walks out of their vision, and when killed, they say things like “I don’t blame you”, or “No hard feelings.”.
WalkThrough Tests 00 – 07
Test Chamber 00
Wait for a portal to appear in your cell and walk through it. The hall to the left leads to the first Testchamber, which is really easy. Then a weighted storage cube will drop from a dispenser in the corner of the room. Pick up the cube, then walk it over to the red floor switch. Drop the weighted cube onto the floor switch and it will open a door at the other end of the room. Pass through the now opened door to continue to the next Testchamber.
Test Chamber 01
Drop down to the floor below. The orange portal is the enter point of the portal and the exit point is changeing from one to the next. There are four rooms in the chamber you are in, and the blue portal the exit portal is changeing between the three rooms that you’re not in. In one of the three rooms is a red floor switch. In another of the three rooms is a weighted storage cube. In the third room is the level’s exit. Wait for the blue portal to change into the room with the weighted storage cube you can see the cube by looking through the stationary orange portal. Step through the portal to grab the cube, then step back through the portal to return to the first room with the orange portal. Wait now for blue portal to warp to the room with the red floor switch. Drop the weighted storage cube on top of the switch and then step back through the portal to return to the first room. When the blue portal changes to the room with the Testchamber exit. Then use the portal gun to make a blue portal anywhere you like, as long as you can reach it. Drop through the portal to warp to the orange portal and you can safely continue to the Testchamber exit.
Test Chamber 02
This Testchamber is easy too, though you’ll have to wait around a bit at first. There’s a doorway that’s locked and you can not do anything to open it. Except wait. The door will eventually open and if you’re quick enough you can catch the blue portal in the following hall before it rotates to another wall. Like in the last Testchamber, the blue portal here is changeing between various walls. Once past the portal and into the main room, approach the portal gun in the center of the main room to grab it. It’s yours, now! As you grab the gun, a doorway on the upper ledge with the orange portal opens up. You can’t just jump up to the orange portal to exit the Testchamber. Instead, use the portal gun to make a blue portal anywhere you like, as long as you can reach it. Drop through the portal to warp to the orange portal and you can safely continue to the
Testchamber exit.
Test Chamber 03
There’s a large gap in the floor ahead and you can’t just jump to the ledge to continue through the wide hall. Shoot a blue portal onto a nearby wall and go through the portal to warp to the orange portal, which is on the upper ledge that we previously said you couldn’t jump to. That’s step one. Once through the portal, look to your right to find another large gap with a ledge you can’t jump up. Fire a blue portal onto a wall near the Testchamber exit, then double back through the orange portal to appear near the particle field thing. That’s the exit.
Test Chamber 04
There’s a red floor switch in front of the hall. Further into the room, you can see a weighted storage cube dispenser hanging from the ceiling. It drops a weighted storage cube down into a pit that’s very deep. Even if you drop down into the pit to grab the weighted cube, you can’t jump out. You can, however, fire a blue portal directly beneath the weighted storage cube in the pit. The cube will fall through the portal and come out in the orange portal that’s right next to the floor switch. With the cube out of the pit pick it up and place it on the floor switch. The Testchambers exit will open.
Test Chamber 05
There are two floor switches in this room. you need to find two weighted storage cubes. The first storage cube you should be able to spot on a platform to your right, but it’s just out of reach. Make a blue portal nearby and step through it to go to a platform directly across from the platform with the first weighted storage cube. Once through the orange portal and on the platform, fire the portal gun to create a blue portal on the outher platform. You can then step through the orange portal to grab the weighted storage cube. Drop it onto the first floor switch. The second weighted storage cube is in a pit, just like the cube in the previous Testchamber. Drop down into the pit and create a blue portal on a nearby wall. Grab the cube and carry it through the portal, which should bring you to the platform with the orange portal. Drop down and place the second cube on the second floor switch to open the door, leading to a room. Shoot a blue portal onto any nearby wall to get out of the room and move to the next chamber.
Test Chamber 06
This Testchamber introduces the high energy pellets which can kill you. Do not touch them. A energy pellet is bouncing between the pellet dispenser on the roof and an orange portal on the ground. Generally, the high energy pellets will pass through portals, but since the orange portal does not have an exit yet that is up to you. You need to guide the energy pellet into the thing on the ground right of the orange portal. To do this shoot a blue portal on the ceiling above the thing there’s a light on the ceiling that you can use as a guide. The energy pellet should pass through the portal and into the thing activating a lift platform that will let you leave the chamber.
Test Chamber 07
There’s another energy pellet in this Testchamber and a thing (I am going to start calling them collecters) on the ceiling. Fire a blue portal on the wall in front of the energy pellet it’ll leave a black mark on the wall where it hits use it as a guide for where you put your portal. The energy pellet will go past the blue portal and out the orange portal on the ground hitting the collecter on the ceiling. That is only half the puzzle. The receptor activates a moving floor at the end of the room that is far too high for you to jump to. Use the portal gun to make a blue portal on the colored patch of roof that hangs over the track of the moving floor. When the floor moves under the blue portal drop in to the orange portal in the center of the room to land on the platform. Ride it to the chambers exit.
WalkThrough Tests 08 – 12
Test Chamber 08
There’s a energy pellet dispenser on the wall to your left and on the wall to your right is the collecter. Shoot a blue portal onto the wall at the opposite end of the room to catch the high energy pellet before it hits the far wall. The pellet will leave a black mark on the wall which is where you should make your portal. The energy pellet will come through the orange portal and move towards the wall with the collecter. The pellet will not, however, go into the collecter right now. Quickly use the portal gun to move the blue portal onto the same wall as the orange portal, but further away from you. There is red light from the energy pellet collecter that marks where you should place the blue portal. The pellet should bounce back through the orange portal and exit the blue portal moving into the collecter. The receptor activates a moving floor along the right wall of the room but it’s out of reach. First, create a blue portal on a nearby wall and step through it to reach the platform with the orange portal. Once on the platform, create a blue portal on the wall next to the track where the floor is moving. Wait for the moving floor to move under the portal you created then step through the orange portal behind you and drop onto the moving floor. Ride the floor to the Testchambers exit.
Test Chamber 09
In this Testchamber, you need to move a weighted storage cube to the other side of an particle field. In case you forgot, that’s impossible because the incandescent particle field acts as a reset button of sorts, resetting the position of the storage cube if you try to walk it through the particle field. Shoot a blue portal onto a nearby wall and then grab the weighted storage cube. Pass through the portal with the cube and you will warp to an elevated floor with the orange portal. From there you can shoot a blue portal through a very small hole in the wall directly above the incandescent particle field. This creates a blue portal on the other side of the particle field. Grab the storage cube again and pass through the orange portal to drop into the room beyond the particle field. Use the cube to press the floor switch and exit the Testchamber.
Test Chamber 10
This Testchamber features three rooms that introduce you to momentum jumps (my favorite). In the first room look overhead to spot an orange portal on a spot of wall that is sticking out. Create a blue portal anywhere on the ground and jump through it. Your momentum slight as it may be right now will launch you through the orange portal and onto the ledge that’s too high for you to jump to. The next room is like the last the distance between the orange exit portal and the ledge you need to jump to is bigger. To make this long jump, you’ll need lots of momentum before entering your blue portal. Fortunately, there’s a large pit just ahead. Fire a portal onto the floor of the pit while you stay on the ledge above. With the portal far below you, leap off the ledge and aim for the portal. You’ll carry your momentum through the orange exit portal and should launch over the long gap in the floor to reach the rooms exit. The third room is much like the second room but this time the orange portal is placed at the bottom of the rooms pit. Look up and watch as a couple of wall panels push out to overhang the pit. Fire a blue portal onto the top of the wall panel and then jump off the ledge into the orange portal below. You will be shot to the next level but you’re still not done. You need to climb another level useing a momentum jump. The wall panel should again push forward closer toward the gap. Again, launch a blue portal onto the very top of this wall panel. From the ledge you are on now, you can jump down into the orange portal far below to build momentum and make the jump to the Testchambers exit
Test Chamber 11
Approach the glass ahead to look at the Testchamber below. There’s an orange portal gun in the center of the room that rotates, firing an orange portal on one of four walls. Three of the four walls overhang nothing and, if passed through, will drop you into the deadly waters below. Fire a blue portal onto a nearby wall and stare into it before passing through. Wait for the orange portal gun to create a portal with a floor underneath, then pass through. Once you’ve warped into the alcove, find a nearby switch and press it. The switch opens a door across the room, beyond the orange portal gun. When the door is open, quickly fire a blue portal into the room beyond the door. Wait for the orange portal gun to place an orange portal near you again then pass through it to enter the room you shot your blue portal in to.There’s a energy pellet bouncing in the room, so watch your head it will kill you if it hits you. There should be a black mark on the wall where the energy pellet hits that is where you will want to shoot your blue portal but only when it is time. Wait for the orange portal gun in the outside room to shoot its orange portal onto the left wall opposite the wall with the energy pellet receptor. The pellet will pass in your blue portal and out the orange portal going forward to the collecter. The activated collecter powers a moving floor in the outside room. Approach your blue portal and look through it, waiting for the orange portal gun to again create a portal on the left wall. When the correct placement of the orange portal is achieved, you’ll be able to spot the moving floor through the portal. Step onto the floor and ride it to the center of the room where you can grab the orange portal gun. Press the switch on the platform where you found the gun and a door across the room will open up. Fire a blue portal into the room before the door closes, then turn around and fire an orange portal onto the opposite wall, at the end of the moving platform’s track. Ride the moving platform toward your orange portal and jump through it to enter the room with your blue portal. Continue to the Testchamber exit.
Test Chamber 12
This Testchamber gives you another chance to play with momentum jumps. Place a blue portal on the wall panel that is comeing out overhead. Look down for the floor of a pit where you should put an orange portal. Drop into the orange portal to build momentum and launch onto the next level of the chamber. Wait for the wall panel behind you to push out then launch another blue portal onto it. Your orange portal should still be placed at the bottom of the pit far below. Drop down into it to and fly through the portals and to a third level of the Testchamber. This third level of the Testchamber has a floor switch, but the weighted storage cube needed to depress the switch is located on a fourth level of the Testchamber. A wall panel behind the floor switch pushes out, with one section of the panel aiming towords the fourth floor. Place your blue portal on this angled wall spot. Again your orange portal should still be in place at the bottom of the pit. Drop down into the orange portal from at least the second level of the chamber and you should have the momentum to launch upwards through the orange portal and onto the fourth floor of the chamber. From there you can grab the weighted storage cube and jump back down to the third level of the chamber to depress the floor switch. Go back through the last momentum jump to return to the fourth level and continue to the Testchamber exit.
Walkthrough Tests 13 – 14
Test Chamber 13
Place a blue portal on the upper part of the wall, near the weighted storage cube that’s on a catwalk overhead. Place an orange portal on a wall you can reach and step through to reach the catwalk and grab the storage cube. Drop back down to the floor and place the weighted storage cube on the red floor switch to open up a door to the next room. Go back through the orange portal to reach the next room of the Testchamber with the weighted storage cube in hand. There’s a bouncing high energy pellet in the room that’s worth taking care of now to avoid future problems. Fire a blue portal onto the ceiling, directly over the energy pellet receptor that’s on the ground. You can spot a faint light on the ceiling that’ll serve as a guide for where to place the blue portal. Now place the orange portal on top of the black pock mark that’s made by the bouncing high energy pellet. The pellet should pass through the portals and enter the receptor on the ground. There are two red floor switches in the room, and both are located on elevated platforms on the left side of the room. You should have one weighted storage cube already, carried over from the first part of the Testchamber. To place it on the first red floor switch, fire a blue portal onto the ceiling directly over the elevated platform (there’s a white square panel on the ceiling that marks where you should place the portal). Shoot an orange portal onto a nearby wall and drop the weighted storage cube through the portal to land on the elevated floor switch. The second weighted storage cube is on a moving platform the platform was activated by the high energy pellet receptor earlier. Fire a blue portal onto the light-colored patch of ceiling that overhangs the moving platform’s track. Look through the nearby orange portal and wait for the moving platform to pass under the portal’s exit before dropping through. You should land on the platform where you can grab the second weighted storage cube. Now it’s time to place the second weighted storage cube on the second elevated floor switch. You can do this the same way you did before, by placing a blue portal on the ceiling directly over the floor switch not the same switch, though—the second switch is on the second elevated platform. Drop the storage cube through the portal and onto the floor switch to open a doorway that leads to the Testchamber exit. To reach the new doorway, fire a blue portal through the door and into the room beyond. Pass through the nearby orange portal.
Test Chamber 14
Right away you spot a red floor switch as the Testchamber branches both left and right. For now, go left up the stairs (the stairs later recede into the floor, forming a pit). At the top of the stairs is a small room with a high energy pellet receptor and a weighted storage cube. The storage cube is a bit out of reach, but you can grab it with a momentum jump. Place a blue portal at the top of the nearest wall that’s facing the weighted storage cube. Next, place an orange portal in the bottom of the pit formed by the receding stairs. Drop into the orange portal from above the pit to fly through the blue portal and onto the mound with the storage cube. Grab the weighted storage cube and backtrack down the stairs (they’re mysteriously back) to place the cube on top of the red floor switch. The switch opens a door at the opposite end of the hall that leads to a room with the high energy pellet needed to activate the receptor at the top of the stairs. Before going through the newly-opened doorway, place a blue portal on the ceiling directly above the energy pellet receptor. You can use the faint red light on the ceiling as a guide for portal placement. Go back down the stairs and through the doorway that you opened with the red floor switch. You’ll need to carefully hop across the moving platforms in the next hall before you can reach the energy pellet. The center platform does not move, letting you stop and wait for the platforms to move into their up positions. Once in the room with the energy pellet, place an orange portal on the wall, on top of the black mark left behind by the bouncing energy pellet. The pellet will pass through the portal and into the receptor in the previous section of the Testchamber. With the receptor activated, pass through the portal yourself to return to the first part of the Testchamber. A platform at the bottom of the stairs is now activated. Use the platform to reach the Testchamber exit.
Walkthrough Tests 15 – 15
Test Chamber 15
You need to get past the large, incandescent particle field that blocks off the opposite half of the room. However, you cannot simply shoot a portal through the particle field. Instead, you’ll need to use a momentum jump to reach the other side of the room. Look overhead for a panel of wall that juts out near the ceiling. Fire a blue portal onto the wall panel. Next, fire an orange portal onto the ground. You want to place the orange portal centered with the blue portal—use the white icons on the ground as a guide. Drop through the orange portal to spit out of the blue portal above, and as you fall to the ground aim yourself to fall through the orange portal again. Having dropped from the higher, blue portal, you’ll have built up momentum to carry through on your second portal warp. The momentum will fling you through the incandescent particle field and to the other side of the room. Continue into the next portion of the Testchamber where you’ll find two incandescent particle fields that separate a high energy pellet dispenser and the pellet receptor. First, fire an orange portal onto the wall that the energy pellet is bouncing against (place the portal directly on top of the black mark on the wall). With the first portal placed, shoot a blue portal onto the same wall, five tiles over (to the left). The placement of the blue portal should warp the high energy pellet and send it through the incandescent particle field that houses the pellet receptor. This next part of the puzzle is tricky. Wait for the energy pellet to warp its way to the half of the room with the pellet receptor. Quickly pass through the incandescent particle field to stand next to the receptor and fire an orange portal onto the black mark on the wall that shows where the energy pellet hits. Place the blue portal on the ceiling above the pellet receptor, using the faint red light as a guide for the placement. The pellet should warp through the wall and come out of the ceiling the enter the receptor. The receptor activates a platform in the room that’ll take you to a third part of the Testchamber. Here you’ll need to make another momentum jump to get through the incandescent particle field at the far end of the room. First, place a blue portal on the wall panel that’s jutting out near the ceiling. The floor directly below that wall panel will not take an orange portal, so you’ll need to find somewhere else to build momentum. Look for a set of stairs along the left wall that lead to a side room. In the side room is a small pit into which you can fire an orange portal. Drop into the pit and into the portal to build momentum that’ll carry through as you launch out the blue portal you placed earlier. However, this momentum alone is not enough to get you over the barrier. As you fall towards the ground just in front of the incandescent particle field, fire another orange portal on the ground directly below you. You’ll warp again to the blue portal placed on the wall panel and, with your increased momentum, will have the energy need to launch over the barrier. Once over the barrier, you’re met with another barrier and a large incandescent particle field. You’ll use another momentum jump to get over the barrier, but this one is much simpler than the jump you just made. Simply launch a blue portal onto the wall panel far overhead, then place an orange portal on the ground beneath it. Drop through the orange portal to fall out of the blue portal above, then guide yourself back into the orange portal as you fall. The momentum will launch you over the barrier. This next portion of the room has a couple of angled wall panels, one of which is currently deflected the high energy pellet that bounces across the long room. First, note the black pock mark on the wall to the left that represents the second bounce of the energy pellet. On the wall to the right, place a blue portal on the same spot of the opposite wall. Since that sentence obviously makes no sense, check out the screenshots we’ve taken. Now place the orange portal on the black pock mark we mentioned earlier—it should be directly opposite the blue portal. The energy pellet will bounce off of the angled wall panel to the left, ricochet into the blue portal, come out the orange portal and then ricochet off of the angled wall panel on the right. Through this miraculous series of events, the energy pellet will be guided into the pellet receptor at the other end of the room. Perform a momentum jump just like before to jump back over the barrier in the center of the room. To the right is a long hall with a series of moving platforms that are now activated by the energy pellet receptor you just triggered. Look down the hall and fire a blue portal onto the wall, directly below the arrow that points around the corner. Place an orange portal on a nearby wall and peek through to spot an incoming moving platform. Quickly warp through the portals to stand on the incoming platform. Immediately look left and fire your blue portal onto the wall at the end of the hall, again just below the arrow that points around the blind corner. Allow the moving platform to move you back to the main room where you can again peek through the orange portal and wait for another moving platform. Step through the portal, onto the platform, and quickly look right to fire a blue portal into the room at the end of the hall. At your leisure, pass through an orange portal to reach the room at the end of the moving platform hall. This Testchamber’s not over, yet! In the next room, note a pair of lift platforms that’ll carry you to a pair of side rooms that overlook the main room with the bouncing energy pellet. In each of these side rooms is a button that opens one of two doors that reveal the energy pellet receptor. Both switches must be pressed in rapid succession in order to reveal the receptor as the doors are on strict timers and will quickly close themselves. Before you start pressing switches, take some time to prepare by placing a blue portal in the side room to the right and an orange portal in the side room to the left. Ride a lift platform to the side room on the left. Wait for the pellet dispenser to create a fresh pellet, then quickly press the switch in the first room. Immediately go through the portal to reach the opposite side room and press the switch there to fully expose the pellet receptor. You’re not finished, yet. Quickly look out into the main room and fire a blue portal onto the far left wall. There’s a small panel jutting out from the wall, which is where you want your portal. Special note: Aim the portal so that it’s at the very bottom of this small wall panel. Once you’ve placed the blue portal, quickly aim for the ground to shoot the orange portal on the black pock mark on the ground. The energy pellet should pass into the orange portal, out of the blue portal and continue through the opened doors to hit the pellet receptor. The receptor powers a lift platform that leads to the Testchamber’s exit
Walkthrough Tests 16 – 17
Test Chamber 16
In this Testchamber, you’ll be introduced to little turret bots (we call them turret buddies). Their laser sights will lock onto you and the turrets will follow by drilling you with machine gun fire. The challenge of this stage is to get through without dying by avoiding the turret buddies. You can sustain a couple of seconds of fire without being fatally wounded, so don’t be too shy about putting yourself in danger if necessary. The first turret you come across is facing away from you, letting you simply walk up and grab the turret. Toss the turret onto the ground and it’ll fall over sideways, permanently disabling it. In the hall beyond the first turret, you’ll see another turret buddy at the end pointing straight at you. Quickly fire a blue portal behind the turret, then warp through a nearby orange portal to disable the turret from behind. Further down the hall, you’ll come to an alcove with a turret buddy to the left. Stick your head out just long enough to fire a blue portal behind the turret, then warp through a nearby orange portal to drop the turret from behind. Further down the hall, you’ll reach a hall to your right that’s got walls that won’t take portals. The usual tactic won’t work here. While the dark-textured walls surrounding the behind-glass turret won’t take portals, the ceiling above the turret is fully portal-able. In fact, there’s a marker on the ceiling directly above the turret, giving you a target to aim your blue portal. With a blue portal over the top of the behind-glass turret, create an orange portal within reach and drop into it one of the weighted storage cubes that are near your left. The cube will fall through the portals and knock the turret buddy over. There’s another turret covering the same hall to the right. Pull the same trick here, creating a blue portal over the top of the turret and dropping in a nearby storage cube. If you run out of cubes, there are large boxes in an adjacent storage room that you can push into portals. With the hall cleared, follow it to a large room with two turrets (one facing you). Place a blue portal behind the turrets and warp to it to knock down the turrets from behind. A room just ahead is packed with a number of turret buddies all facing different directions, making it difficult to sneak up from behind. Fortunately, there’s also a nearby stash of weighted storage cubes in an adjacent room. Peek into the room of turret buddies long enough to place blue portals over the turrets, then retreat to safety and drop storage cubes through an orange portal. Once past that set of turret buddies, you’ll enter a hall with a mesh wall and a single turret buddy facing you. Quickly create a blue portal under the turret buddy (your portal gun will shoot through the mesh, as will the turret’s bullets), and then create a nearby orange portal to warp to the other side of the mesh. You’ll need to pull another warping trick to get around the next mesh wall—make sure you end up behind the turret on the other side of the wall so you can knock it down with your bare hands.
Test Chamber 17
In this Testchamber, you’ll need to carry the weighted storage (companion) cube with you from beginning to end. The first challenge drives home the point, forcing you to place the companion cube on the ground, use it as a step to the next level, and then pick up the companion cube to use it to reach the next level. Once you reach the top, grab the companion cube and take to the next hall. There’s a high energy pellet dispenser at the end of the hall and it’s firing pellets right at you. Thankfully, the companion cube will deflect the energy pellet away from you, letting you progress through the hall unharmed. The hall bends right and runs the opposite direction with a second energy pellet dispenser firing high energy pellets behind you. You can either wait for the pellet to get ahead of you before running down the hall, or move down the hall backwards to deflect the pellet as it comes out of the dispenser. When you reach the end of the second hall, place an orange portal on the wall where the black park mark is. The other side of the portal won’t be open yet, but you’ll be ready to catch one of the created high energy pellets. In the next room, look for a slanted wall across the room and to the left. Place a blue portal on the center tile of the slanted wall and, eventually, a high energy pellet should travel from the previous hall, through the blue portal, and into the pellet receptor on the slanted wall across from your blue portal. There are two more energy pellet receptors in the area, and each of them raises one of three platforms you need to escape the room. Drop down to ground level with the weighted companion cube in hand and go into the narrow hall to the left. There’s a very small room at the end of the hall with a energy pellet dispenser and receptor. To get the pellet into the receptor, hold the companion cube in the pellet’s line of fire to deflect it into the receptor. That takes care of the second receptor. Carry the companion cube out of the hall and turn left down the larger hall with a red floor switch in the center. Further into the hall is a second red floor switch that’s on a platform that’s barely too high to jump on. Place the companion cube on this elevated floor switch to depress it and open one of the two doors that lead to the third energy pellet receptor. Before worrying about the second red floor switch, exit to the hall to return to the room with the risen platforms. Look for a small wall panel near the ground that’s jutting out and place a blue portal in the center of the panel. Warp your way to the upper level of the room and backtrack to the long halls at the beginning of the Testchamber. There should still be one bouncing energy pellet in one of the halls. Place the orange portal on the black pock mark the pellet leaves on the wall to transport the pellet to the other room. Run back to the hall with the red floor switches and stand on the floor switch that’s not being held down by your companion cube—and make sure you crouch! The high energy pellet will eventually travel through the portals and should continue through the hall, past the two opened doors and into the receptor at the end of the hall. This raises the third and final platform in the previous chamber room. Grab your companion cube, warp to the upper level of the room with the platforms, and hop across the three platforms to reach the next portion of the Testchamber. Once in the next room, place the companion cube on the nearby red floor switch to open a door just ahead. Inside the door is a small switch you can press that temporarily opens an incinerator just outside the glass. Open the incinerator, then quickly go back to grab the companion cube and drop it into the open hole. With the companion cube euthanized, the Testchamber’s exit opens.
Walkthrough Tests 18 – 18
Test Chamber 18
To get across the first large gap, fire a blue portal onto the ceiling of the far end of the room, then create a nearby orange portal to pass through and drop to the other side of the gap. There’s a distracting side room on the left that leads to some stairs and other stuff—ignore this area and instead look to the right for another gap to cross. Again, you’ll have to fire a blue portal onto the ceiling that overhangs the ledge on the other side of the gap. However, be sure that your portal is as far along the left wall as possible (see our screenshots for more clarification). The only nearby wall for placing the orange portal is across a small gap. Place the orange portal just a bit below your level, then jump over the gap, into the wall to pass through the portals. There are a couple more levels to climb via the same jump technique—just place blue portals on the ceilings that overhang your destination, then drop through an orange portal on the floor to reach the next level. When you reach the second-to-last level, this technique won’t be enough to get you to the final ledge. To reach the top level of this room, place a blue portal on the wall panel that’s jutting out directly overhead. Look down from the edge of the platform you’re on now and you should see a platform below you onto which you should place an orange portal. Drop down into the orange portal to momentum jump through the portals and across the chasm to the top level of the room. There’s a floor switch on the top level, but for now you’ll have to ignore it. Continue into the next hall and press the red switch to open a section of wall, leading you to a large, open room beyond. There are many turret buddies guarding the room, and before you do anything else you should focus on taking them out. To do so, place an orange portal on the wall to the right, exactly centered on the black park mark left by the high energy pellets being fired by the rotating dispenser. To guide the energy pellets into the turrets, move the blue portal between the walls, exactly centered on the ends of the laser sights from the turret buddies. If both portals are perfectly centered, the energy pellet will travel through the portal and knock over the turret. Simply move the blue portal around to clear the room. With the turrets disabled, it’s time to focus on an energy pellet receptor that’s in the left corner of the room. To open the doorway that’s blocking access to the receptor, fire a blue portal onto the small wall panel that’s seemingly pulled away from the wall at a 90-degree angle (it’s also to the left, just in front of the receptor). Fire an orange portal onto a nearby wall and peek through—don’t walk through—the portal to press the switch that’s suspended over the pit below. Problem: The switch only opens the door to the receptor for a couple of seconds, and it takes longer than a couple of seconds to warp the room’s energy pellet that direction. Before opening the door, you’ll want to set the energy pellet in motion, moving it towards the receptor. Place your orange portal on the same spot you had it before, on the black pock mark on the right wall. Place the blue portal on a small wall panel jutting out at the far end of the room, to the left (see the screenshots for clarification). With the portals properly aligned, the pellet will warp and start a trajectory that’ll bring it into the energy pellet receptor. As soon as you see the pellet pass through the orange portal and out of the blue portal, quickly move your blue portal onto the wall panel just in front of the small red switch. Quickly place an orange portal on a nearby wall and peek through the portal just enough to hit the red switch on the other side and open the door to the pellet receptor. Once activated, the receptor should power a moving platform that spans the entire length of the room. Hop onto the moving platform when it’s near you and ride it to the other side of the room. When the platform stops, you’ll have to jump forward to reach the lower landing where you’ll find a small red switch that temporarily opens an angled wall panel across the room, back where you started. The angled wall panel will quickly retract back into the wall, so you’ll have to execute this next bit of running around very quickly. As soon as the angled wall panel is in position, fire a blue portal onto the surface of the panel. Place an orange portal on a nearby wall and warp through to return to the other side of the room. Immediately turn right and look down into the pit below. There’s a floor surface below that can shoot an orange portal onto. Create the orange portal, then drop down into the portal to fire out of the angled blue portal you created earlier. Your momentum jump should carry you back across the room to the upper landing. There’s a weighted storage cube on this upper landing that you need to transport back across the room. Wait for the moving platform to get near you, then jump onto the platform with the storage cube in hand. Ride the platform to the other end of the room and place the storage cube on the ground. Create a blue portal somewhere on the nearby wall, then ride the moving platform back to the lower landing at the other end of the room. Press the red switch to temporarily open the wall panel back by the storage cube, then warp through a nearby orange portal to return to the other side of the room. Grab the storage cube and quickly pass behind the wall panel before it retracts into the wall again. You’re now back where you were a while ago, and you should be near a red floor switch which you can now depress with the weighted storage cube. The switch opens a door across the room, which you’ll need to get to by portal warp. Place a blue portal on a wall near the door you’ve opened, then drop down to one of the platforms below you that has lightly colored textures that’ll take your orange portal. Be careful to not momentum jump through into the orange portal as you’ll likely launch yourself into a pit. Just casually step through a portal to reach the newly-opened doorway. The next room has a pretty tricky set of platforms to traverse. The first platform is low enough that you can fire a blue portal onto its surface. To the left is a deep pit at the bottom of which is the surface where you should put the orange portal. Make the long jump into the orange portal below to momentum jump through the blue portal you laid down earlier.As you fly upwards, orient your aim to move the orange portal onto the next platform, one level up from the first. As you drop back down to the first platform, aim your drop to go through the blue portal. Your momentum should carry again, launching you up so that you can fire your blue portal onto the next platform level. Once again, drop straight down through the orange portal below you to fire up from the blue portal on the next level, then look for an even higher level platform on which to shoot your orange portal. After this almost-the-last-one momentum jump, look for an angled wall panel that’s sticking out from the wall above. Fire your blue portal onto this angled panel to catapult yourself onto the final platform of the room.
Walkthrough Tests 19 – 19+
Test Chamber 19
In the first room of the Testchamber is a high energy pellet dispenser as well as a receptor, both positioned on the ceiling. First, place a blue portal on the angled wall panel under the pellet receptor, dead-center on the panel. Next, position the orange portal on the wall panel directly under the pellet dispenser. As soon as the pellet passes into the orange portal and out of the blue portal, quickly move the blue portal away from the slanted panel its currently on (move it anywhere). With the portal moved, the pellet should ricochet off the wall and bounce into the receptor. Go to the other side of the room to find a hall with an electrified track for a moving platform. You can wait for the platform and ride it through the hall, or you can warp to a stationary platform that’s further down the hall by firing a blue portal onto the wall above the platform. Pass through a nearby orange portal to reach the platform, then look left down the hall. You can spot an alcove to the left into which you can fire an orange portal. Pass back through the nearby blue portal to reach the alcove. The switch in this small alove temporarily opens a door in the hall, though the door closes too quickly for you to pass through while riding the moving platform. Press the switch and then quickly fire a blue portal through the doorway and onto one of the walls of the hall beyond. Peek through a nearby orange portal and wait for a moving platform to pass in front of the portal exit you just created to bypass the closed door. Think quickly, ’cause there’s another danger just around the corner. Further down the hall is a high energy pellet bouncing between the very narrowly spaced walls, directly in your way. Quickly fire a blue portal onto one of the black park marks on the wall to warp the energy pellet out of the hall. As soon as the pellet is gone, immediately fire an orange portal onto any nearby wall to make sure the pellet doesn’t bounce back through the portal loop and re-enter the hall.You have to act quickly again. Around the next corner of the hall is a wall panel jutting out into the path of your moving platform. Quickly fire a blue portal onto the left wall, just past the wall panel and positioned high. Then fire an orange portal onto the wall panel itself. As the moving platform brings you to the wall panel, move halfway through the portal to rest in between the two. When you can see the moving platform through the portal, jump down onto it to continue the ride.
The Escape Part 1
Now the moving platform is taking you to a large pit of fire that you, obviously, need to avoid. Look across the large room for a landing just past the fire pit. Launch a blue portal onto the wall over the landing, then place an orange portal onto the wall to the right, positioned slightly below you. Jump off your moving platform to pass through the portal and onto the safe landing. From here, you need to reach a high-above ledge that’s on the other side of the fire pit. To reach it, you’ll need to perform a momentum jump by placing a blue portal at the very top of the nearby high wall. Place an orange portal on the ground and pass through it to drop from the blue portal above. Carry your momentum back down through the same orange portal on the ground and you should momentum jump across the fire pit and onto the high-above ledge. Follow the hall to the left and go up the short flight of stairs to open a door along the catwalk. Through the door is another set of stair that leads to a locked gate. Place a blue portal behind the gate and warp through a nearby orange portal to get to the other side of the lock where you can open the next door to reach the next room. There are two massive sets of spinning blades in the next room. Warp to the other side of either blade wheel by placing a blue portal on the wall behind the wheel and passing through a nearby orange portal. Once through, look down the hall to the wide-open room beyond. At the far side of the room is a landing you can warp to. Just fire an orange portal onto the wall across the room and step back through the nearby blue portal to reach the landing Turn around and note the catwalk in the center of the open space—that’s where you need to get to, next. Place a blue portal at the top of the wall on the other side of the room, and then look through a nearby orange portal. You can jump through the portal to land on the catwalk below. There’s an open door to your right and, to the left, the catwalk leads to a more urban-looking area. Go left to that urban area. Look for a half-broken platform that’s above you and across the room. Fire a blue portal just above the platform, then step through a nearby orange portal to reach the elevated platform. Once there, look right for another half-broken platform. Reaching this platform requires a momentum jump; first, place a blue portal at the top corner of the wall to your left, and then place an orange portal on the ground below you so that you can drop through it and carry your momentum over to the second platform. There’s a stairway nearby that seems to lead to nothing. However, if you look down over a railing you can see a weighted storage cube transport tube that’s broken open. Drop inside and you’ll automatically be transported to the next area. Go left through the incandescent particle field and step on the red floor switch. Fire a blue portal through the opened door, then place an orange portal on a nearby wall to pass through and bypass the door. Drop into the hole at the end of the hall. To get past the large chain-link wall in the next room, look for a lightly-colored surface on a very low-hung ceiling panel. Place a blue portal on that surface, then place an orange portal on the nearby floor surface in the center of the ring you dropped into. Step through the portal to warp behind the chain-link.To the right is a pair of giant pistons that cycle up and down. Stand on the tallest piston and wait for it to move to up. From that vantage point, you can fire an orange portal on the top surface of the slab where you earlier fired your blue portal. With that portal in place, move around the room so that you can crawl under the slab to pop up through the blue portal on the underside and out the orange portal on the top side. From the top of the slab you can jump onto the horizontally-aligned piston in the corner of the room that’ll push out, letting you jump onto a ledge with a hand-scribbled sign in red. Follow the sign’s directly, going left to a dead-end. You can fire a blue portal through the mesh barrier, then backtrack to the previous room to drop back through the nearby orange portal and warp into the new area that was blocked by the mesh. Once you’ve wormed your way into the next small area, look for a ledge overhead. Face the ledge you’re trying to reach, then fire an orange portal onto the wall just right of the ledge. You should be able to pass through the nearby blue portal and jump diagonally to reach the ledge and continue. Continue through the hall to a room with a number of very tall pistons. Hop onto the center piston when it’s in the down position and ride it up. There’s a small passage near the ceiling that leads out of this large room. Fire a blue portal into the passage, hitting one of the walls inside. Next, drop back down to the ground level and create a nearby orange portal to warp into the hall high above.
Walkthrough Tests 19+ – 19+
The Escape Part 2
There are more pistons in the next room, though they’re not as tall. Look overhead for a small gap through which you can spot a lightly-colored ceiling surface. Place a blue portal on the surface, then look for a nearer ceiling surface just above the vertically-aligned pistons to your right. Place an orange portal on that nearby surface and then hop onto the piston just underneath your portal. The piston will push you up into the portal, warping you to the second level of this room and onto the top of the horizontally-aligned pistons on the next level. Be careful to avoid being crushed by the horizontally-aligned pistons on the second level and quickly hop to the lightly-colored platform on your left. Once here, look to the top of the left wall for a portalable-surface. Place a blue portal at the top of the wall, near the far corner. Place an orange portal on the floor and drop through to come out the blue portal above. As you fall down, aim yourself back into the orange portal to carry your momentum back through the warp. You should launch to the top level of the room. Move to the far wall on the top level and you’ll come to an area with a bunch of fast-moving, smaller pistons. Simply fire a blue portal through the mess of pistons and onto the wall behind them, then pass through a nearby orange portal to bypass the hazard. Next up is a set of two larger pistons. Simply wait for the pistons to both move down, then fire an orange portal through the hall and pass through the nearby blue portal to reach the next room. Once in the next room, look straight up to see a whole mess of pistons. Near the ceiling is a pair of pistons that come in from the walls on your left and right. Aim a blue portal just above these pistons, then shoot an orange portal onto a nearby wall. Peek through—don’t jump through—the portal and wait for the pistons to push outward. When they do, jump through the portal, onto the pistons, and you should be able to spot the portal-able surface on the ledge straight ahead. Fire a blue portal onto the inside of the ledge, then drop back down to the bottom of the room you’re in. Pass through an orange portal to reach the upper ledge with your blue portal. A scribbled wall sign directs you down into a gap that drops you onto a glass tube. Follow the pipe into a sewage-filled room ahead and then drop down onto another glass tube below. Follow the lower tube under a moving piston (crouch under it) and note where the piston hits when it’s pushed out. Place a blue portal directly above the spot where the piston hits, then crawl back under the piston along the glass tube. Place an orange portal on a nearby wall, just over the deadly sewage. Looking into the portal, you can see when the large piston to your left is pushed out. When it’s in position, jump through the portal to land on top of the piston. From there you can reach the next level of the room. Jump over the short railing ahead to drop down. Move through the next hall and onto the row of pistons in the room beyond. The pistons will pull away, dropping you into a room with three doors. Place an orange portal on a nearby wall and wait for one of the three doors to open, revealing a turret buddy that’s got you in its sights. Place a blue portal behind the turret and warp through the orange portal you placed earlier to knock over the turret from behind. The other two doors will open to reveal their own turret buddies—repeat the previous process to knock ’em out. In the room where the third turret buddy was there is a hole in the ceiling with a claw poking down. Step inside and, while hugging the left wall but looking right, jump so that you can just barely find a portal-able surface inside the hole overhead. Shoot an orange portal into the room overhead, then warp through a nearby blue portal to reach the next area. There’s a large glass tube near the ceiling of the room that you need to get on top of (if you’re not already there). Create a blue portal just above the tubing and warp through a nearby orange portal to land on top of the glass tube. From on top of the tube, you can jump a small gap to the floor platform. There’s another scribbled sign on the wall that directs you into a hole. Drop down behind a turret buddy and knock it over, then continue through the small crawlspace to a room beyond. As you exit, look directly overhead for a slanted wall panel that’s facing slightly upward. Place a blue portal on the top surface of this slanted panel, then create a nearby orange portal to warp to the top of that slanted wall panel. From your elevated position, look down and create an orange portal directly below you. Jump off the ledge and fall into the orange portal below to momentum jump through the slanted wall panel and onto an upper walkway. Continue forward to another sterile office-type room and through an incandescent particle field. In the room just past the particle field is a small red switch. Press the switch and a small bot in the next room will activate, target you, and fire a rocket. Don’t be too alarmed, as that’s actually a good thing. The rocket the bot fires will destroy the glass wall that’s in your way. Hop to the other side of the bot and goad it into shooting another rocket at you to destroy the second glass wall in the room (be sure to dodge this rocket) Hop through the now-destroyed glass wall and look for a doorway on the right. Before leaving the area, place a blue portal on the wall just left of the doorway. Follow the hall beyond the doorway to red-lit room with another glass wall. Place an orange portal on the wall opposite the glass and you should be able to see the rocket bot through the portal. Goad the bot into launching a rocket through the portal and into the glass wall. Go through the destroyed glass and note the glass tube on your right. Move your orange portal to the ground directly under the glass tube. Step through the portal and goad the bot into firing a rocket, then step out of the way to let the rocket destroy the glass tube. A weighted storage cube will drop out of the broken tube. Pick it up and use the cube as a step to enter the small crawlspace to the left. The crawlspace leads to a bit of a dead-end, a narrow area with a spinning blade in the floor. However, you can see past the spinning blade walls that are portal-able. Fire a blue portal onto one of the walls behind the blade, then crawl back out of the narrow space to pass through a nearby orange portal and into the next area. You’ll need to use portals to traverse this relatively simple sewer line, warping back and forth between platforms that are not covered in seage. When you reach the end of the sewer line, look over head for a mesh grating you can shoot a blue portal through. Place an orange portal nearby and pass through to reach the level above you. You’re now in a large trench that you can easily warp out of with an orange portal on a nearby wall and a blue portal placed on the level above you. Once you’re up top, try to take cover. A bunch of walls in the room drop down to reveal turret buddies all aimed at the center of the room. Systematically eliminate the turret buddies by creating portals behind them, warping behind them, and knocking them over. When the room’s cleared of all turret buddies, look for the turret buddy alcove that’s placed highest in the room. Throw a blue portal into the alcove and warp to it by way of a nearby orange portal. Once in that alcove, look directly across the main room for an angled wall panel that’s facing slightly upwards. Place a blue portal on the top of this surface.
Walkthrough Tests 19+ – End
The Escape Part 3
Now look straight down and fire an orange portal onto the ground below. Drop through the orange portal to momentum jump out of the blue portal, flinging yourself across the room. This momentum jump isn’t enough to get you where you need to go, but it will put you high enough so that you can target the top surface of another angled wall panel that’s positioned even higher in the room. As you fly from the first momentum jump, hit the top surface of this second angled wall panel with a blue portal. When you land back on the ground, go back into the orange portal you placed on the ground earlier. After warping to the blue portal you just placed, you can drop down through the orange portal once more to build the momentum needed to fling yourself across the room and onto the ledge high above. Once on the high ledge, move forward quickly to get behind a pair of turret buddies that drop in from the ceiling. Knock ’em down, then look overhead. You need to rocket yourself up through the hole in the ceiling to reach the ledge above. First, place a blue portal on the ground directly under the hole. Then backtrack towards the large room you just came from. Create an orange portal on the ground, far below, then drop down into it. You’ll build a lot of momentum that’ll carry through as you come out the blue portal. As you fly up the overhead hole, aim yourself to land on the next platform. There’s another level above you that you can simply warp to with a basic portal hop. Follow the catwalk at the top level and you’ll go through a number of doors that you need to open. Eventually, you’ll reach the final room of the game.
Boss GLaDOS
It’s here where you’ll battle GLaDOS to complete the game. At first there’s nothing to do but stand around and listen to GLaDOS taunt you. Eventually, a piece of the machine will drop out of GLaDOS. Pick it up and walk it to the back of the room where you’ll find an incinerator. The incinerator is closed, so for now just place the machine piece on the ground next to the incinerator. Place a blue portal on a nearby wall, then turn left and fire an orange portal on the wall next to a small stairway. Warp to the stairway and enter the small room at the end of the walkway. Press the red switch inside the room to temporarily open up the incinerator. Quickly step back through the portal to return to the incinerator, pick up the machine piece, and drop it into the incinerator before it closes up. GLaDOS reasonably gets upset. This is where the fight really begins and a countdown timer starts tickin’ towards your death. GLaDOS also summons a rocket bot that, like before, actually works out to your advantage. Place a blue portal on the ground directly below GLaDOS and then place an orange portal on a nearby wall. Goad the bot into firing a rocket at you and then dodge it so that the rocket warps through the portal and hits GLaDOS instead. When you hit her, you’ll knock off another piece of the machine that you need to toss into the incinerator. This second machine piece bounces up onto some piping that’s out of reach. Place a blue portal behind the piping and peek through a nearby orange portal to grab the machine piece. Move it near the incinerator and you’ll again have to go through the dance of opening the incinerator via the red button, warping back to the incinerator and quickly tossing the machine part inside.There are two more pieces of machine to knock off of GLaDOS and throw into the incinerator. One piece bounces up to a platform way overhead. To reach the platform, create a blue portal near the ceiling and step through an orange portal in the floor. As you fall out of the blue portal overhead, aim yourself to drop back through the orange portal in the floor. Your momentum will carry through and fling you onto the platform where you can grab the machine piece. The final machine piece bounces up and sort of hovers in mid-air. To grab this piece, place a blue portal on a nearby wall, near the ceiling. Step through a nearby orange portal to drop out of the blue portal overhead. As you fall, grab the machine piece on your way down to knock it out of the air. Throw the last piece into the incinerator to finish GLaDOS and the game.
Hidden Radios Guide
In portal there are 26 hidden radios in the game. If you get them all to specific spots in the game you will get a achievement for all your hard work. Once you find a radio do this to get closer to Getting your achievement. Take the Radio and move it across the room near the place where it needs to catch a signal, you will start hearing noise and like signal interference, when you start hearing that, move a while in the circle, up down, left right, until you catch whole signal (on few segments radio needs to be set in air or in same position just level below or above in the map and before you can get this achievement you must complete the game first than start over again and chase the radios. I am not sure about this step because I played the game before while trying to get the achievement but some people reported that they can’t get the transmission before they complete the game first so just finish the game first, anyway here’s are where all the hidden radios are in the game.
Radio #1
As soon as you wake up the radio is right there in front of you, you can’t miss it as you are locked in this room for a whole minute. Press E to take it with you (remember that sound because when you hear it, that means radio is near you). Pass the door and you will catch signal at place where you should place a cube. Once radio is in right position red light will change to green and you will hear something that sounds like Morse code.
Radio #2
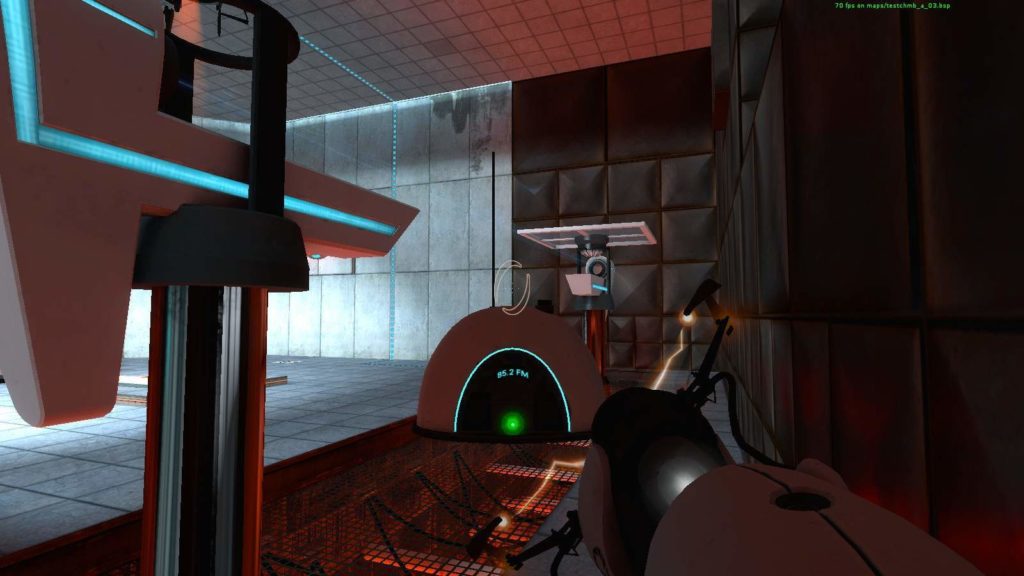
This one is easy to miss. When you go through elevator and passage where room 01 sign is don’t fall down, stay on the edge and look to the right. Radio is on the camera. Take it through the portals and you will catch signal in middle of the room near the doors.
Radio #3
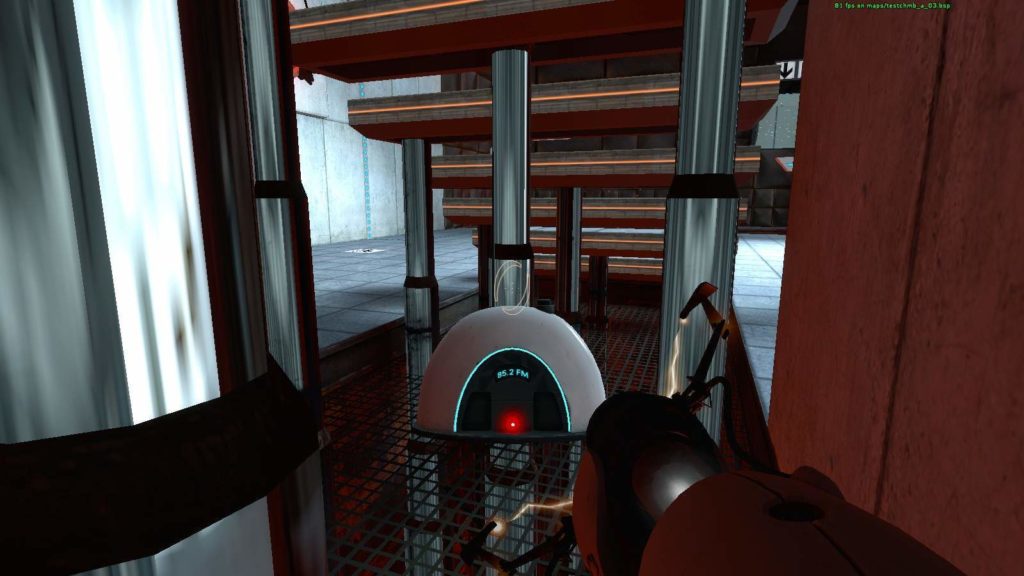
This one is high up, so to grab it you can open a portal where it is in the photo and jump into the portal to grab it. Than take it down in middle of the room and you will catch signal.

Radio #4
When you pass the hall, look to the left and up there is a camera, radio is on there. Open a portal to destroy camera and radio will drop down to get it. This one get’s signal in air so when you pass first portal you will start hearing signal, open a portal across the orange one up in the wall and take radio through portal.

Radio #5
Into the elevator and to the next section. You can’t miss this one it falls down with the cube you need to open the door. Pick it up and take it back to the elevator.
Radio #6
There is a section where you have to set 2 cubes to open the door, radio is right behind the doors so you can’t miss it. BUT don’t go through the doors it will close and you failed. Instead open a portal to get radio to you. And take it back to the place where the last radio was.
Radio #7
This one was a bit hard to see. In next section take a look up in the ceiling from where those balls are fired. Radio will stand on the edge and you will have to open a portal on the roof next to it and try to grab it. Then go to the elevator you activated and it will catch signal.

Radio #8
Next when you come to the stairs, don’t continue, go crouch behind the stairs to get to the radio. And take it to the position where you activate a moving platform.
Radio #9
When you come to the moving platform over radioactive water, the radio is just below it. Once you activate it stand on the it and grab the radio. Then you have to take it back to the start.

Radio #10
At the wall where a disintegration field is you can see a radio standing at top. I took a cube jumped and pushed it over the wall. This is a good place to save and be careful if the radio touches this field it will be destroyed. Open the door and take it near there.
Radio #11
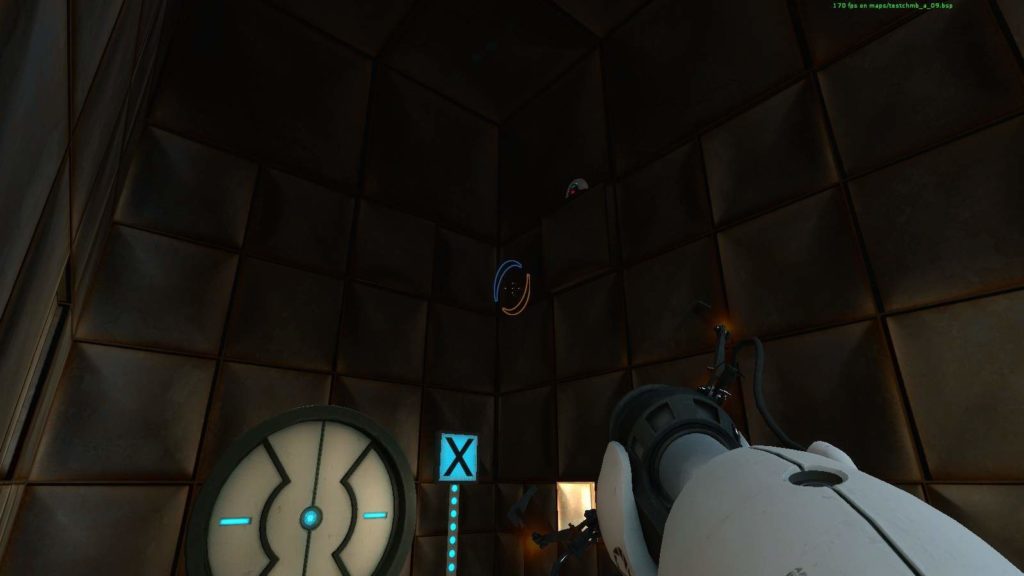
You will come across the test chamber where you need to use portals to jump high. Take a look at the left near the one dot sign there will be a radio on the wall. Go up the stairs and near the edge you will get the signal.

Radio #12
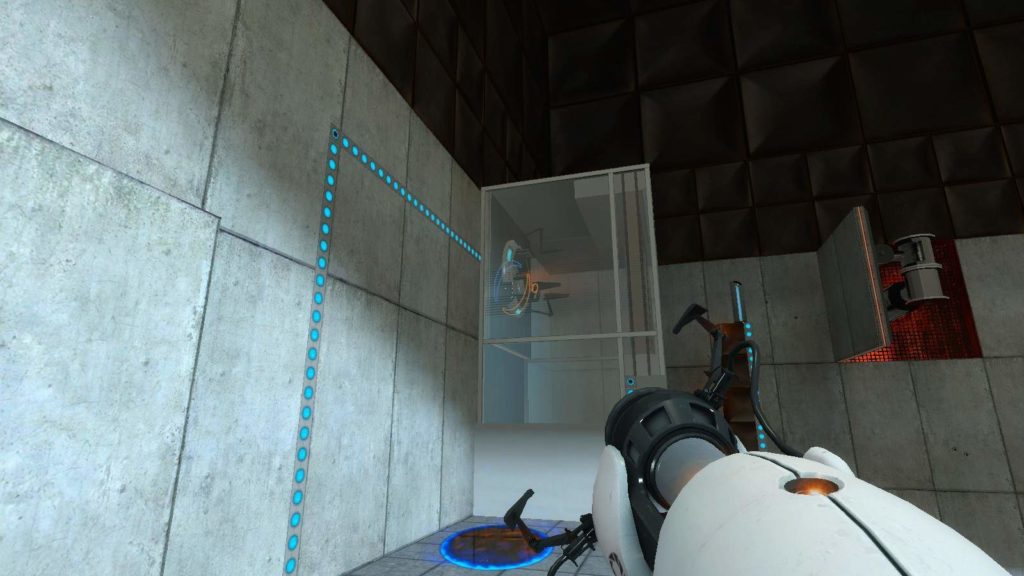
Here is where you get second portal gun. Once you get 2nd portal gun there is a button that open’s the door to go further. Radio is at the edge of the door, so put a portal near the door and grab the radio. And set your radio at the place where you got the 2nd portal gun.
Radio #13
There is another jumping area to go up, as you jump wall will expand and move with hydraulics. Jump all the way up, than try to drop down on the wall and radio is on hydraulic bars. Go back down to the area where the cube opens the door and you should get the signal.

Radio #14
At the start of the level you open a door with a cube and in the next room you need to activate a platform. When you activate the platform, jump on the cube and on the wall if you are lucky you can grab it and take it back to the start of the level.

Radio #15
You will come into the large room, on the right, there are some doors you need to open, on the left is some big gap, which turns into the stairs. Go to the right and on the wall near the doors you will see the radio, put one portal, and another into the gap to jump for it. Once you open the doors you will catch the signal between 2 platforms moving up and down into the radioactive water.
Radio #16
Right on the beginning you will come across force field, look up at the wall cube that’s a bit out from the wall, behind it on hydraulic is a radio. Take it back to the start of the map.

Radio #17
For this you have to be fast. In the room where you have to use portals to click 2 switches fast, behind those 2 doors that open is a radio, use portals to press the switches and when the doors are open jump inside and grab the radio. In the same room near the elevator you just activated, you catch a signal.

Radio #18
You will come in the room with a lot of turrets, there is a place with a lot of cubes, radio is standing on them, you can’t miss it. Take the radio in the passage behind the open wall into the room where Help is written.
Radio #19
You will have to activate 3 ramps to get to the next section, once the third ramp is lifted up, the radio will be down there. Take the radio near you and put it near place where you destroy companion cube.
Radio #20
Right at the start you will have to jump across the radioactive water. There is small opening in front of you go pass that and you will get to the radio. This have to fly high. When you hear the sound that you are near the location where radio should be. you have to send the radio through a portal you put right above where you are and in mid air the radio will catch the signal.

Radio #21
This one you can easily miss. It’s up hidden and i didn’t hear the sound of the radio. You pass the wall opened by a button where there are few turrets and cube that you need to get to go to the next section. In the place where you need to open a door for the ball to get inside, a radio is up there.
Open a portal right next to where the radio is and behind you, down below is a floor where you can open another portal to jump up to the radio. Then you can take the radio over the ramp to the switch.
Radio #22
When you got the cube and on through the doors. On the left is a huge drop down, and in a corner is another radio. Use the portals to get radio to the same level where you are. Leave the radio for now, jump all the way up to the end of the map, and use portals to retrieve the radio up there.
Radio #23
Another one you can easily miss. Now you are near the end of your journey and going into the fire. Take a look back into the fire for a radio. It will be on the right side of the wall if you are looking from safe zone, or on the left side if you are looking from the moving platform. Use a portal to grab the cube. It’s a good idea to save, as you will jump and go through few portals and you might lose your radio. When you jump up, pass the big ventilation fans, jump on the platform, on one side is place where you should go, on the other side are just some rooms. Take the radio into those rooms.
Radio #24
Continuing through your escape journey just when you come into the room where are 5 big hydraulics going up and down. In that small passage on the right are some stairs and behind a stairs is a wall where you can shoot a teleport. go there and in small vent you will get the radio. Take the radio all the way up, you will come in area where 2 pumps are pressing the wall moving up and down, and 2 pumps pressing wall moving horizontally. Go to the upper platform and you will catch a signal.

Radio #25
When you come into the room with some broken turrets, you will see the radio on the table. Take the radio with you, continue your journey, and when you drop on a turret where wall will open and on the wall you will have writings like “Over Here”. go there, not up, and you will see small ventilation opening. Signal is there.
Radio #26
And finally last one. Once you are in the large room with a lot of turrets. you will have gap with muddy water. Go into the gap and circle around. You will find the radio on a vent there. Kill all the turrets and you will need to jump up to the top of the room. it’s easier to leave radio at the bottom (not in the gap) and once you are at the top. You will see the place with 2 massive electric engines. Take your radio to the engine and catch the signal.
That’s it where to find all 26 Hidden Radios. Let me know if you can not get one and I will try to help you
Storyline
This is basically what happens in Portal written entirely by me.
Chell wakes up from being asleep and is told to do these tests by a voice coming from a robot called GLaDOS. Chell completes a few tests and in the next test chamber she finds a portal gun she grabs the portal gun and uses it to finish a few more tests. Once a few more tests are done then she finds an upgrade to the portal gun so now she can make portals to solve the tests. After 19 tests GLaDOS tries to put Chell on fire but of course she escapes. GLaDOS tries to trick Chell into coming back for some cake but Chell is smarter then that. She secretly sneaks up to where GLaDOS is. When Chell finds where GLaDOS is she tries to kill her but GLaDOS starts to fill the room with poison gas. Chell defeats GLaDOS before she can fill the room with poison gas. Then the game ends.
Be the first to comment