
This guide shows a good safety and graphics settings for many Nvidia video cards with specifications between a Geforce GTX 1650 Super to a Geforce RTX 3060. It contains photos and instructions for good performance settings.
Table of Contents
Safety Setting Menu
To open the safety settings menu, open the launch pad by pressing the menu button. (ESC on Desktop)
Then Click the gear on the bottom right corner. Once in the small settings menu, click the arrow within the square in the top right corner of the menu.
To get to the safety menu, click the shield beside the gear on the bottom of the menu.
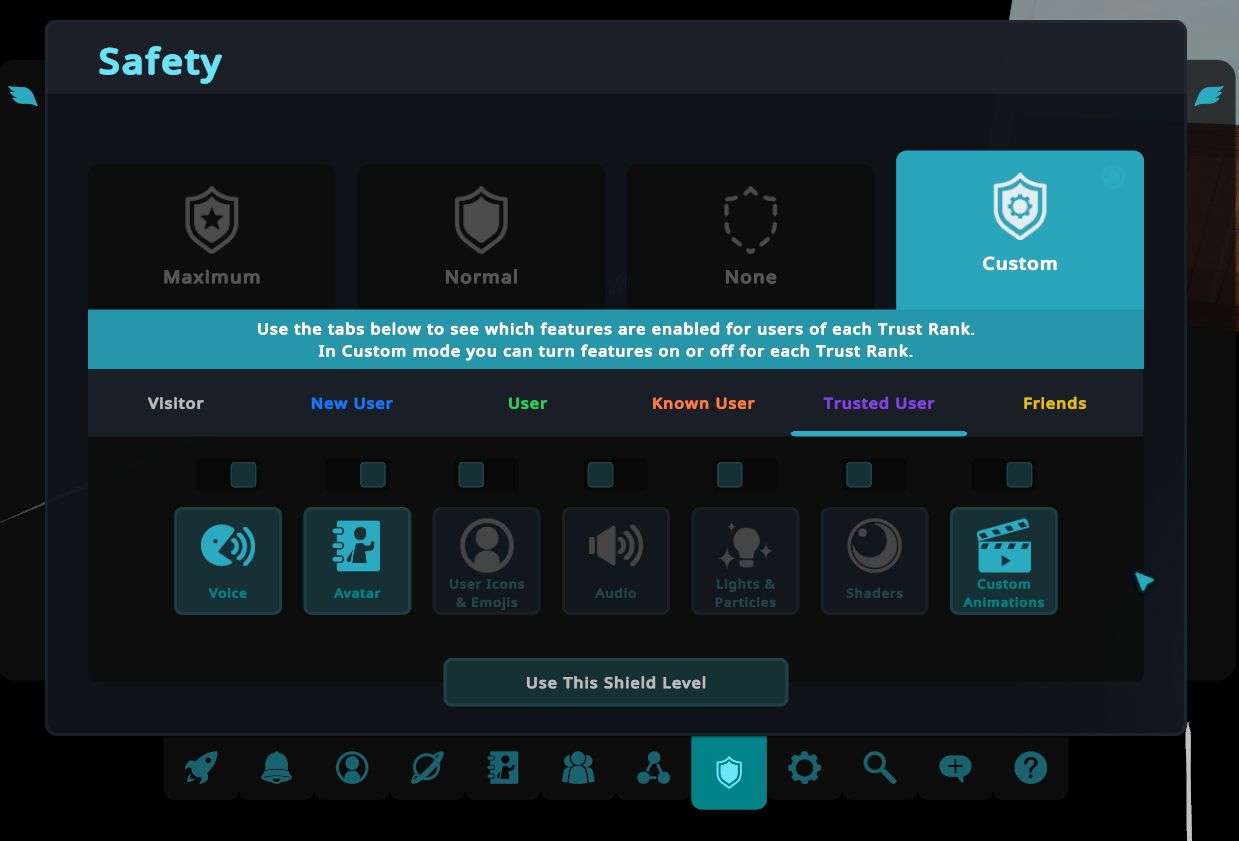
Press “Custom”. Then adjust all 5 trust settings to be the same as the following image where voice, avatars and custom animations are on, and user icons & emojis, avatar audio, lights & particles and shaders are off.
Once all 5 match the image, click on the yellow “friends” options and choose whether to show shaders or not. Once all 6 settings have been changes, press the button below where it’s written “Use this shield level”.
Manually Showing and Hiding Avatars
To manually show an avatar on keyboard press ESC and then press and hold shift and then with the mouse, click on an avatar you want to show, then scroll down to click the eye ball without the diagonal line on it.
If you don’t like the avatar you see, you can either hide the avatar by scrolling down and clicking hide globally or pressing the eye with the diagonal line. Alternatively, if you see a fallback and want to see the avatar that’s higher than your set download size, you can press the eye ball and then once it’s downloaded, press the shield button beside the eye with a diagonal line in it.
Graphics Settings Menu
(For Geforce GTX 1650 Super to RTX 3060)
Here are the Graphics settings I use often.
To get to the Graphics menu, open the launch pad by pressing the menu binding on your controller or ESC on your keyboard & double click on the gear on the bottom right corner of the menu.
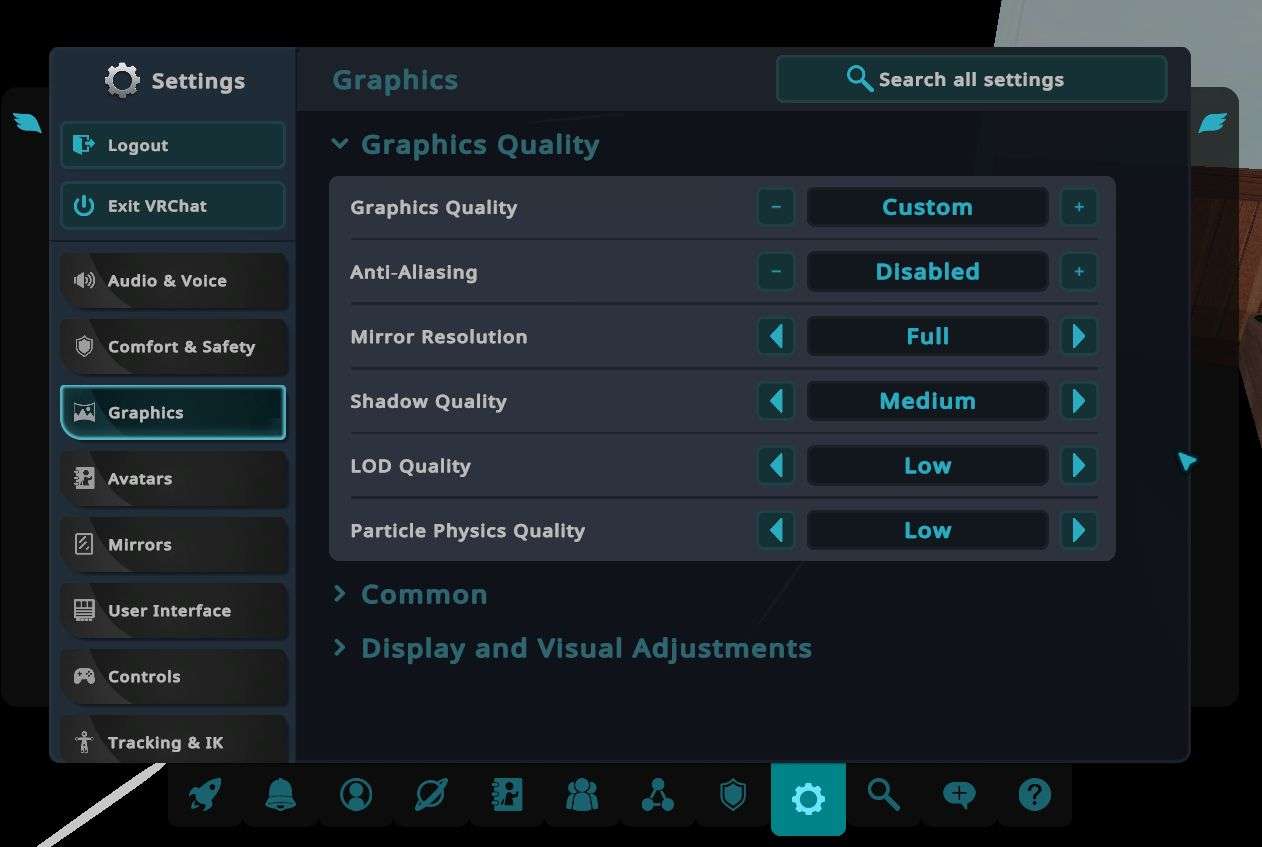
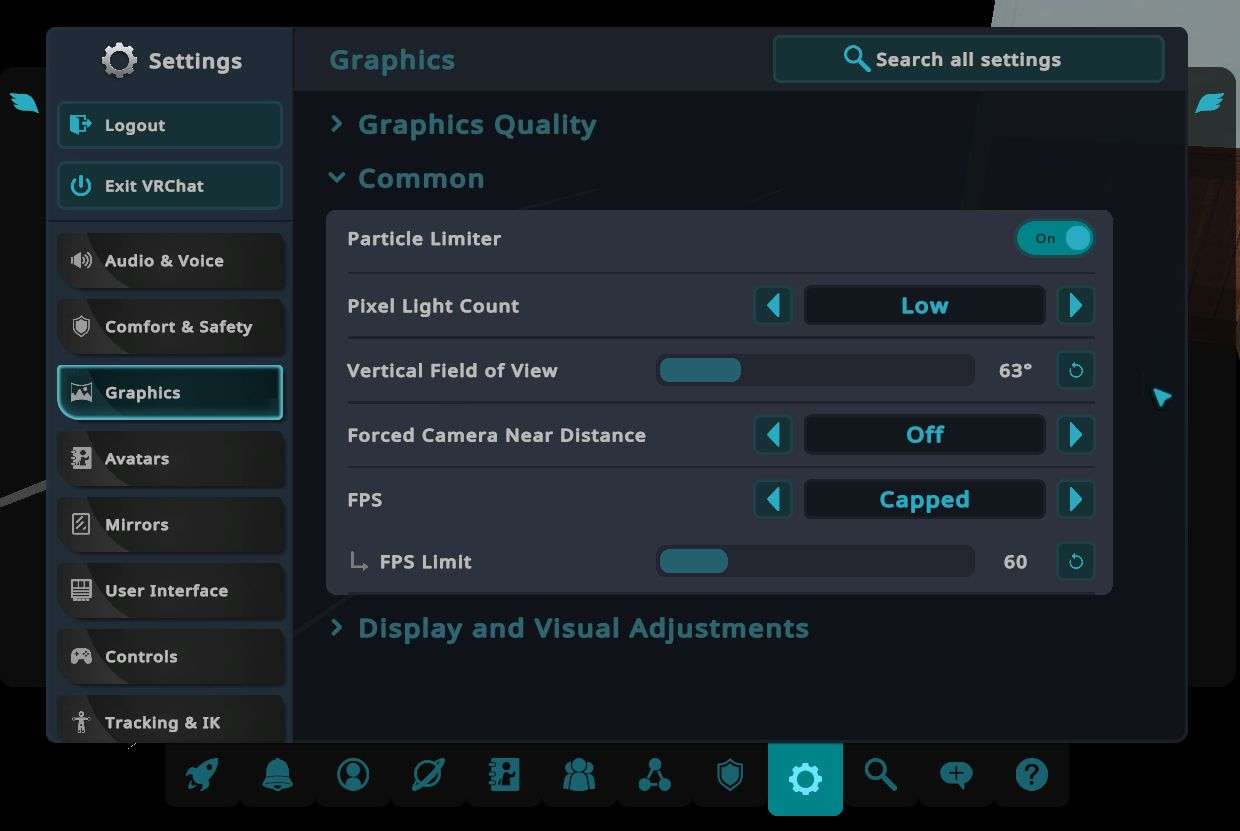
On the left click “Graphics”. Adjust the settings like these screenshots to get optimised performance, adjusting the FPS limit to the Hz rating of the monitor if on Desktop and the Hz rating of the headset if in SteamVR & adjust the bloom and brightness for your comfort. :
Graphics:
Particle Limiter & FPS Limit:
Game Brightness & Bloom Intensity:

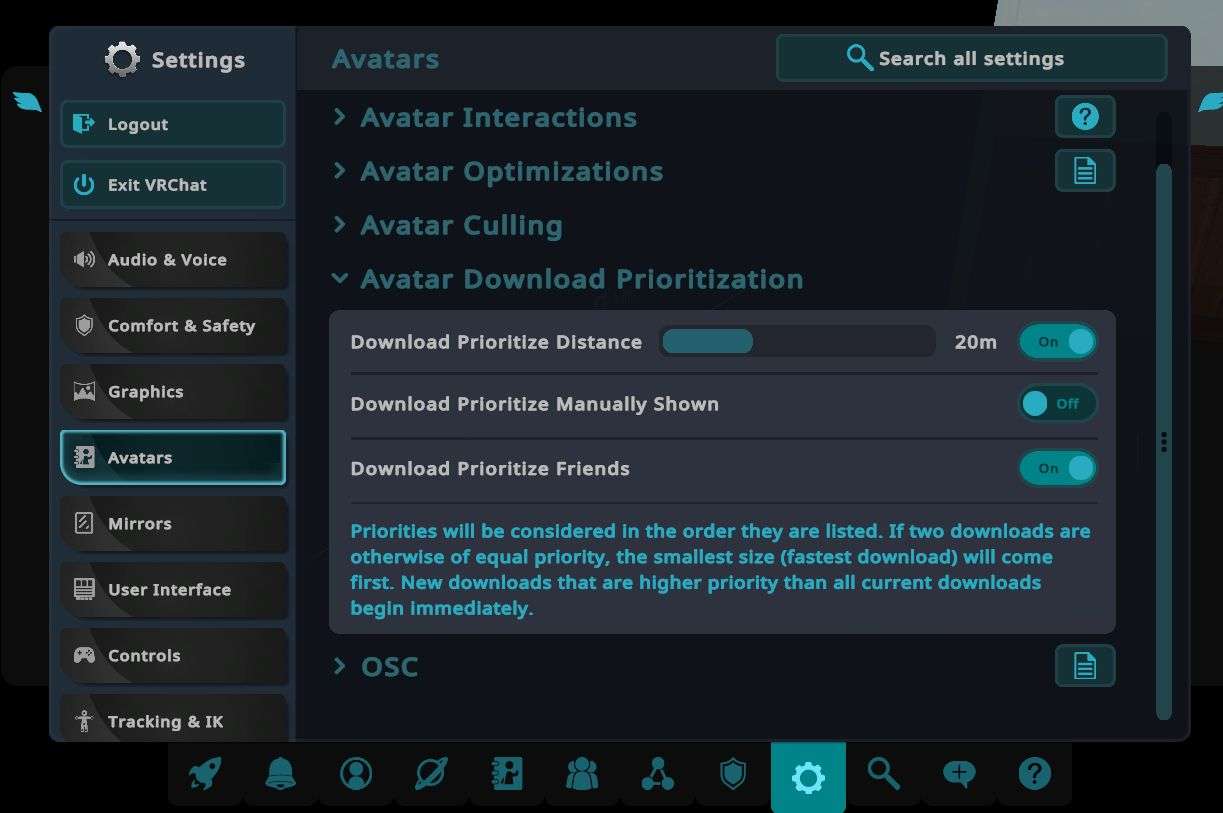
Max Avatar Download Size, Avatar Culling & Avatar Download Prioritization
To customise your performance and experience, you can change what’s called avatar download size, avatar culling & download prioritization to improve at what distance in virtual meters the game renders/downloads avatars/characters.
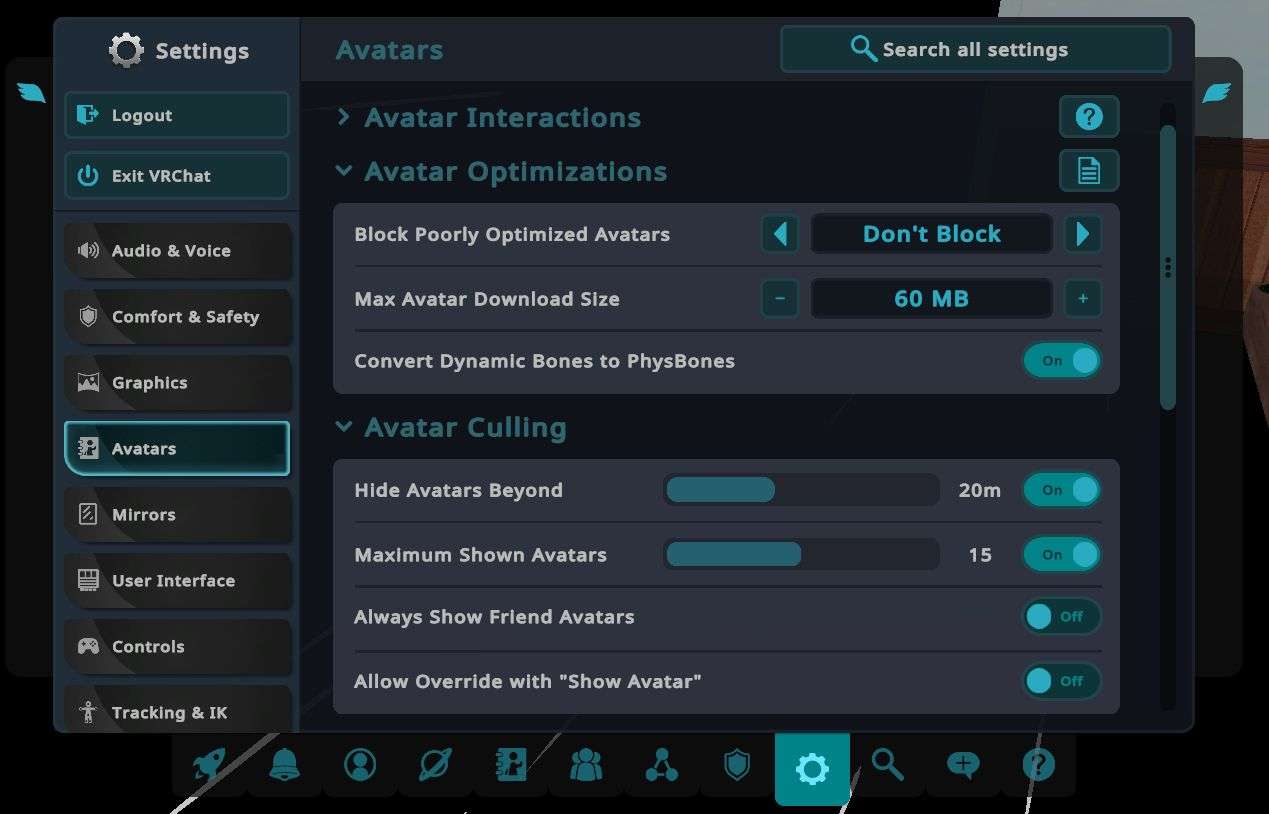
To do this, open the settings menu by opening the launch pad & double clicking the gear button on the bottom right corner of the menu and then clicking avatars and scrolling down to avatar culling and Avatar download prioritization. I’ve found that on a GTX 1650 Super and a RTX 3060 that the following settings allow for good performance:
Avatar Download size & Avatar Culling:
Avatar Download Prioritization:

Be the first to comment