
This guide should help teach you the tricks and techniques necessary to beat the AI at the hardest difficulty in a more-or-less straight fight.
And if you’re not ready for Impossible, I hope you can learn a few things to make the complex world of Gladius a little more accessible. After all, you’re just a simple Guardsman in a universe full of monsters; you can use all the help you can get!
Table of Contents
Introduction
I have a soft spot for the Astra. They remind me the most of the little plastic infantry and artillery figures I used to play with as a kid. And in the lore, they are just regular men and women caught up in the madness of the eternal war of the 42nd millennium; I can really sympathize with their day-to-day support of each other during trying times while tangled in a remorseless bureaucracy.
Also, tanks. Lots of tanks.
“Commissars too much invested in their zeal, and too little in their troops, often find themselves dying heroically for the Emperor. Sometimes even at the hands of the enemy.” (Inspired by musings of Commissar Cain.)
Faction Traits
The Astra Militarum are probably the most difficult to learn of the four factions in the base game, and they are slower to develop than the others.
Once in full swing, however, they can create and sustain the largest tank armies in the game.
Advantages
“Sarge, what are those things coming after us?”
“Dunno. I’m pretty sure they burn when you dump promethium on them, though.”
- Cheap infantry. The base infantry units are among the least expensive in Gladius. Once upgraded, they are useful sweepers throughout the game.
- Unit variety. The Astra have an answer to everything…there’s strong air units, tough infantry, solid anti-air, and of course, tanks. They are also the only faction with a dedicated psyker building.
- One really great hero. The Tank Commander is effectively a powerful Leman-Russ tank available at Tier 3 and highly mobile, heavily armored, and a force multiplier for other tanks.
- Solid top-tier units. Although not quite a stomper at the level of the Greater Brass Scorpion, Baneblades are great linebreakers, equipped with multiple attacks. Their smaller cousins the Rogal Dorns can support the Baneblades throughout the game.
- Edicts. Used properly, edicts are effective and inexpensive ways to hugely boost your economy.
Disadvantages
- No infantry healers. Although some infantry have a self-heal ability, there aren’t any units designed just to mend wounds.
- “Well, I got the fake leg on Elaris Prime. And it was Orks took my right eye. And that hand is probably part of some Tyranid somewhere. But my heart, well that’s all mine.”
- Weak infantry. The Astra’s best isn’t great. The Tempestuous Scions require Tier 4 research *and* require a DLC, but they are only about as good as a starting-level Space Marine, and make easy fodder for late game enemies. Bulgryns are tough, but a complete lack of ranged power leaves them helpless to many opponents.
- No passive production bonuses. Unlike Necrons, Orks, etc., there aren’t any technologies which make your buildings better or increase your city size limits passively. Edicts can solve these issues, but only with good planning and plenty of influence.
- Two low-functioning heroes. The Primaris Psyker has 6 health and little armor, but his powers require him to be near the front. Easy prey. The Commissar has some synergies that are interesting, but since he’s infantry-focused, he’s working with weak material.
- Poor mobility. Astra units don’t have access to teleports, Webway gates, or orbital drops. The units themselves are inherently slow and don’t have Chaos-style boosts available. Expect relatively long supply lines.
Getting Started
Starting Settings
We’ll use the settings mentioned in the general guide, with a couple of comments. Make sure there’s plenty of “Tropical” environments, as food will be a significant limiting factor otherwise.
Maximum neutral creeps will slow down the AI; for the Astra, neutral units are how you’ll build experience for your heroes and other units.
Extra Jokero camps mean that you can buy items reliably, and increased arctic and temperate terrain will assist with research and food production, respectively.
Should I Play the Story Quest?
Ah, probably not. This is the only faction where I recommend turning off the quest option. On the surface, this seems silly…the rewards are some of the best, giving lots of units, unique upgrades, and relatively simple challenges.
Unfortunately, there’s absolutely no “off ramp.” If you even do the first couple of tasks, you’ll be unable to play the game without doing the entire story (unless you cripple your influence production later). Most likely, you’ll end up finishing the story before you’ve even properly engaged with your AI opponent.
Co-operative Play
The Astra Militarum makes a middling partner in co-op. As mentioned above, their ground units don’t have any rapid transport options to reach out to help allies under siege. However, they do have three excellent aircraft, which can quickly move to boost a stressed defense. Support isn’t bad…while they can’t heal friendly infantry units, they can field a lot of inexpensive Enginseers to set up vehicle repair points for allies.
“I think I’d like our mechanic more if she didn’t have tentacles.”
“Trust me, rookie, you’ll be a lot less picky once your Chimera’s half-destroyed by Ork raiders.”
If playing co-op, make a beeline for your ally’s territory so that you can have a corridor to transport units for mutual defense, and consider building cities towards your ally to close the gap. Once you have a clear path, you can set up tank convoys boosted by the Commander’s Full Throttle ability. Alternately, pair up with an ally with mass transport capability such as the Tyranids, Eldar, or Orks.
Starting City
Chief Architect Hedran: “Well, Techpriest, this is exciting. How do you think we should plan our new hive city?”
Techpriest Alana Beta-87: “May I suggest using the same plan as the previous 683 hive cities?”
Architect: “Could you have given a more boring answer?”
Techpriest: “Consistency is beauty, Chief Architect.”
As always, this is one of the most important decisions in the game.
The ideal starting city will be a little unlike most other factions. You still need the research, and you need it badly, so make that a high priority.
However, now you might diverge a bit from the usual path. The Astra’s strong suit is armor! So strong, in fact, that I use infantry only as an afterthought. For that, you need ore, and it’s equally great to have a production boost (the orange cogwheel)
Food is less important, and can be delegated to your second city.
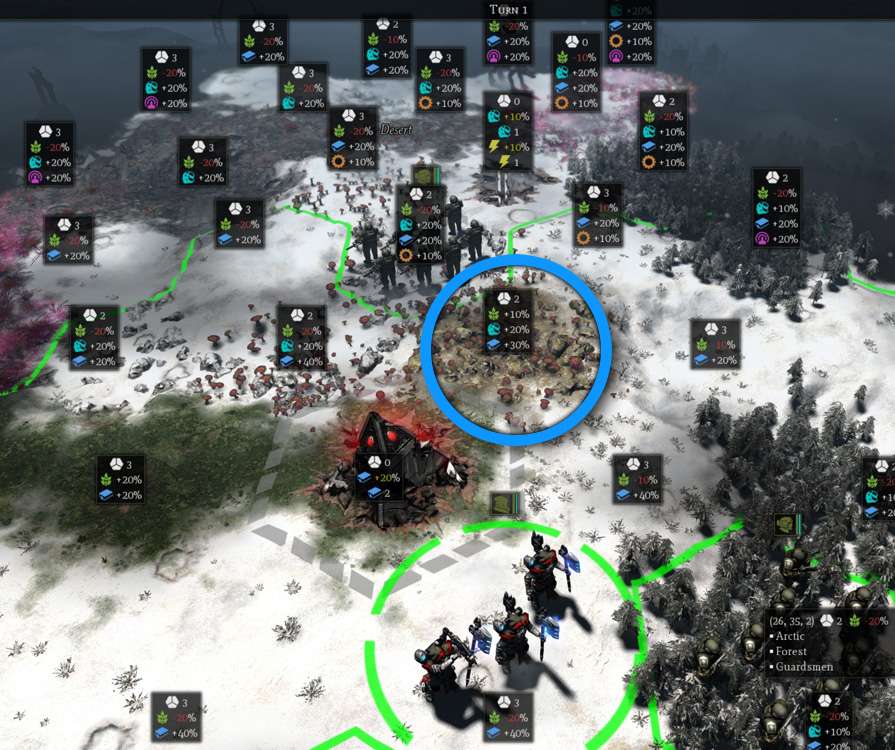
In this example, on turn 1 I’ve selected a spot for a starting city. (Click on the image to enlarge it). The Enginseers are in the green circle, and my city site is in the blue circle. Why did I select this spot?
- It starts with a decent research bonus, and has access to a tile with +40% (the tundra square) and a Ruin of Vaul which will boost that to +60%.
- Because it’s on a tundra, it avoids the glacier food penalty but still offers a 10% research boost.
- The tile contains rocks, which add a 20% production increase, and brush, which adds an additional 10% food. Note that these features reduce the number of potential buildings from 3 to 2.
- It’s next to two tiles with production bonuses, perfect for unit buildings.
- There’s no water or cliffs to limit expansion.
Second City
It’s never too early to be planning your second city. The city centers have to be five tiles apart, and that’s plenty. In most cases, it’s actually better to have all of your cities close together so they can support each other and don’t draw the ire of too many neutrals.
By the end of the game, ideally your urban areas will have merged into one mega-city. How appropriate, right?
Early Game
Early goals are to have a second city by around turn 20, and begin producing units. Once both cities are built, you’ll be looking for a third.
Build Order
Generally, it’s safe to follow the build order suggested in the “General” strategy guide, but there’s a few tweaks. I usually take a more aggressive path toward research, and I’m less inclined to build early heroes. The big difference is that your first units will be mechanical, not infantry.
First, acquire the nearby Ruin of Vaul (and I do recommend starting next to one), giving a small, no-cost quick research boost. Now, acquire the best research tile you can (the +40% tile in the example above), and build the Officio Tactica (the research building) on it. Now build another research building. Seems like overkill? For most factions, having your research output equal to the turn number is “par.” This won’t be a problem for a long time!
Now, given the flood of research (probably in the 20s by now), you probably have enough to have acquired the Tier 2 technology Cult Mechanicus. Build this building on the same tile with your research buildings because it produces another 4 research per turn.
This crazy research focus has some advantages and disadvantages. You’ll be discovering a new technology every turn from the first 2 or 3 tiers, so you’ll quickly have access to all the necessary infrastructure buildings (for population, loyalty, etc.). The downside is that you’re running low on free population to staff these buildings.
Remember to put population buildings (Hab Blocks) and loyalty buildings (Sancti Imperialis) on the least productive tiles, because they don’t benefit from any tile bonuses.
Unit Management
You start with three Astra Militarum Guardsman squads. Do not lose any of them. If you need to save scum, then do it! These infantry are weak, but if used together they can take down early neutrals. Splitting them up is a sure way to get them killed, and they’re too weak to destroy any other unit on their own.
Keep the Guard units near your cities. You can capture any local compounds, but don’t die for the Emperor trying to hold them. Practice setting overwatch traps by moving slowly into new territory but holding your fire. Overzealous neutrals will move into range of two or three of your units, get raked with laser fire, and then die to your counterattack.
Assume every tree line has a Stingwing ready to overwatch your unsuspecting troops!
Carefully expand near a potential second city site, using your guards to weed out some of the neutrals. Keep enough ore and influence to pay for the second city. Once you have that first Enginseer, move it straight to the new site and build it. The city itself can help defend against any remaining neutrals (although it will struggle against a group of Kastelans!) Don’t spend too long looking for perfect; accept the “good enough.” Cities need time to develop; obsessive searching will cost you more than you gain.
Where’s My Army?!?
By now, maybe you’re feeling like you’ve been building infrastructure and barely scraping by militarily. Your empire is kind of anemic, with no more than a dozen compounds and just a few Guards trying to avoid getting killed by every scary thing in the bushes.
Welcome to the Guard!
With no passive boosts to resource production, population, or loyalty, you always feel like you’re patching shortages and trying to avoid population caps, and you’ve reinforced your valiant Guards with Enginseers (?). This is okay! That ore and influence that’s been accumulating is about to help you get a jump start on a real military.
Technology (Tiers 1 through 4)
“Corporal, I heard that Mars fellow Cawl is comin’ up with all sorta new guns and ships and stuff.”
“Private, this lasrifle has been handed down for seven generations in my family. If it was good enough for great-great-great-great-great Grandma, it’s good enough for me.”
Tier 1
The first priority is Frag Grenades. Your Guards need all the help they can get. Take Manufactorum, even if you won’t be building it right away. (We’ll come back for Chimera[/b] and Shrine of the Aquila[/b] later when they only take a turn to research.)
Tier 2
This one is easy… Cult Mechanicus first, so you can start producing Enginseers; Hab Blocks are necessary infrastructure. Krak Grenades give another explosive attack to your Guards, but they’re a lot less useful than Frags, so don’t wait to move on.
Tier 3
Medipack provides an excellent heal to keep those Guards alive, and you’ll probably need it by now. Sanctum Imperialis rounds out your production buildings. By now, your research is probably really pumping, so you may want to go back to Tier 1 as noted above if you’re close to building a Manufactorum. Otherwise, move on to Tier 4.
Tier 4
There’s some great infrastructure stuff at this tier. At last, you can build the Labour Corps (the “building building building” that looks like a crane). Research this first, and then build it as soon as possible in all cities. In new cities this should be the first building you create. It is the ultimate investment, cutting production times in half for all other buildings. The only reason to delay is if you’re out of ore or power.
After that, research Imperial Bastion and place these immediately to guard cities, compounds, or artifacts. This will help stop the endless recapturing of your resources by infuriating neutrals, and the Bastions are a real bargain, requiring zero build time, minimal maintenance, and excellent firepower. You’ll also need Substructure Extension to finally give your cities some room to stretch.
You won’t find much of use in the next tier of technologies, so I suggest you spend a few turns filling in technologies from earlier tiers…they should be very quick to research, and then they’ll be ready when you are. You don’t want to delay that Tank Commander at all!
Where’s My Army?!?
By now, maybe you’re feeling like you’ve been building infrastructure and barely scraping by militarily. Your empire is kind of anemic, with no more than a dozen compounds and just a few Guards trying to avoid getting killed by every scary thing in the bushes.
Welcome to the Guard!
With no passive boosts to resource production, population, or loyalty, you always feel like you’re patching shortages and trying to avoid population caps, and you’ve reinforced your valiant Guards with Enginseers (?). This is okay! That ore and influence that’s been accumulating is about to help you get a jump start on a real military.
Heroes
“…I’ve never been the kind of man who laughs in the face of danger, much preferring to sniggger behind its back and make vulgar hand gestures while it isn’t looking.” Commissar Ciaphas Cain, from the novel The Last Ditch.
General Tips for Heroes
Heroes really shine when they are kitted out properly from the Jokero encampment. I send each new hero to a Jokero encampment immediately to purchase a Tantalizing Icon. This chaotic object will add 8 influence per turn, which will more than offset the maintenance of each hero, and will act as an investment to buy future items. Holding this item and a Scroll of Magnus are the primary reason I even build a Primaris Psyker.
The Lord Commissar
Despite being a centerpiece of some of the best Warhammer 40K fiction, the Commissars in Gladius are decidedly mediocre. Low on health and armor, they are primarily support units. However, because their infantry boost radius is only 1 (i.e., they must be directly beside the unit), they often end up too close to the front line. All his boosts only apply to infantry, which are generally so weak as to be useless in the front line anyway. Give him a Zoat Hide Jerkin and an Adamantium Weave Vest to keep him from being killed instantly by zealous enemies.
There is only one very specific scenario where I find the Commissar useful. Chimeras (a Tier 1 tank) have two unique properties: their Mobile Command ability allows a hero to continue to provide passive boosts to surrounding units even when riding inside. With a group of Tempestus Scions, a Lord Commissar can lead a strike force to kill neutrals and expand your empire away from the dangers of the main front with the AI.
Primaris Psyker
A true “glass cannon.” The psyker has some excellent destructive powers, and the only infantry healing ability in the game. What’s not to like? Well, sudden death, obviously. The healing is a weird vampiric attack which requires him to be close to the enemy, as do his Molten Beam (which does well against air targets) and the Psychic Maelstrom. Unfortunately, his low defense and high experience value draws enemy attacks like flies, and you’ll be lucky to get more than a turn or two out of him before he’s taken down.
I usually build one because they are so cheap, but I use him as the most distant of support heroes…he carries a Scroll of Magnus and a Tantalizing Icon to increase research and influence. I use his Scrier’s Gaze for a free look into the fog of war; finally, I will sometimes buy him a Faolchú’s Wing to allow him to shuttle items to other heroes (including co-op allies) from Trading Camps.
Tank Commander
One of the best heroes in the game! The tank commander costs the same amount of ore as a Lemann Russ, except he’s available at Tier 3, and is ultimately much better. The Tank Commander
- Has the most health of any hero
- Has [nearly] the only hero range 3 attack
- Turns up to six surrounding armored units into a highly lethal rapid strike force
- Is a vehicle, so he can be healed by Enginseers and benefits from all vehicle upgrades
- Does not benefit from hero damage reduction, so those hit points don’t go as far as you might expect
Using him takes strategy, because you want to time his buffs to maximize their impact. Full Throttle adds up to three movement to all adjacent tanks; it’s best when moving armor to the front, or retreating, so use it early in the round (unlike Chaos boons, it does not add any movement to a unit which has already moved.)
Gunners, Kill on Sight! increases tanks damage by up to 45%, which is devastating when combined with a Baneblade or Rogal Dorn. Even better, it works with all allied tank units. (Try it with an Aeldari Scorpion!)
Roll Over Them will squish most infantry, but once the Commander has Extra Heavy Bolters, this attack becomes less necessary.
Strike and Shroud covers all surrounding armor units in smoke (greatly reducing ranged damage). This is far better than the usual Smoke Launchers on other tanks, because it’s a free action.
Pro tip: you can’t fire a ranged attack through a hex with smoke on it, so it may block some of your tanks’ firing solutions. You can, however, fire from within a smoke cloud across clear tiles.
Build at least two of these, and they can buff each other and rotate out of the front to be repaired by Enginseers in the rear echelon.
Buy your Tank Commanders every item which increases ranged damage, particularly the Sightless Helm and Concealed Weapon System. Make sure he has the usual Zoat/Weave defensive combination.
Middle Game
Tanks, at last!
By turn 30, you should be close to founding a third city, and your first two should have a solid infrastructure, particularly with extra Labour Corps to begin production of Manufactorums and (eventually) Voidports.
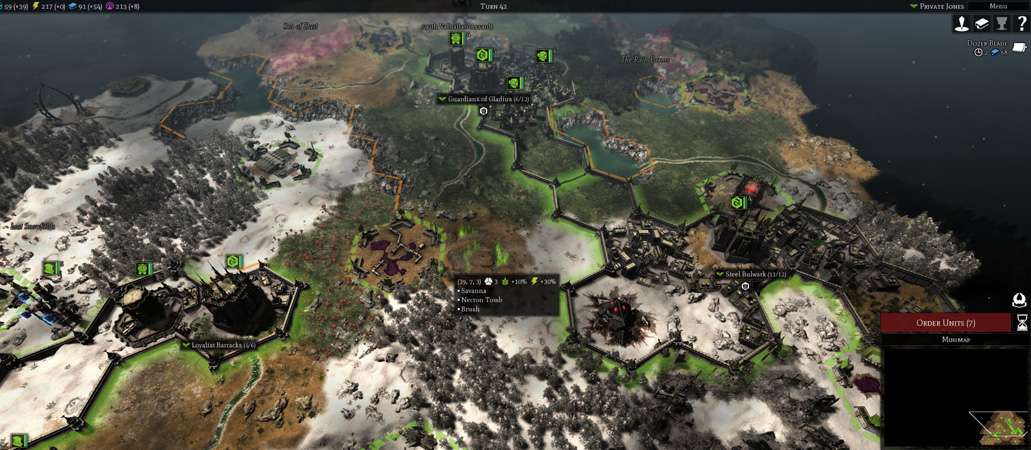
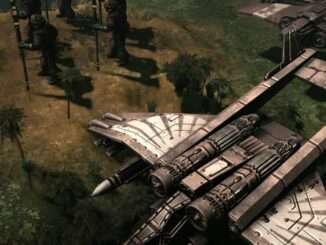
This shows a three-city layout which carried me through the game. (Click on the image to expand it). It’s turn 42, so all of them are well-established and clear of neutrals. Note that they are as close to the lower right corner of the map as they can be, and that they are very close to each other. This allowed them to stay safe while I coddled them through the early stages of development. (This game used a mod which increased the number and variety of neutrals even more than usual; I find it slows development by several turns but otherwise doesn’t change gameplay principles).
I have almost no military, and I’ve had to build two Imperial Bastions to defend the outer cities from neutral attacks. The city in the southeast was my first, and it’s doing research and making Enginseers and heroes. The northern city will be my ore hub and build tanks and aircraft, and the western one will handle power and influence production (and eventually psykers).
This was the turning point in my game, where I could finally begin to move away from survival and on to conquest. The secret was Edicts.
Build Order
You’ll have three cities, and that should be enough. Build the required infrastructure (loyalty buildings, population expansion buildings, and a second building constructor) in all cities, while paving the way for the versatile Leman Russ tank. I try to emerge from the cocoon of the infrastructure phase by around turn 40-45. To rapidly build and resupply your army, make sure you have *three* unit production buildings of each type (two is probably enough for Shrines of the Aquila.)
Your unit production at this point should be leaning toward mechanical units. Even if you have the technology for Leman Russ tanks, you’ll probably still be a little dry on ore, so start with Chimeras to synergize with your infantry.
Unit Management
Produce a lot of Enginseers. Then make some more. See the Unit Guide for details.
Chimeras are a beautiful complement to infantry. The infantry get increased mobility, and the Chimeras can have their extra laser cannons fully manned. Best of all, the Chimeras can fire with the infantry inside, and then you can disembark the infantry and get another shot. If you prefer, the Chimera can have a Commissar or Enginseer inside to man the guns, and the Commissar can still project his aura.
Expand your empire! Strategically stay to the edges of the map to avoid meeting the AI too early, and clear any corners behind your cities so that you have some compounds adding to your economy even during the invasion.
Tactically, lead with your best armored units because they can easily be repaired. In the mid-game, the Leman Russ tanks are the best choice as a spearhead.
Artifacts are like gold, and should be prioritized, particularly the Siren Caster. This little gem adds two loyalty in all cities, and thus makes expansion a lot less painful in the early game.
When you have to choose, it’s usually better to finish a slivered (nearly dead) neutral unit, rather than damage a different unit. By destroying the unit, you’ll get the experience, and the little creep won’t run off to heal.
Technology (Tiers 5 through 10)
Tier 5
While there are no profound technologies here, several are quite useful. Breeding Licenses will spike your growth rates in cities now that you finally have enough Hab Blocks. You’ll need the extra population to work in your ore factories and Manufactorums. Void Shield Generators will increase survivability of your armies dramatically. Important note! These (like city tiles) help your enemies too!
Recovery Gear allows your tanks to heal in the field (the boost is actually +5% of total hit points per round.) Basilisks seem to be able to hit anything, anywhere, but they are a support unit and can wait. We’ll come back for Psyker Covens later.
Do you have Extraction Quotas yet (Tier 4)? You’ll need them once you have a city with two or three Ore Extractors to really squeeze those mines for ore.
Tier 6
Revelations of the Omnissiah will be immediately useful in that research city, so take it first and activate it right away.
Cheap, tough, and powerful, the Leman Russ Battle Tank is a staple of any game. Your armies can finally start to overwhelm the neutrals, and they will be useful through the rest of the game. Camo Netting will make your new tanks even more durable.
Tier 7
Now that your cities are starting to produce, Voidports[/b] can open up air support and transport. Extra Vehicle Armor continues the steady upgrades to your armor. Dozer Blades are nice to have, but not crucial if your Enginseers are keeping the roads clear as you advance.
Tier 8
At Tier 8, you’re getting a glimpse of the Astra’s real strengths. Rogal Dorn Battle Tanks can both give and take heavy damage, often dishing out more hurt than the Baneblade. Extra Heavy Bolters vastly upgrades all of your strongest tanks (and the Commander), giving them solid damage against air and infantry. Now those Leman Russes aren’t just fancy bulldozers! Running Hot will solve those pesky power shortages at last. The others can definitely wait.
Tier 9
Surprisingly, only two of these technologies really make a difference right away: Substructure Supply Tunnels can connect your cities to those peripheral outposts, giving big boosts to resources. Kraken Bolts improve nearly everything, especially since you’ve got those Extra Heavy Bolters already installed!
Tier 10
The ultimate tier, and with it the mighty Baneblade. See the unit guide for how to use this beast most effectively, and add the Baneblade Lascannons at the first opportunity as they add an entirely separate attack. Propaganda Broadcasts will fix those ongoing loyalty issues and boost all resource production nicely. Hunter-Killer Missiles aren’t that strong individually, but they can hit nearly anywhere on the map, and they can be great for finishing slivered units. Bulwark of the Emperor really only helps if you’re actually fighting in your own cities, which means that things have gotten really dire.
After Tier 10
Once you’ve made that first pass, go back and get your Psyker technologies so you can build the last of the unit buildings and provide psyker support to your front line troops. Then pick and choose among any remaining technologies, maybe with an eye to building a few infantry squads for light work at the frontiers. Because they use food, they can help without draining your ore supplies.
Late Game
“Well, ya might. At a distance, and moving at a full run. Then you’ll see a bunch of explosions, the Astartes will zoom off, and we’ll get called in to mop up. Won’t be much left to kill, though.”[/i][/b]
Eventually the dreaded moment arrives when you’ve found the enemy. Typically, you’ll spot a weak-looking scout unit and the introductory message will flash up. Tempting as it may be, don’t send your units haring off after the AI. Right behind that lone Necron warrior is a huge mass of enemy units ready to surround you, cut off your retreat, and destroy you.
Instead, pull back from the visible range. You now have two or three turns to begin consolidating and preparing for the huge wave of air units which is about to arrive. The Tyranids are hard because they can flood you with weak units to slow you down while chipping away at your armor. If it’s the Aeldar or the T’au, then you’re fighting on the best ground, because you can duel them at range with good effect (although rushing forward will get you killed by overwatch). No Impossible opponent is easy, obviously.
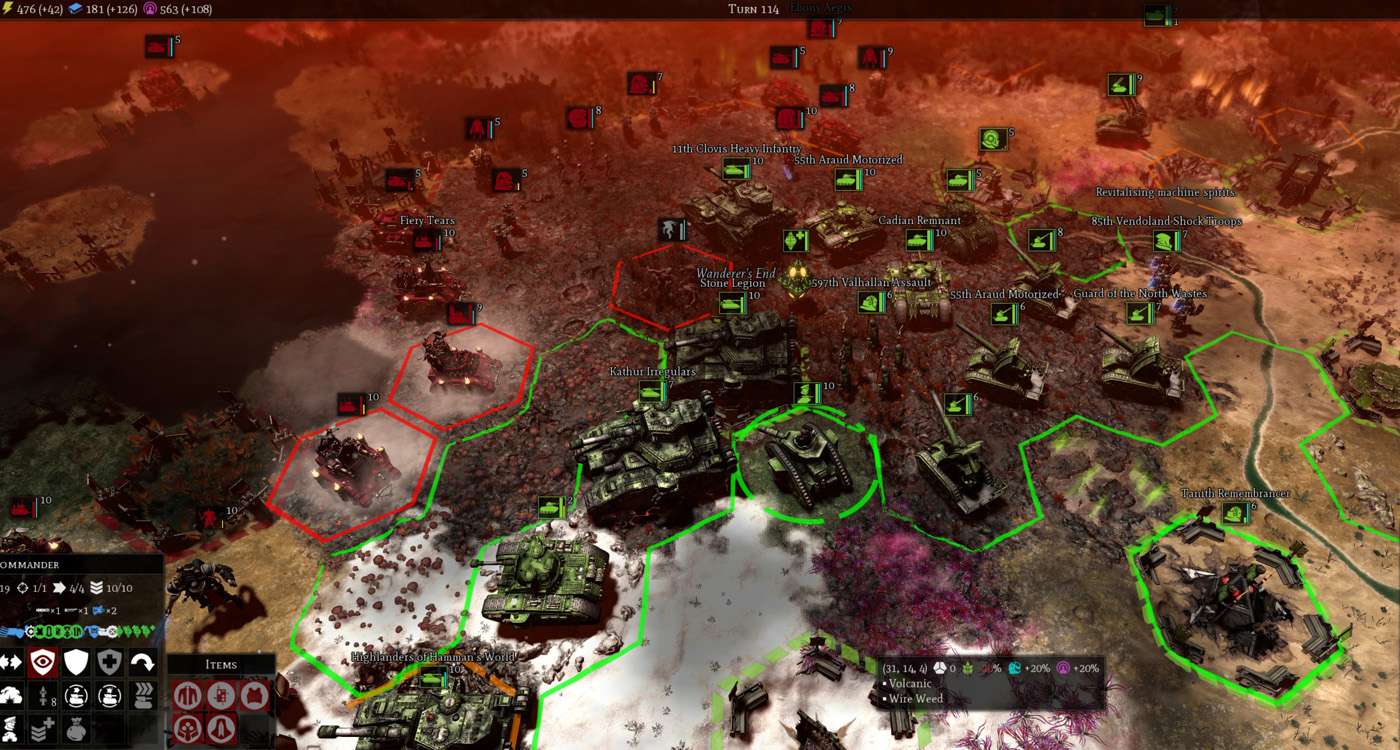
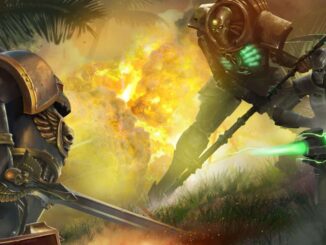
This image shows a late game battle line. The Sisters initially showed up with ten Cerastus Knight-Lancers and a sky full of aircraft. I focused on those threats first, and this shows the remaining line as I begin to advance into their territory. (The pink demon in the middle is a cameo from the Extra Neutral Pack)
Begin pushing your army forward, keeping your Baneblades and Rogal Dorns in a solid mass around your Tank Commander. Rotate out wounded units to a reserve pool in the back populated by Enginseers and Psykers. Keep a row of Basilisks to constantly shell their infantry and finish off weakened units.
One “noob trap” is to allow your heavy tanks to get cut off at the front. They have enormous health pools, but they will die the “death of a thousand cuts.” It’s easy to let their health drop to 60 out of 200, and then you lose your whole salient to an endless sea of enemies.
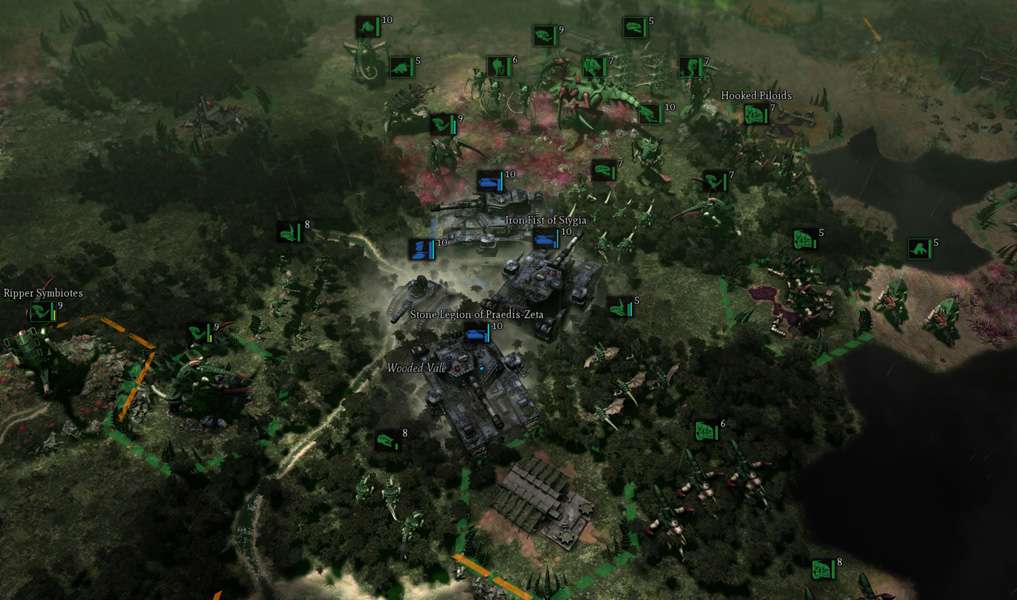
Here’s when I did exactly that. The Baneblades took out ten enemies apiece, but every unit here died eventually to the tide of Tyranids. How apropos.
Push on slowly, crushing their strongest units first and bringing reinforcements forward. Eventually, you’ll reach the first enemy city, which you’ll pound to dust with tanks and artillery.
Unit Guide
Here’s my individual breakdown of units available to you as Astra Militarum. (Note that heroes have their own section above.)
Infantry
Guardsmen. The three you start with are enough. They aren’t tough enough to even slow down later enemies. Best used in conjunction with Chimeras.
Ratlings. If you take an infantry route, ratlings are a cheap sniper unit to extend your range. Not worth diverting from your path in my opinion.
Heavy Weapons Squad. I’m usually down on Astra Militarum infantry, but these guys are respectable for their cost. They can seriously damage Umbra, neutral Bastions, and Catachan Devils. The problem is that they need support from other infantry, and that wastes time if you’re following the mechanical pathway.
Tech-Priest Enginseers. Incredibly versatile, cheap support units who found cities. Build a lot of them.
- They are inexpensive and don’t block production of other units because they get their own building.
- They can repair any allied mechanical unit (including the Tank Commander).
- They can build Bastions to create temporary rally points or control artifacts and compounds.
- They can build Void Shield generators which can shield a sizeable army.
- Bring at least one with every army to clear wireweed, which allows you to maximize mobility and force concentration. I try to keep a clear route home for injured units and reinforcements.
Tempestus Scions. In the later phases of the game, I’ll build these to replace or supplement the original army I built around the starting Guardsmen. They are better in every way, and can root neutrals out of Ruins and forests while your tanks are dueling with the AI at the front. For co-op, you can load up a Valkyrie with these and they can at least provide some flanking fire support while you wait for your tanks to make the overland journey to assist. They require the Reinforcement Pack DLC to use.
Bullgryns. In the world of Warhammer 40K, ogryns can carry some hundred-pound ranged weapons like melta guns and heavy stubbers. Unfortunately, not here. They are highly damage resistant, but are stopped cold by any flying unit like psychneueins or enemy aircraft. The AI is very good at deploying air units to counter your Bullgryns. You can’t even haul them efficiently to help allies as damage sponges because they don’t fit well in aircraft (understandably).
Wyrdvane Psykers. So weak, with short ranged attacks. Building these early is like feeding chicken nuggets to a bear…you can do it forever, and the bear only benefits. But later…wow. Misfortune, a tier 6 Psyker technology, increases the damage of your heavy tanks to cataclysmic levels, particularly when stacked with the Commander’s buffs. And it’s range 2.
Build a steady stream of Psykers (they cost almost nothing) and send them to the front. Sure, they’ll die, but if they can curse a few units before they get killed you can wipe out enemy superheavies with relative ease. Also, the AI may send aircraft to kill them even behind your lines. That’s like trading a bishop for a pawn.
Mechanized Units
“That tank…it’s massive!”
“Oh, yeah. That’s the General’s command Baneblade. They say he has a posh suite with a full bar on the second deck. I wonder if he spills his amasec when the tank hits a bump.”
Scout Sentinel. Being open topped means these guys are highly vulnerable, and so I was reluctant to use them at first. However, now I usually build a couple to run alongside infantry teams. That scouting ability has saved me from punishing overwatch on numerous occasions.
Chimera. One of my favorite Astra units, the Chimera is a perfect force-multiplier for your early infantry squads. I love the interplay: the Chimeras protect and transport the infantry (who can heal while inside the vehicle), and the infantry operate the extra laser cannons which make this little tank a threat to most of the neutrals. If that wasn’t enough, it’s also amphibious. Like so many of the good units, this one needs a DLC (the Assault Pack).
Hydra. Dedicated anti-aircraft weapons are always welcome. Hydra can drive off enemy air units, and in numbers they can knock down a few. Their overwatch often scares AI aircraft enough to keep them from swarming your defenses. Have a few in your back line.
Devil Dog. The melta does what they do best…cuts through armor. They do fill a niche, and are quick enough to dash in and pick off single target enemies. If you are having Kastelan problems early in game, consider these guys. They do cost almost as much as a Leman Russ in maintenance, so don’t overbuild. You’ll need the Escalation Pack DLC to use these guys.
Basilisk. I’ll sometimes build four or five of these artillery pieces. They have a range of six, which means they can harass fleeing units and weaken infantry units at incredible ranges. Note that their Earthshaker cannon has a weird range, listed as “2-6.” This means they cannot hit adjacent targets, so don’t let them get overrun.
Leman Russ Battle Tank. Such a classic, and for a reason. These are your “medium” battle tanks…possibly the best Tier 6 unit in the game. They have high armor and health, and once fully upgraded they can hit hard. You’ll almost certainly be underwhelmed when you first build one…they really come into their own when you get extra heavy bolters. Even in the late game, remember you can build and maintain four of these for the cost of one Baneblade.
Rogal Dorn Battle Tank. These are an ideal bridge between the medium Leman Russ and the super-heavy Baneblade. They fire a storm of bolter rounds and one big, armor piercing shell. Even at range 3, they can demolish most infantry units and damage anything else. I build about two of these for every Baneblade. One of the best reasons to buy the Firepower Pack DLC.
Baneblade. This is it, the biggest tank in the Imperium. Their main armament is remarkably like the Rogal Dorn’s, but it’s the extras that matter. You can separately target the Baneblade’s lascannons and Demolisher Cannon…in theory this means it can destroy three targets in a single turn. In practice, that’s rare. Remember to use the cannon first against infantry…it does more damage against units with multiple group members.
Should you build Baneblades? They are so expensive to build and maintain! But nothing else in the armament has the huge health of the Baneblade (up to 250 hit points) which makes it the ultimate line breaker.
Aircraft
Valkyrie. A sturdy inexpensive aircraft, capable of fighting and transporting infantry, with plenty of health. The backbone of your air force.
Thunderbolt. A dedicated attack fighter, the Thunderbolt is better than the Valkyrie at armored targets, but has less health. They are really good counters to enemy aircraft, but don’t advance them too far across the front line, or they’ll be targeted and destroyed in one turn.
Marauder Bomber. With the possible exception of the Tiger Shark, these are the heaviest aircraft in the game, boasting around 100 health. I find them relatively unimpressive given their high cost and maintenance…their usual armament is fairly light. The big bomb they carry is only useable every three rounds, and it’s only good on infantry, which aren’t usually much of a threat to late-game units. Because the bomb requires adjacency, the bomber is exposed to intense enemy fire when deploying the payload. I usually keep one around to hassle flanking infantry units.
Summary
- Build your first city to focus heavily on research and unit production or food.
- Research and build the Cult Mechanicus. Scout for a second city location.
- Build a second city focused on production, food, and/or energy, depending on shortages.
- Play carefully and cautiously while your technology level grows.
- Move up the tech tree focusing on infrastructure improvements. Build Chimeras and (maybe) Scout Sentinels to support those early infantry. Find a third city site.
- Create a Tank Commander as your first hero, then finally get some Leman Russ tanks to build a real force.
- Begin stoking population growth, ore production, etc. with Edicts. Astra Militarum cities should be highly specialized.
- Stay in constant combat with neutrals to level up your units. Make sure you have plenty of Enginseers.
- Continue to build ore production as you develop better tanks.
- Add aircraft and psykers to support your tank armies.
- Meet the enemy and engage initially, freely giving ground to avoid losing units.
- Build Rogal Dorn and Baneblade tanks, backed by Commanders, Psykers, and Enginseers to create a resilient and dangerous front line.
- Advance to victory by rotating wounded units and moving steadily forward.
Quick Tips
- Negative loyalty is twice as bad as positive loyalty is good (-2% versus +1% per point). Therefore, *stay out of negative loyalty situations.*
- Assume every forest and ruin is full of enemies until you’ve scouted it. Avoid overwatch traps!
- Attack units you can destroy, because this will simultaneously raise your morale and lower theirs. For this reason, carefully consider the order of your attacks to maximize these advantages.
- Move rear-echelon units forward *before* landing the killing blow with a different unit. Any unit within three tiles will gain experience.
- Outfit all heroes with items from the shop to make them more survivable.
- Astra units have excellent long-ranged attacks. Use these to avoid getting in close and to focus many units on the single strongest enemies. Break them by destroying their anchor units.
- The infantry path is largely a dead end, and should be used only later to create squads to capture neutral artifacts and compounds.
- Baneblades are strong units, but you can lose them if you don’t pull them back to heal at around half health. They will heal around 40 health per turn in a compound, so be patient.
“Pay attention, girl, and you may just live long enough to learn enough to live a little longer. Essentially it just boils down to two things…show up on time, and do what they tell you. And no matter what the Commissar says, you don’t fight for the Emperor, you fight for your squad mates. So cover their backs, and they’ll cover yours.”
Be the first to comment